Contents:
Description and Operation
| 1. |
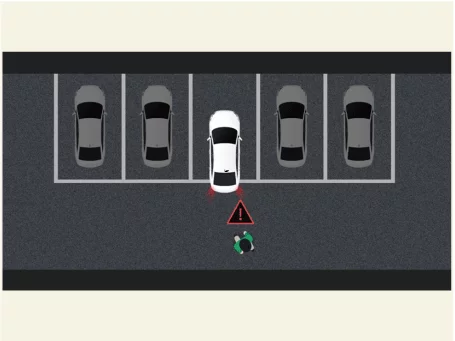
Parking Collision-Avoidance Assist (PCA) : If there is a risk of collision with a rear object when moving
revers, PCA provides a warning. After the warning, if the risk of collision increases, PCA automatically
assists with emergency braking.
|
| 2. |
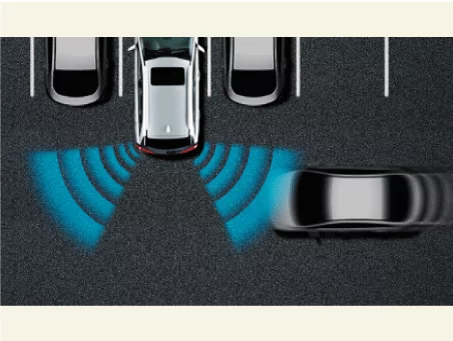
Rear Cross-Traffic Collision-Avoidance Assist (RCCA) : If there is a risk of collision with an oncoming
vehicle on the left or right side when moving revers, RCCA provides a warning. After the warning, if the
risk of collision increases, RCCA automatically assists with emergency braking.
|
| 3. |
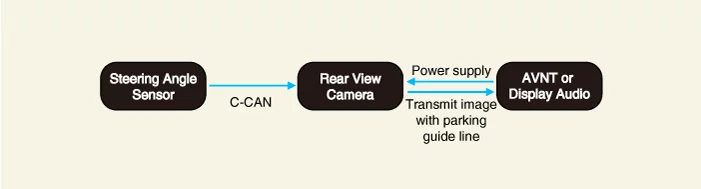
Rear View Monitor (RVM) : For safe parking, RVM displays the situation rear of the vehicle. Changing the
gear to R or pressing the parking/view button, activates RVM.
|
| 4. |
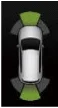
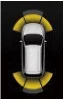
Parking Distance Warning (PDW) : PDW warns against collisions with objects around the vehicle at low
speeds. Changing the gear to R or pressing the Parking Safety button in gear D activates PDW.
Warning level
|
System check
|
Level 1
|
Level 2
|
Level 3
|
Front
|
No warning
|
60 - 100 cm (23.62 - 39.37 in.)
|
31 - 60 cm (12.20 - 23.62 in.)
|
0 - 30 cm (0 - 11.81 in.)
|
Rear
|
60 - 120 cm (23.62 - 47.24 in.)
|
31 - 60 cm (12.20 - 23.62 in.)
|
0 - 30 cm (0 - 11.81 in.)
|
Indicator display
|

|
|
|

|
|
Components and Components Location
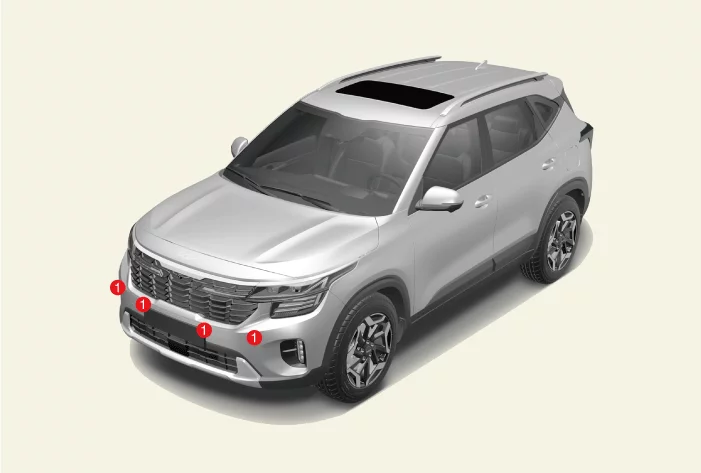
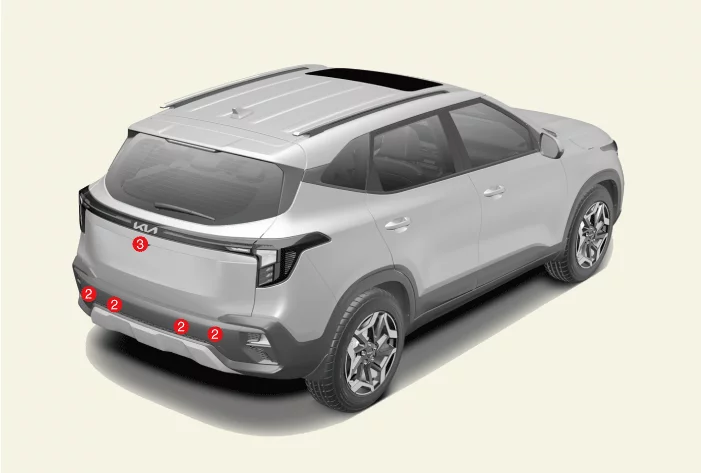
1. Front Ultrasonic Sensor
2. Rear Ultrasonic
Sensor
|
3. Wide Angle - Rear Camera
|
Rear View Monitor (RVM) Description and Operation
| Description and Operation |
Function Name
Item
|
Function Name
|
Function
|
Parking Safety
|
Rear View Monitor (RVM)
|
Display of vehicle rear image on the AVNT via wide angle rear view camera
|
Rear View While Driving (RVWD)
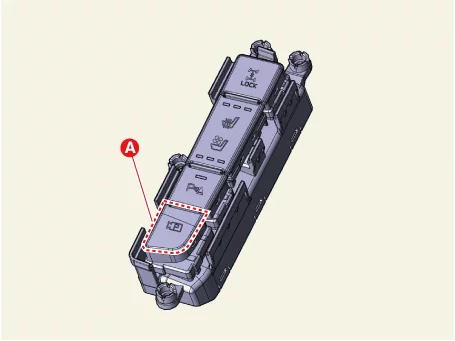
RVWD function is used to switch on rear view while driving forward.
|
•
|
Press button (A) when in drive (D) or neutral (N) shift position.
|
|
•
|
Press button (A) again.
|
Rear View Monitor (RVM) Specification
Item
|
Specification
|
Rated voltage (V)
|
6.5
|
Operating voltage (V)
|
6 - 7
|
Operating temperature [°C (°F)]
|
-30 to 75 (-22 to 167)
|
Quantity
|
RVM
|
1
|
Rear View Monitor (RVM) On Vehicle Inspection
Visual Inspection
If there is a problem with RVM, PCA check the items below.
| 1. |
Check the cleanliness of the wide angle camera mounting location.
|
•
|
If the wide angle camera lens is contaminated with snow, dust, or stickers, the performance may
deteriorate.
|
|
•
|
If the wide angle camera lens glass is damaged, the performance may deteriorate.
|
|
| 2. |
Check the condition around the wide angle camera
|
•
|
If a door or trunk (tailgate) equipped with a wide angle camera is opened, an abnormal screen may
be displayed.
|
|
| 3. |
Check the shape and condition of the wide angle camera mounting location
|
•
|
If the vehicle is tilted due to cargo loading, etc. the accuracy of parking guidelines and RVM
top view may be reduced.
|
|
•
|
If moisture enters the wide angle camera lens, performance may deteriorate.
|
|
| 4. |
Check the wide angle camera and driver assistance parking controller in case of a trouble code.
|
•
|
Check for damage to the wide angle camera, IBU.
|
|
•
|
Check connection status to the wide angle camera, IBU connector and wiring.
|
|
| 5. |
Check the button operation
|
•
|
For RVM specification, press the parking/view button (A) briefly (less than 1 second) to confirm
RVM On/Off.
|
|
Check for Poor Picture Image Quality of Wide Angle Camera
Symptom
|
Cause
|
Dirty lens
|
Damaged lens
|
Damaged lens
|
Airtightness failure
|
|
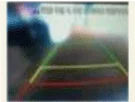
Blurry and display quality trouble
|
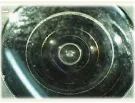
Exterior stain
|
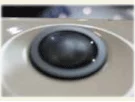
Lens coating peeled
|
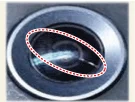
Lens crack
|
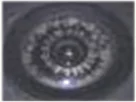
Inflow of water in lens
|
|
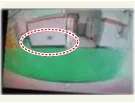
Any object or line on monitor
|
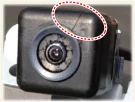
Crack and inflow of water
|
Countermeasure
|
Clean the exterior of lens with water or clean cloth (fabric)
|
Clean lens with Kia approved cleaners, if unable to clean, replace camera.
|
Replace wide angle camera
|
Repair or replace the wiring
|
|
•
|
Check whether the vehicle is equipped withe a genuine product or not. (if the vehicle is not
equipped with a genuine wide angle camera, it will result in low quality image or malfunction.)
|
|
•
|
Warranty repair in not available for the replacement of the wide angle camera in case of
malfunction due to negligence in use (cleaning with detergent, imfact from foreign substances) or
non genuine installation.
|
|
•
|
Be sure to clean it with water or a clean cloth when cleaning the exterior of the wide angle
camera lens.
|
|
•
|
Check whether the same defect occurs After checking the surface condition of the wide angle
camera lens and removing foreign substances.
|
|
•
|
The coating of the wide angle camera lens may be peeled off when washing the car with a strong
acid cleaner.
|
|
•
|
The wide angle camera lens can be damaged by objects such as sones frying from outside while
driving.
|
|
Diagnosis with KDS
| 1. |
The advanced driver assistance system (parking) can be more quickly diagnosed for problems with the KDS.
(Refer to "DTC guide")
| (1)
|
Self diagnosis : Inspect the Diagnostic Trouble Code (DTC) with the KDS.
(Refer to DTC guide when fault code is found.)
|
|
Refer to the KDS screen for operating conditions and details.
|
|
Rear View Monitor (RVM) Connector And Terminal Function
| Connector And Terminal Function |
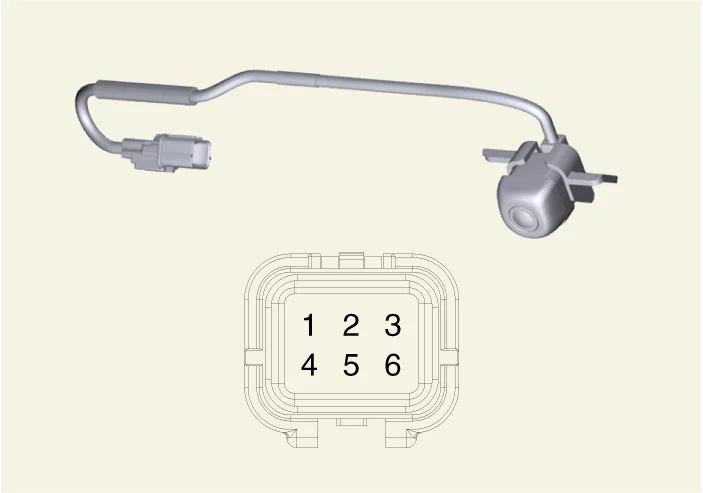
Pin No
|
Connector
|
1
|
Camera ground ( - )
|
2
|
C-CAN (High)
|
3
|
Camera video output
|
4
|
Camera video ground
|
5
|
C-CAN (Low)
|
6
|
Camera power ( + )
|
Rear View Monitor (RVM) Removal and Installation
|
In the case of poor image quality or poor focus, first check the surface condition of the wide angle
camera lens and contamination by foreign substances.
|
| 1. |
Remove the tailgate garnish.
(Refer to Body - Tailgate Garnish)
|
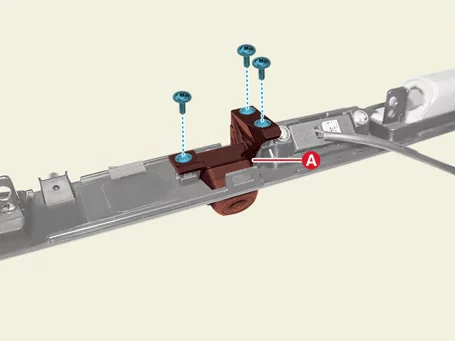
| 2. |
Remove the wide angle rear camera (A) after removing the screws.
|
| 1. |
Install in reverse order of removal.
|
•
|
If there is a problem after replacing the wide angle camera, replace the IBU and check
the normal operation.
|
|
•
|
If the error presists after replacing the IBU, do not replace it.
|
|
|
Parking Distance Warning (PDW) Specification
Item
|
Specification
|
Rated voltage (V)
|
12
|
Operation voltage (V)
|
9 - 16
|
Front Detecting range (cm (in.))
|
30 - 100 (11.81 - 39.37)
|
Rear Detecting range (cm (in.))
|
30 - 120 (11.81 - 47.24)
|
Operation current (mA)
|
Max. 350
|
Operation frequency (KHz)
|
43 - 53
|
Operating speed (km/h)
|
10 or below
|
Quantity
|
PDW-R
|
4
|
PDW-F/R
|
8
|
Parking Distance Warning (PDW) Description and Operation
| Description and Operation |
Function Name
Item
|
Function Name
|
Function
|
Parking Safety
|
Parking Distance Warning - Reverse (PDW - R)
|
Detect pedestrians and objects around the vehicle when driving backward and warn by the steps.
|
Parking Distance Warning - Forward / Reverse (PDW - F/R)
|
Detect pedestrians and objects around the vehicle when driving forward / backward and warn by the
steps.
|
Parking Collision - Avoidance Assist - Reverse (PCA - R)
|
Detects pedestrians and objects around the vehicle when driving backward and assists in collision
avoidance with warning or braking.
|
System Operation Specification
| 1. |
PDW recognizes LIN ID and sets the sensor ID up during initialization.
|
| 2. |
When IBU initialization is completed, for 100 ms, the PDW will drive each sensor to perform fault
diagnosis.
|
| 3. |
Fault diagnosis is completed, the sensor does not transmit fault information, and a PDW warning is
issued.
|
| 4. |
If at least one front/rear sensor failure, display a fault warning.
|
| 5. |
The fault statement is displayed on the instrument cluster, and the fault symbol is displayed on both the
instrument cluster and the audio/AVN monitor.
|
| 1. |
The start of the normal routine after initialization begins after 100ms delay after completion of the
alarm output.
|
| 2. |
The obstacle alarm has 3 levels in 1, 2 and 3 step levels; alarms 1 and 2 have intermittent audible
sounds, while alarm 3 has continuous audible sound. For the front ultrasonic sensor level 1 alarm does not
exist.
|
| 3. |
In the case of a cluster display, information from each sensor is transmitted from the IBU to the
cluster.
|
| 4. |
The operating vehicle speed of the PDW is less than 10Km/h.
|
Parking Distance Warning (PDW) On Vehicle Inspection
Visual Inspection
If there is a problem with PDW, PCA check the items below.
| 1. |
Checking bumper cleanliness
|
•
|
If snow or water droplets freeze on the ultrasonic sensor surface, the performance may
deteriorate.
|
|
•
|
If there are foreign substances such as mud on the surface of the ultrasonic sensor, the
performance may deteriorate.
|
|
| 2. |
Check the condition around the bumper
|
•
|
If an object generating ultrasonic waves is nearby, the performance may deteriorate.
|
|
•
|
If decorations are attached around the ultrasonic sensor, the performance may deteriorate.
|
|
| 3. |
Checking bumper geometry or mounting status
|
•
|
If the ultrasonic sensor and the peripheral part are arbitrarily separated, the performance may
deteriorate.
|
|
•
|
If an impact is applied to the surface of the ultrasonic sensor or if it is damaged by scratches,
the performance may deteriorate.
|
|
•
|
If the installation state of the ultrasonic sensor is different from that at the time of shipment
of the vehicle, the performance may deteriorate.
|
|
•
|
If decorations are attached around the ultrasonic sensor, the performance may deteriorate.
|
|
| 4. |
Check the ultrasonic sensor installation status when a trouble code occurs
|
| 5. |
Check the button operation
|
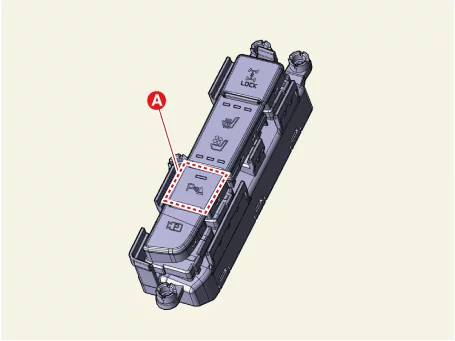
•
|
For PDW specification, press the parking safety button (A) briefly (less than 1 second) to
confirm PDW On/Off.
|
|
•
|
For PCA specification, press the parking safety button (A) briefly (more than 1 second) to
confirm PCA On/Off.
|
|
Diagnosis with KDS
| 1. |
The advanced driver assistance system (parking) can be more quickly diagnosed for problems with the KDS.
(Refer to "DTC guide")
| (1)
|
Self diagnosis : Inspect the Diagnostic Trouble Code (DTC) with the KDS.
(Refer to DTC guide when fault code is found.)
|
|
Refer to the KDS screen for operating conditions and details.
|
|
Parking Distance Warning (PDW) Connector And Terminal Function
| Connector And Terminal Function |
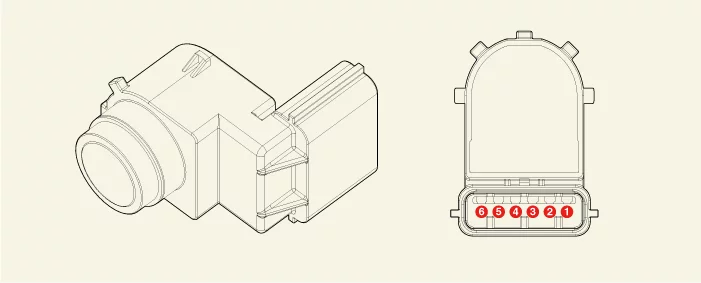
Pin No
|
Connector
|
1
|
-
|
2
|
-
|
3
|
-
|
4
|
Ground ( - )
|
5
|
LIN
|
6
|
Sensor power ( + )
|
Parking Distance Warning (PDW) Removal and Installation
|
For failures such as PDW false warnings or non-warning, firstly check the surface condition of the
ultrasonic sensor and contamination by foreign substances.
|
Ultrasonic Sensor [Front]
| 1. |
Remove the front bumper assembly.
(Refer to Body - "Front Bumper Assembly")
|
| 2. |
Disconnect the ultrasonic sensor connector (A).
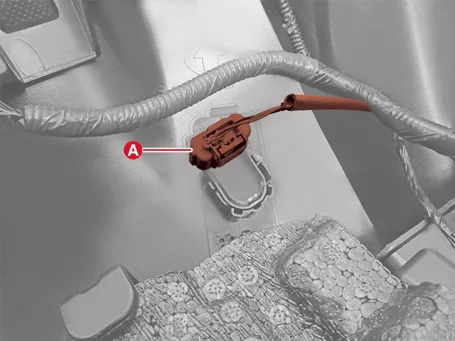
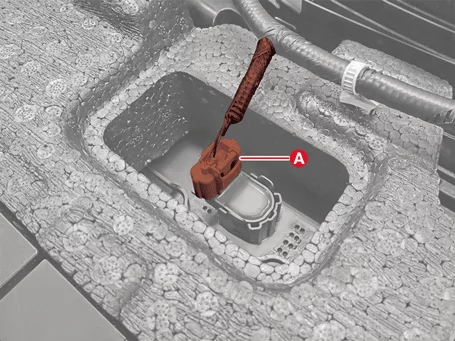
|
| 3. |
Remove the ultrasonic sensor (A) by pushing the sensor holder in the direction of arrow.
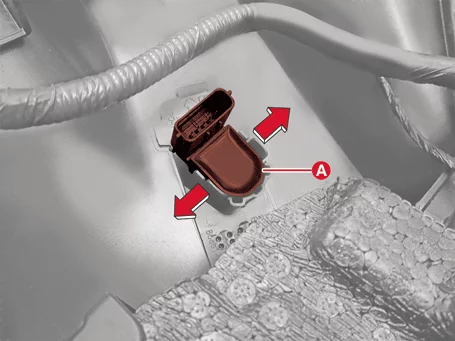
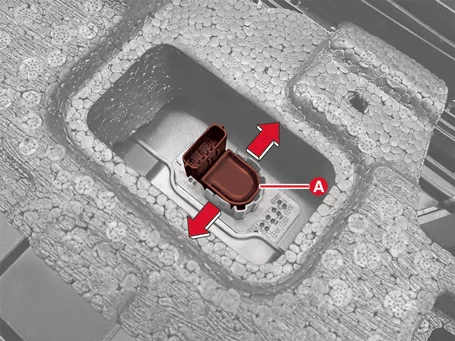
|
Ultrasonic Sensor [Rear]
| 1. |
Remove the rear bumper assembly.
(Refer to Body - "Rear Bumper Assembly")
|
| 2. |
Disconnect the ultrasonic sensor connector (A).
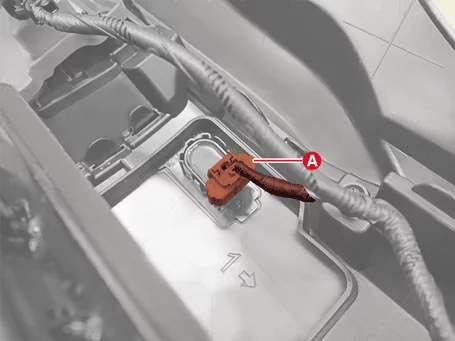
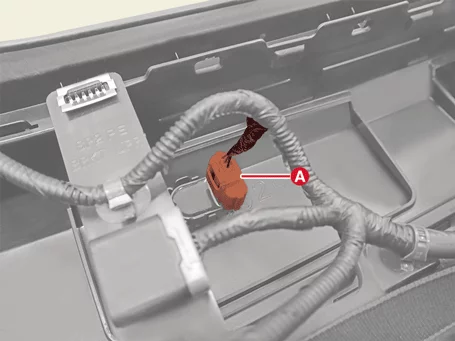
|
| 3. |
Remove the ultrasonic sensor (A) by pushing the sensor holder in the direction of arrow.
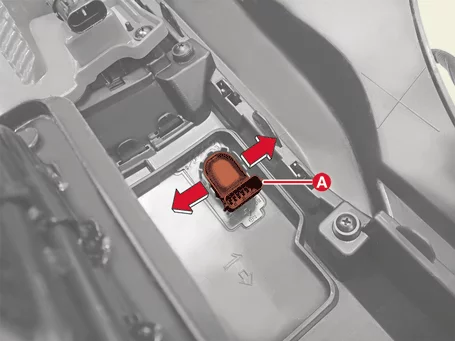
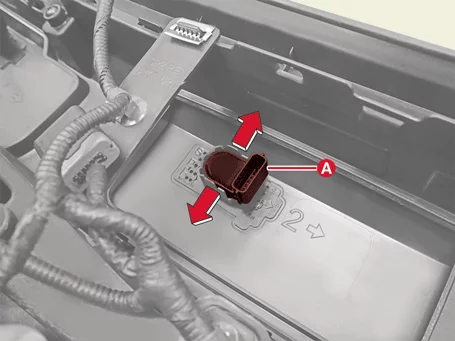
|
| 1. |
Install in reverse order of removal.
|
Driver Parking Assistance Switch Connector And Terminal Function
| Connector And Terminal Function |
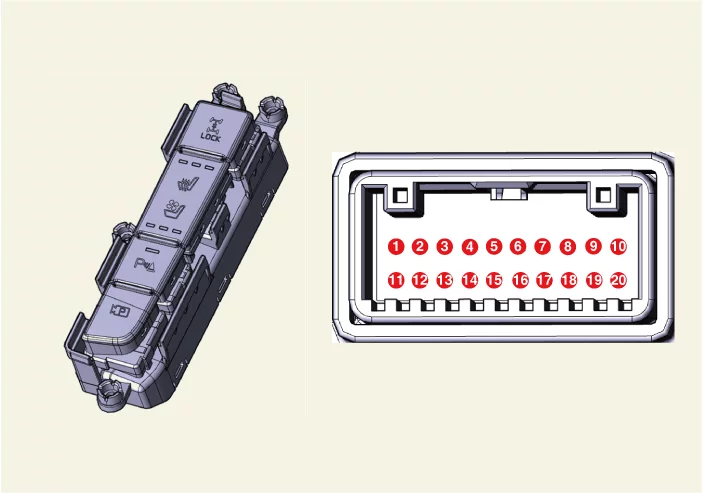
Pin No
|
Connector
|
1
|
Passenger's side heater switch signal
|
2
|
Passenger's side heater switch High IND
|
3
|
Passenger's side heater switch Mid IND
|
4
|
Passenger's side heater switch Low IND
|
5
|
Passenger's side ventilation switch signal
|
6
|
Passenger's side ventilation switch High IND
|
7
|
Passenger's side ventilation switch Mid IND
|
8
|
Passenger's side ventilation switch Low IND
|
9
|
-
|
10
|
Ground ( - )
|
11
|
Parking safety button
|
12
|
Parking / view button
|
13
|
AWD Lock switch input
|
14
|
-
|
15
|
Parking safety button IND
|
16
|
-
|
17
|
-
|
18
|
illumination ( + )
|
19
|
-
|
20
|
Illumination ( - )
|
Driver Parking Assistance Switch Removal and Installation
| 1. |
Remove the console upper cover.
(Refer to Body - "Console Upper Cover")
|
| 2. |
Remove the console upper cover garnish after removing the screws.
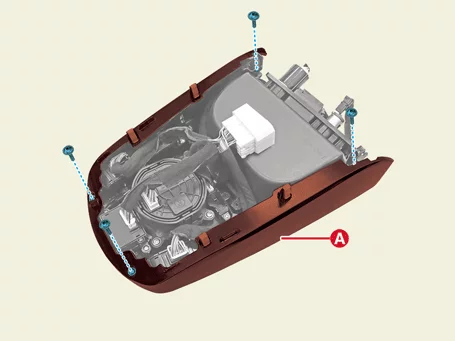
|
| 3. |
Disconnect the driver parking assistance switch connector (A).
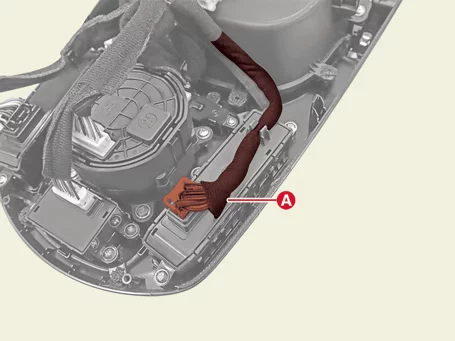
|
| 4. |
Remove the driver parking assistance switch (A) after removing the screws.
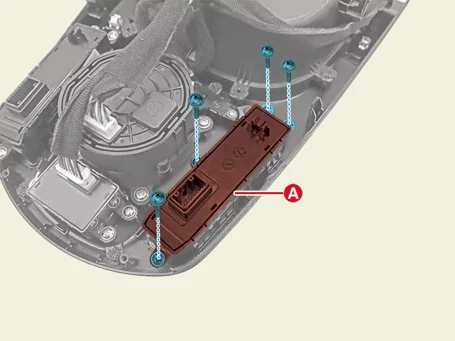
|
| 1. |
Install in reverse order of removal.
|


