
Kia Seltos SP2 (2021-2026) Service Manual / Engine Electrical System / Ignition System
Kia Seltos: Engine Electrical System / Ignition System
Contents:
- Description and Operation
- Troubleshooting
- Ignition Coil Specification
- Ignition Coil Components and Components Location
- Ignition Coil Description and Operation
- Ignition Coil Troubleshooting
- Ignition Coil Removal and Installation
- Spark Plug Specification
- Spark Plug Components and Components Location
- Spark Plug Description and Operation
- Spark Plug Troubleshooting
- Spark Plug Removal and Installation
- Spark Plug Cleaning
Description and Operation
| Description |
| • |
Ignition timing is controlled by electronic ignition system, and standard ignition timing data according
to the engine operating condition is stored in the Engine Control Module (ECM).
|
| • |
Engine operation conditions (speed, load, temperature) are detected by various sensor. Based on these
sensors ignition timing data, the primary current cut-off signal is received from the ECM to activate the
ignition coil and control the ignition timing.
|
Troubleshooting
| Troubleshooting |
Engine won't start or is hard to start (cranks OK)
|
Suspected Cause |
Correction |
|
Start / stop button fault |
Inspect or replace start / stop button |
|
Ignition coil fault |
Inspect and replace the ignition coil |
|
Spark plug fault |
Inspect and replace the spark plug |
|
Ignition wiring disconnected or broken |
Repair or replace the wiring |
Rough idle or stalls
|
Suspected Cause |
Correction |
|
Ignition wiring fault |
Repair or replace the wiring |
|
Ignition coil fault |
Inspect and replace the ignition coil |
Engine hesitates or poor acceleration
|
Suspected Cause |
Correction |
|
Spark plug fault |
Inspect and replace the spark plug |
|
Ignition wiring fault |
Repair or replace the wiring |
Poor fuel efficiency
|
Suspected Cause |
Correction |
|
Spark plug fault |
Inspect and replace the spark plug |
Ignition Coil Specification
| Specification |
|
Item |
Specification |
|||||
|
Rated voltage (V) |
14 |
|||||
|
Operating voltage (V) |
4 - 16 |
|||||
|
Engine speed (rpm) |
1,000 |
2,000 |
3,000 |
4,000 |
5,000 |
6,000 |
|
Dwell time (ms) |
3.6 |
3.6 |
3.6 |
3.2 |
2.9 |
2.5 |
|
Secondary coil voltage (kV) |
44.8 |
44.8 |
44.8 |
43.4 |
42.6 |
41.0 |
Ignition Coil Components and Components Location
| Component Location |
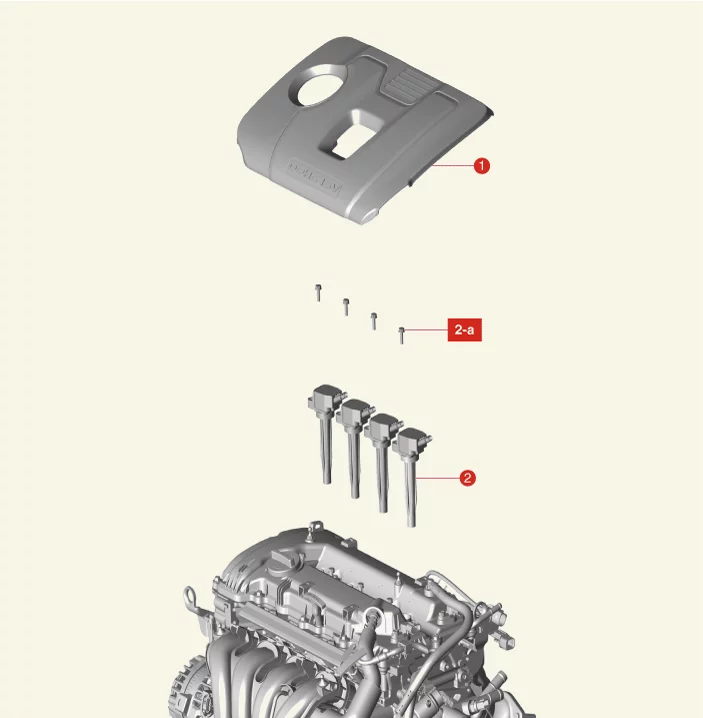
| 1. Engine Cover |
2. Ignition Coil 2-a. 9.8 - 11.8 N·m (1.0 - 1.2 kgf·m, 7.2 - 8.7 lb·ft) |
Ignition Coil Description and Operation
| Description |
| • |
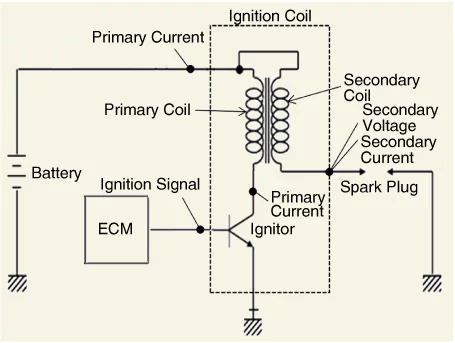
The ignition coil is a small transformer that transforms the battery voltage to 30 kV or more to create a
spark in the spark plug gap in the cylinder.
|
| • |
The igniter built into the ignition coil includes the power transistor and it is an electronic switch
whose electric current is controlled by the Engine Control Module (ECM) signal.
|
| • |
The ignition timing is controlled by the ECM and the standard ignition timing data according to engine
operating condition is stored in the ECM memory.
|
| • |
The engine operating conditions (speed, load, warm-up state, etc.) are detected by the various sensors.
Based on these sensor signals and the ignition timing data, when the ECM applies the ignition signal to the
ignition coil for a certain period of time, the igniter is energized. As the current flows and rises
gradually to the primary coil and the magnetic field is produced.
|
| • |
When the current in the primary coil is cut off by the ignition signal of the ECM, the rapid change of
the magnetic flux by the mutual induction action is induced to the secondary coil and high voltage is
generated depending on the coil winding ratio.
|
| • |
This high voltage generated from the secondary coil is caught in the spark plug gap and discharges as the
electric field is destroyed to generate a spark.
|
Ignition Coil Schematic Diagrams
Ignition Coil Troubleshooting
| Troubleshooting |
Connector connection condition test
| 1. |
Disconnect the battery negative ( - ) terminal.
|
| 2. |
Remove the engine cover.
(Refer to Engine Mechanical System - "Engine Cover")
|
| 3. |
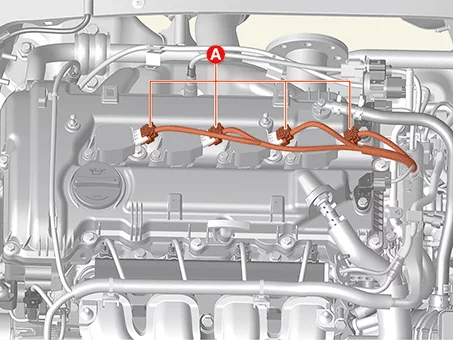
Re-connect the ignition coil connector (A) after disconnecting the ignition coil connector.
|
| 4. |
Install the engine cover.
(Refer to Engine Mechanical System - "Engine Cover")
|
| 5. |
Connect the battery negative ( - ) terminal.
|
| 6. |
Perform the driving test after deleting the DTC code.
|
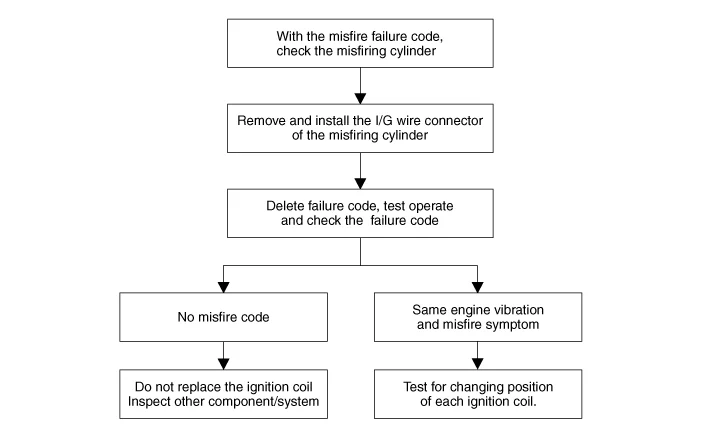
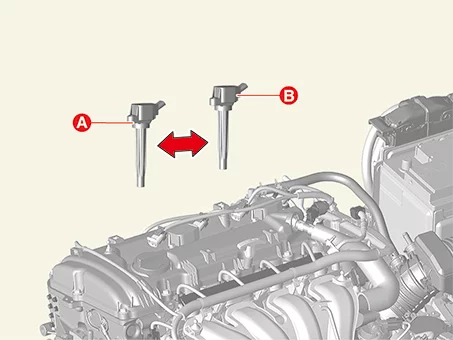
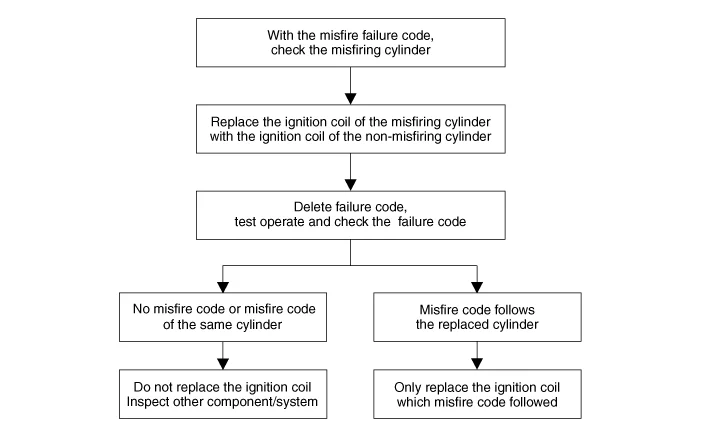
Test for changing position of each ignition coil
| 1. |
Change the misfired ignition coil (A) and normal ignition coil (B).
(Refer to Ignition Coil - "Removal and Installation")
|

| 2. |
Perform the driving test after deleting the DTC code.
|
Ignition Coil Removal and Installation
| Removal |
| 1. |
Disconnect the battery negative ( - ) terminal.
|
| 2. |
Remove the engine cover.
(Refer to Engine Mechanical System - "Engine Cover")
|
| 3. |
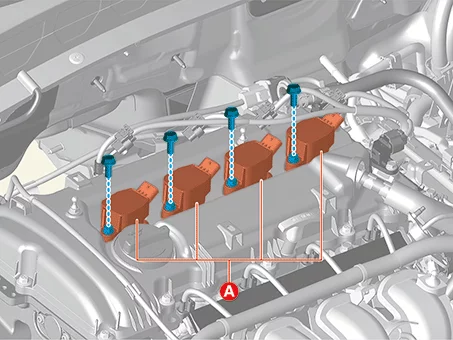
Disconnect the ignition coil connectors (A).
|
| 4. |
Remove the ignition coils (A) after removing the bolts.
|
| Installation |
| 1. |
Install in reverse order of removal.
|
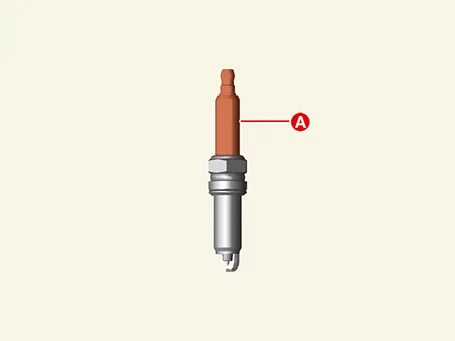
Spark Plug Specification
| Specification |
|
Item |
Specification |
|
Type |
ELR9IQP9+ |
|
Plug gap [mm (in.)] |
0.8 - 0.9 (0.0314 - 0.0354) |
|
Electrode material |
SPE Iridium |
Spark Plug Components and Components Location
| Component Location |
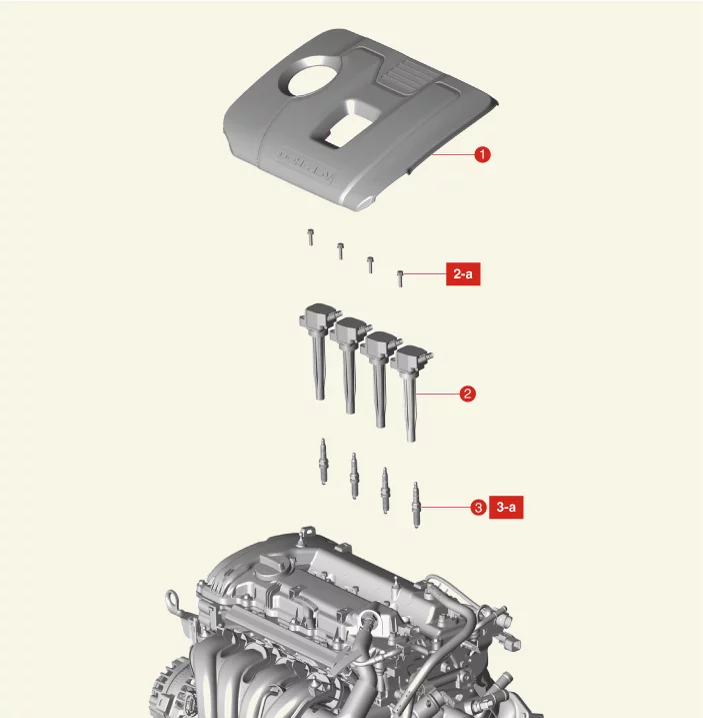
| 1. Engine Cover 2. Ignition Coil 2-a. 9.8 - 11.8 N·m (1.0 - 1.2 kgf·m, 7.2 - 8.7 lb·ft) |
3. Spark Plug 3-a. 14.7 - 24.5 N·m (1.5 - 2.5 kgf·m, 10.8 - 18.1 lb·ft) |
Spark Plug Description and Operation
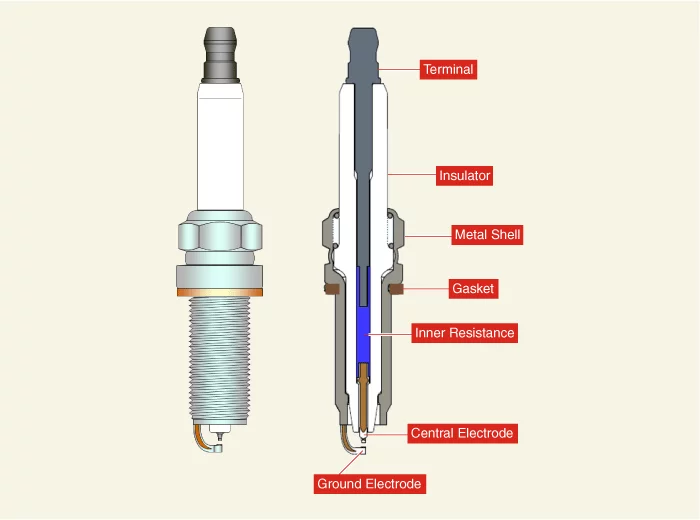
| Description |
The high voltage generated by the ignition system ignites the air mixed with the fuel at an appropriate time, and
the pressure generated by the explosion of the mixture operates the piston to drive the engine.
Spark Plug Troubleshooting
| Troubleshooting |
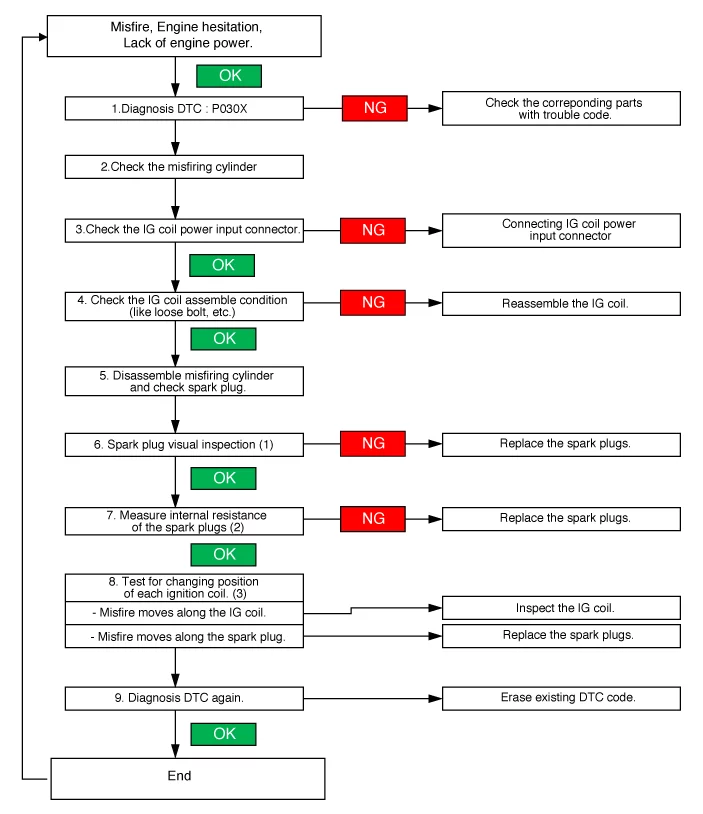
| 1. |
Check the DTC code by using the KDS (Refer to "DTC guide").
|
| 2. |
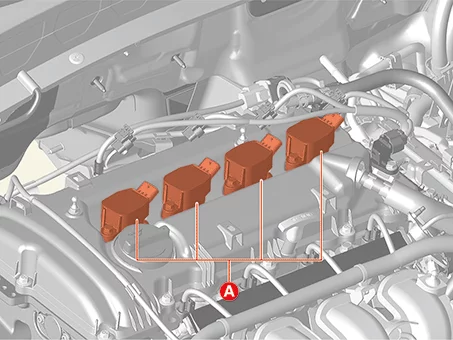
Check the ignition coil connectors (A).
|
| 3. |
Check the installation condition of the ignition coils (A).
|
| 4. |
Remove the spark plug.
(Refer to Spark Plug - "Removal and Installation")
|
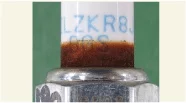
| 5. |
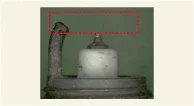
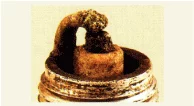
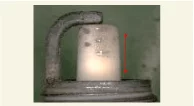
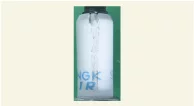
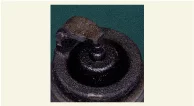
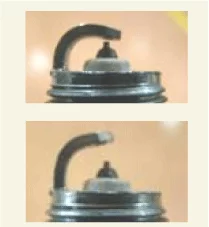
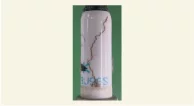
Visually inspect the external spark plugs.
|
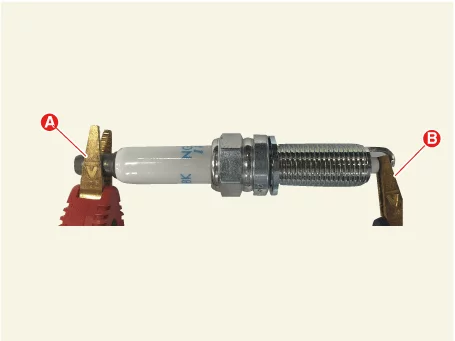
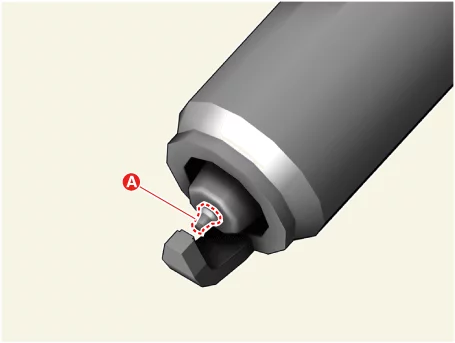
| 6. |
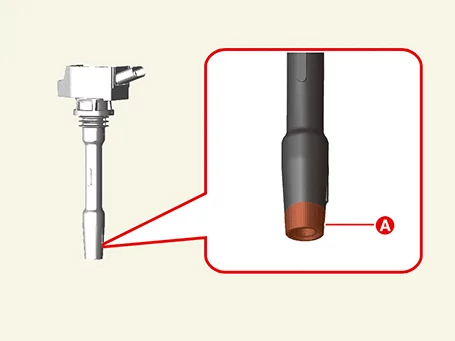
Check the resistance between the spark plugs terminal (A) and probe (B) by using a multi-tester or a
resistance meter.
|
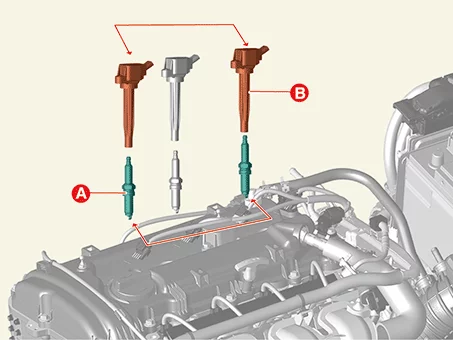
| 7. |
Test for changing position of each ignition coil and spark plug.
|
Spark Plug Removal and Installation
| Removal |
| 1. |
Remove the ignition coil.
(Refer to Ignition System - "Ignition Coil")
|
| 2. |
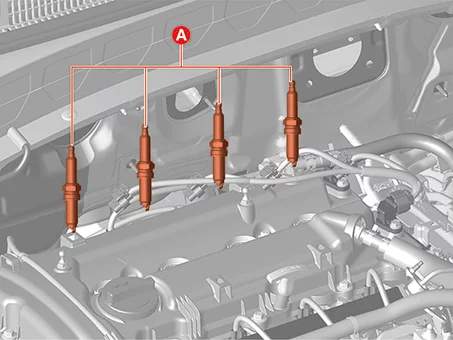
Remove the spark plug (A) by using a spark plug socket.
|
| Installation |
| 1. |
Install in reverse order of removal.
|
|
Spark Plug Cleaning
| Cleaning |
Incomplete combustion builds up carbon deposits and fuel accumulates in the spark plug. Therefore combustion
becomes temporarily unstable, and cleaning should be performed as below.
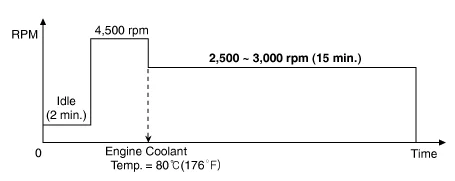
| [1st Method] |
| 1. |
Start the engine and keep the engine running at idle for 2 minutes.
|
| 2. |
Place the shift lever in N and press the accelerator to maintain engine rpm at 4,500.
Warm up the engine until engine coolant temperature reaches at 80°C (176°F).
|
| 3. |
Keep the engine running at 2,500 - 3,000 rpm in the N position for 15 minutes.
|
| [2nd Method] |
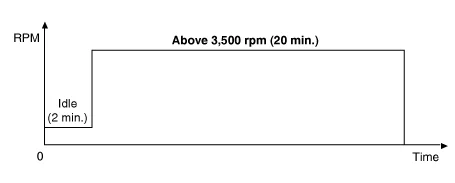
If [Method 1] does not work properly, perform the cleaning with [Method 2].
|
| 1. |
Start the engine and keep the engine running at idle for 2 minutes.
|
| 2. |
Drive the vehicle for over 20 minutes and keep the engine speed above 3,500 rpm.
|


Other information:
Kia Seltos SP2 (2021-2026) Service Manual: Description and Operation
Description Integrated Body Control Unit (IBU) Integrated body control unit has integrated several functions including body control module (BCM), smart key unit (SMK), and tire pressure monitoring system (TPMS). 1. Body Control Module Functions Burglar Alarm Tailgate Burglar Alarm Issues an alarm depending on the tailgate operation.Kia Seltos SP2 (2021-2026) Service Manual: Closing the fuel filler door
To install the fuel cap on the Kia Seltos, turn it clockwise until it clicks one time. This click indicates that the cap is securely tightened and properly sealed. Close the fuel filler door and press it lightly to make sure it is fully closed and flush with the body of the vehicle. WARNING Refueling Always remove the fuel cap carefully and slowly.