
Kia Seltos SP2 (2021-2026) Service Manual / Body (Interior and Exterior) / Interior Trim
Kia Seltos: Body (Interior and Exterior) / Interior Trim
Contents:
- Components and Components Location
- Front Pillar Trim Removal and Installation
- Door Scuff Trim Removal and Installation
- Cowl Side Trim Removal and Installation
- Center Pillar Trim Removal and Installation
- Rear Pillar Trim Removal and Installation
Components and Components Location
| Component |
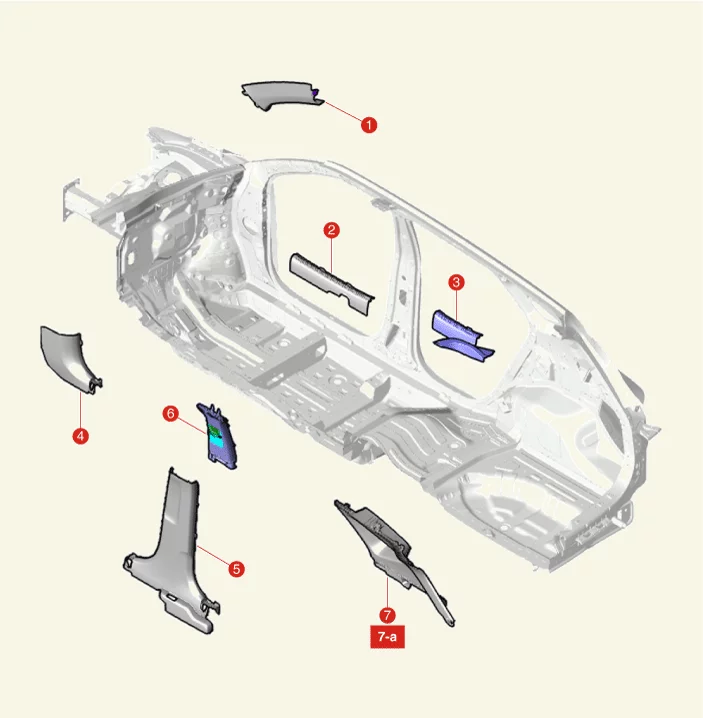
| 1. Front Pillar Trim 2. Front Door Scuff Trim 3. Rear Door Scuff Trim 4. Cowl Side Trim |
5. Center Pillar Lower Trim 6. Center Pillar Upper Trim 7. Rear Pillar Trim 7-a. 7.8 - 11.8 N·m (0.8 - 1.2 kgf·m, 5.8 - 8.7 lb·ft) |
Front Pillar Trim Removal and Installation
| Removal |
| 1. |
Remove the front door body side weatherstrip.
(Refer to Front Door - "Front Door Weatherstrip")
|
| 2. |
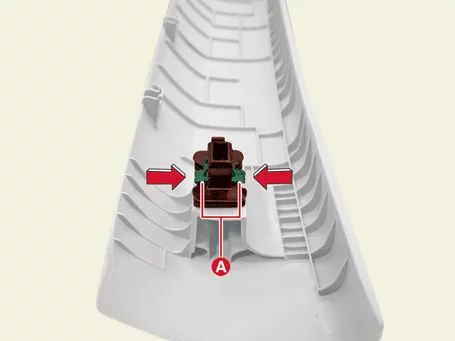
Press the hook (A) to release the clip after removing the front pillar trim.
Front Pillar Trim Mounting Clip Separation (Play â–¶)

Notes When Refering Video
This video helps clearly identify areas that are hard to distinguish in manual images, such as component
locations or assembly structures.
It also allows visual confirmation of areas that are difficult to see directly due to restricted
visibility caused by surrounding components, from a technician’s perspective.
|


| 3. |
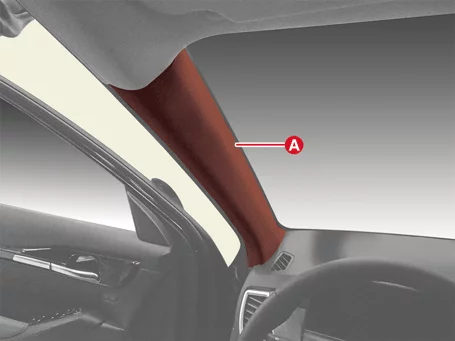
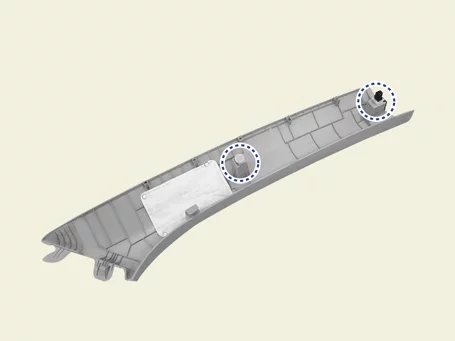
Remove the front pillar trim (A).
|


| Installation |
| 1. |
Install in reverse order of removal.
|
Door Scuff Trim Removal and Installation
| Removal |
Front Door Scuff Trim
| 1. |
Remove the front door body side weatherstrip.
(Refer to Front Door - "Front Door Weatherstrip")
|
| 2. |
Remove the front door scuff trim (A).
|
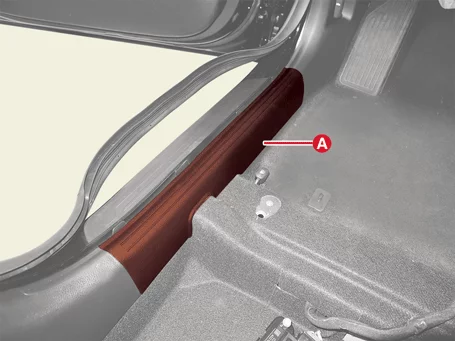
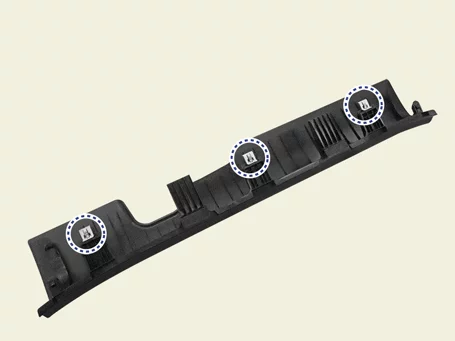
Rear Door Scuff Trim
| 1. |
Remove the rear seat cushion assembly.
(Refer to Rear Seat - "Rear Seat Assembly")
|
| 2. |
Remove the rear door body side weatherstrip.
(Refer to Rear Door - "Rear Door Weatherstrip")
|
| 3. |
Remove the rear door scuff trim (A).
|
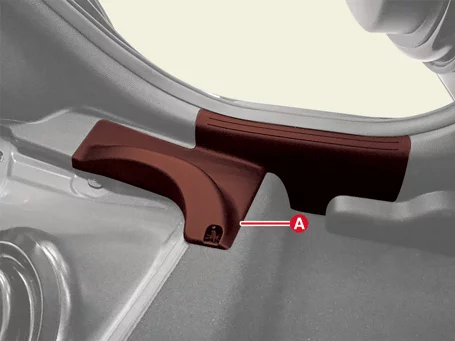
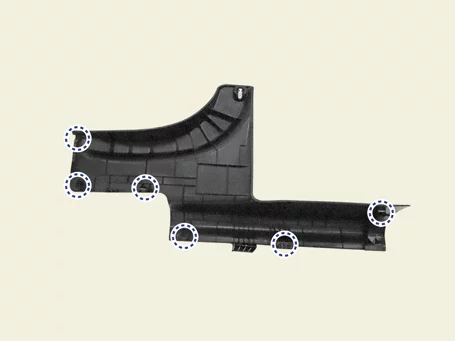
| Installation |
| 1. |
Install in reverse order of removal.
|
Cowl Side Trim Removal and Installation
| Removal |
| 1. |
Remove the front door scuff trim.
(Refer to Interior Trim - "Door Scuff Trim")
|
| 2. |
Remove the hood latch release handle. [Driver's side]
(Refer to Hood - "Hood Latch Release Handle")
|
| 3. |
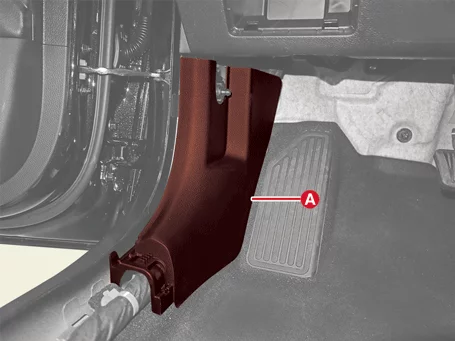
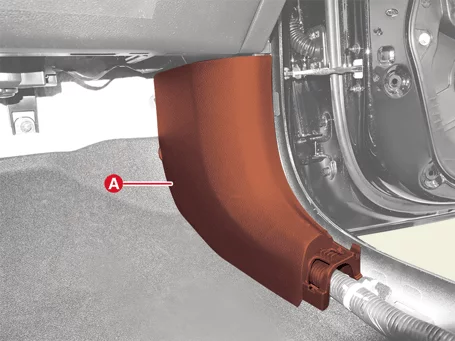
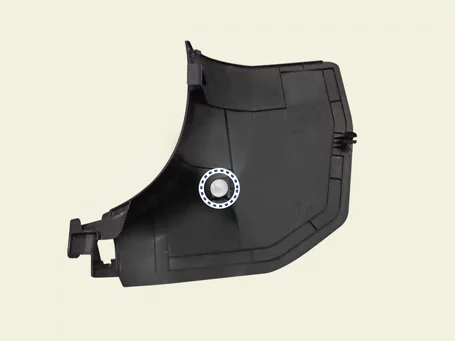
Remove the cowl side trim (A).
|
| Installation |
| 1. |
Install in reverse order of removal.
|
Center Pillar Trim Removal and Installation
| Removal |
Center Pillar Lower Trim
| 1. |
Remove the front, rear door scuff trim.
(Refer to Interior Trim - "Door Scuff Trim")
|
| 2. |
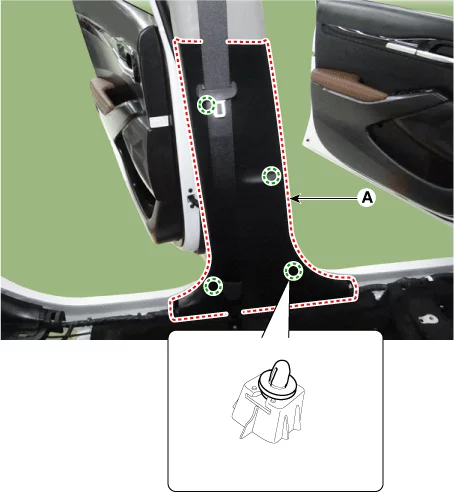
Remove the center pillar lower trim (A).
|
Center Pillar Upper Trim
| 1. |
Remove the center pillar lower trim.
|
| 2. |
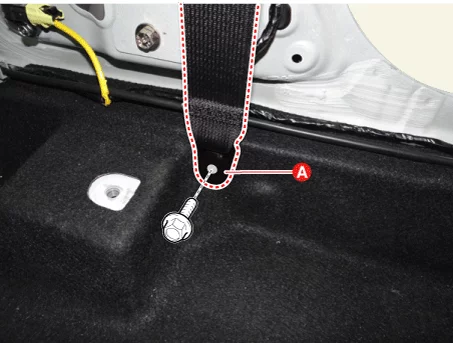
Remove the front seat belt lower anchor (A) after removing the bolt.
|
| 3. |
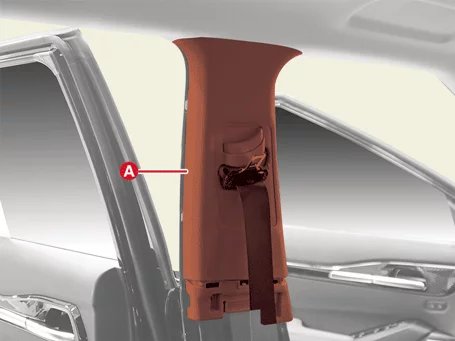
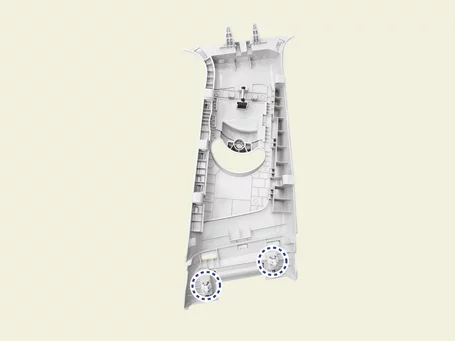
Remove the center pillar upper trim (A).
|
| Installation |
| 1. |
Install in reverse order of removal.
|
Rear Pillar Trim Removal and Installation
| Removal |
| 1. |
Remove the luggage side trim.
(Refer to Tailgate Trim - "Luggage Side Trim")
|
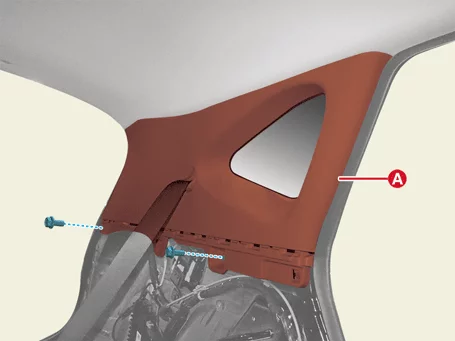
| 2. |
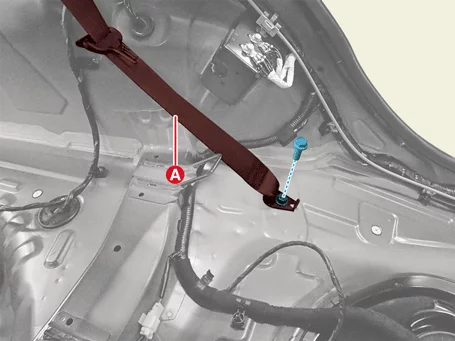
Remove the rear seat belt anchor (A) after removing the bolt.
|
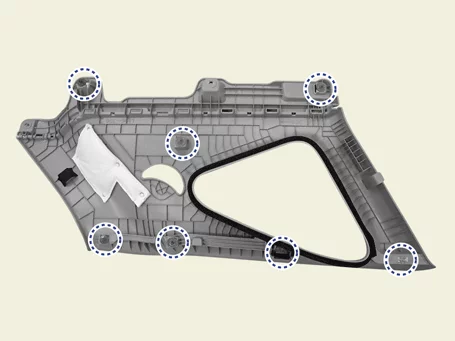
| 3. |
Remove the rear pillar trim (A) after removing the bolts.
|
| Installation |
| 1. |
Install in reverse order of removal.
|


Other information:
Kia Seltos SP2 (2021-2026) Service Manual: Lighting control
The Kia Seltos light switch includes positions for headlights, position lamps, AUTO lighting, and OFF or DRL OFF operation. To operate the lights, turn the knob at the end of the control lever to one of the following positions: OFF position / DRL off position Auto light position Position & Tail lamp Headlight positionKia Seltos SP2 (2021-2026) Service Manual: Automatic climate control system
The Kia Seltos automatic climate control system uses cooling, heating, air intake, fan speed, and air distribution control to help maintain a pleasant cabin environment. When AUTO mode is selected, the system automatically adjusts several settings to reach the selected temperature. Type A Type B Fan speed control button Air intake control button Mode selection button Rear window defroster button Temperature control knob Air conditioning (A/C) button OFF button Front windshield defroster button AUTO automatic control button Climate control display NOTICE Operating the blower when the ignition switch is in the ON position without the engine running may discharge the battery.