
Kia Seltos: Body (Interior and Exterior) / Crash Pad
Contents:
- Components and Components Location
- Crash Pad Side Cover Removal and Installation
- Crash Pad Air Vent Removal and Installation
- Crash Pad Panel Removal and Installation
- Crash Pad Garnish Removal and Installation
- Steering Column Shroud Panel Removal and Installation
- Glove Box Removal and Installation
- Main Crash Pad Assembly Removal and Installation
- Cowl Cross Bar Assembly Removal and Installation
Components and Components Location
| Component |
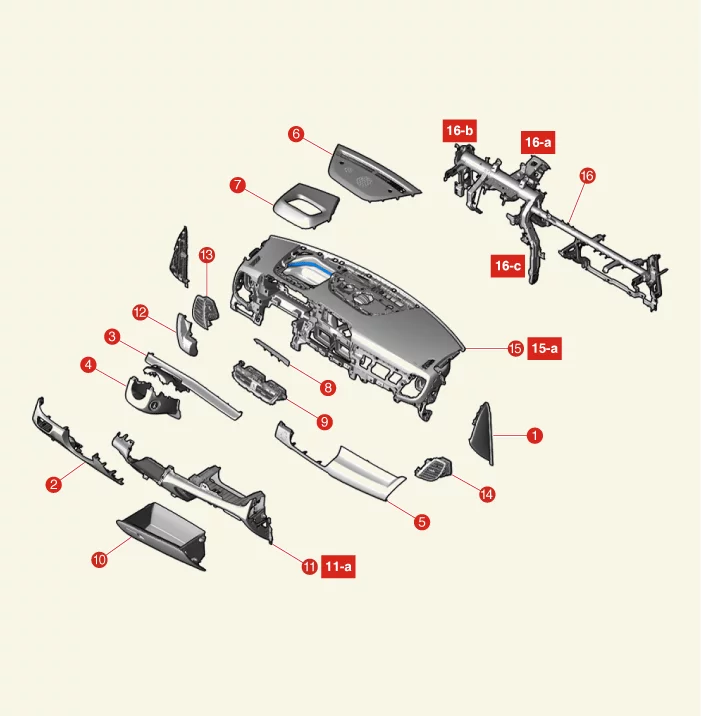
| 1. Crash Pad Side Cover 2. Crash Pad Lower Panel 3. Crash Pad Center Garnish 4. Steering Column Shroud Lower Panel 5. Crash Pad Garnish [Driver's side] 6. Center Speaker Grille 7. Head-Up Display (HUD) Unit Cover 8. Center Fascia Upper Panel |
9. Crash Pad Center Air Vent 10. Glove Box 11. Crash Pad Center Panel 11-a. 6-a. 6.9 - 10.8 N·m (0.7 ~ 1.1 kgf·m, 5.1 - 8 lb·ft) 12. Crash Pad Garnish [Driver's side] 13. Crash Pad Side Air Vent 14. Crash Pad Upper Garnish [Passenger's Side] 15. Main Crash Pad Assembly 15-a. 6.9 - 10.8 N·m (0.7 - 1.1 kgf·m, 5.1 - 8 lb·ft) 16. Cowl Crossbar Assembly 16-a. 22.6 - 30.4 N·m (2.3 - 3.1 kgf·m, 16.6 - 22.4 lb·ft) 16-b. 17.7 - 23.5 N·m (1.8 - 2.4 kgf·m, 13 - 17.4 lb·ft) 16-c. 16.7 - 22.6 N·m (1.7 - 2.3 kgf·m, 12.3 - 16.6 lb·ft) |
Crash Pad Side Cover Removal and Installation
| Removal |
| 1. |
Remove the front door body side weatherstrip.
(Refer to Front Door - "Front Door Weatherstrip")
|
| 2. |
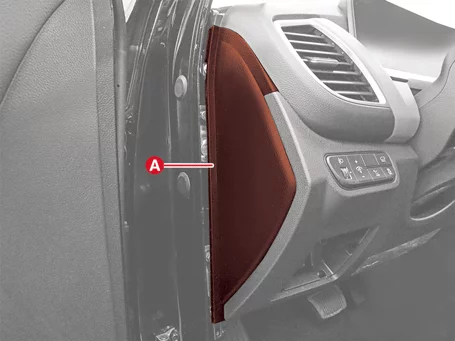
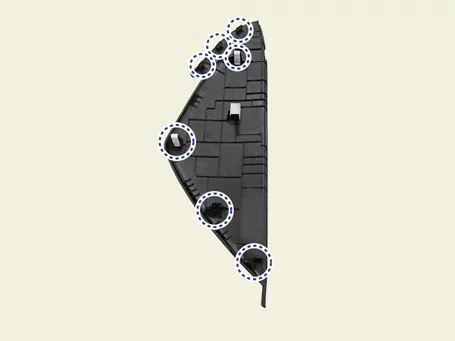
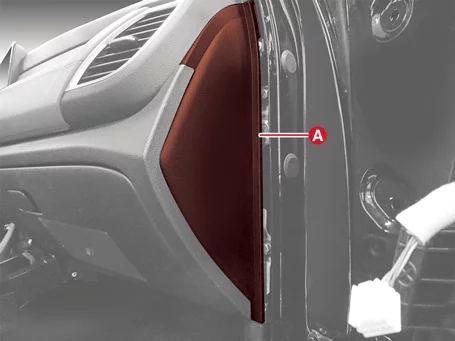
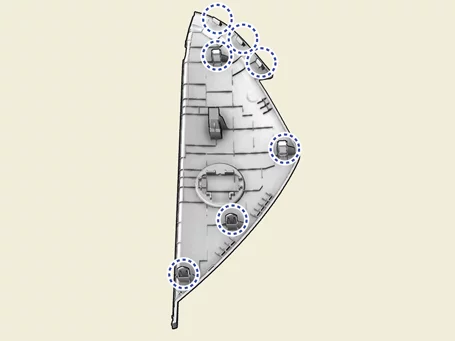
Remove the crash pad side cover (A).
[Driver's side]
[Passenger's side]
|


| Installation |
| 1. |
Install in reverse order of removal.
|
Crash Pad Air Vent Removal and Installation
| Removal |
| 1. |
Remove the crash pad garnish [Passenger's side].
(Refer to Crash Pad - "Crash Pad Garnish")
|
| 2. |
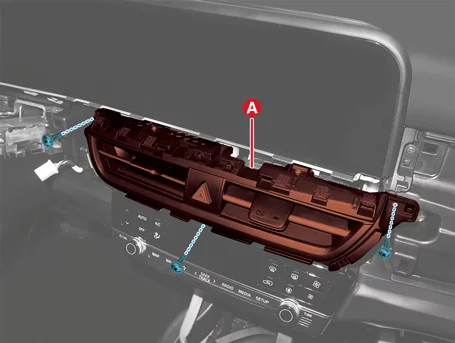
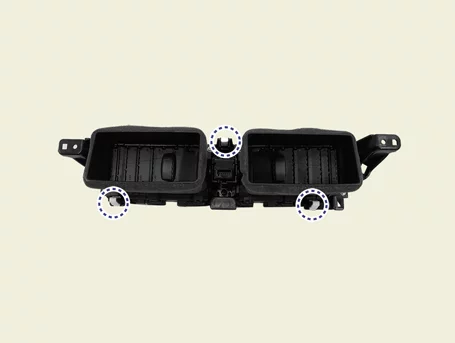
Remove the center air vent (A) after removing the screws.
|
| 3. |
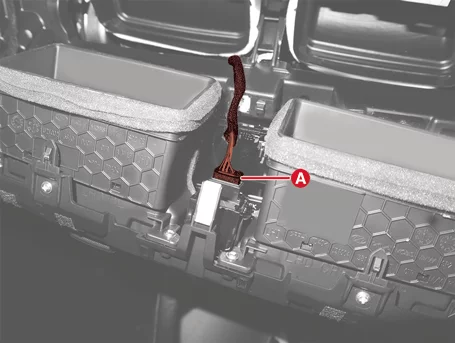
Disconnect the hazard switch connector (A).
|
| 1. |
Remove the crash pad garnish [LH].
(Refer to Crash Pad - "Crash Pad Garnish")
|
| 2. |
Remove the side air vent [Driver's side] (A).
|
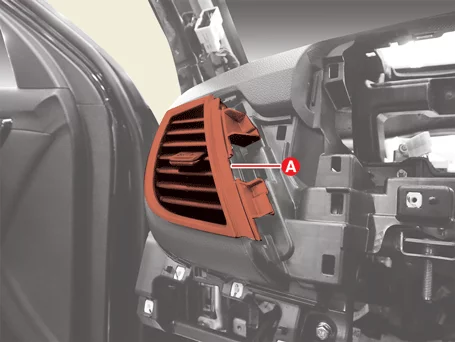
| 1. |
Remove the crash pad garnish [Passenger's side].
(Refer to Crash Pad - "Crash Pad Garnish")
|
| 2. |
Remove the side air vent [Passenger's side] (A) after removing the screw.
|
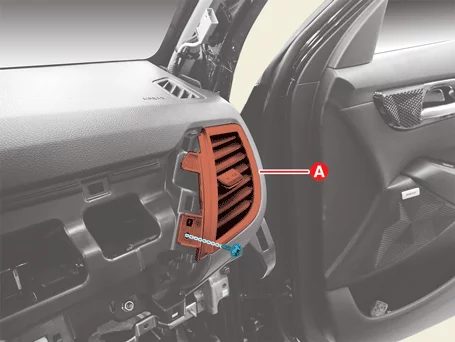
| Installation |
| 1. |
Install in reverse order of removal.
|
Crash Pad Panel Removal and Installation
| Removal |
| 1. |
Disconnect the battery negative ( - ) terminal.
|
| 2. |
Remove the crash pad side cover [Driver's Side].
(Refer to Crash Pad - "Crash Pad Side Cover")
|
| 3. |
Remove the crash pad lower panel (A) after removing the screws.
|
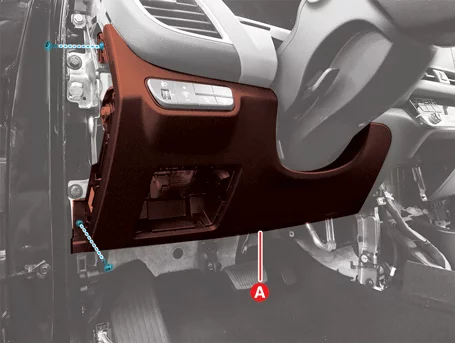
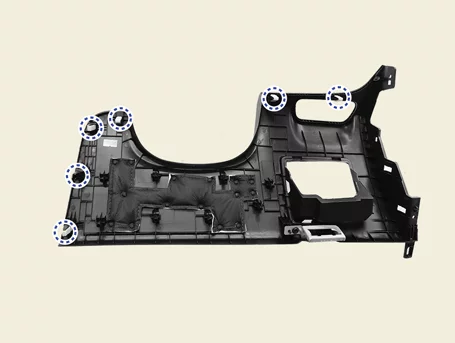
| 4. |
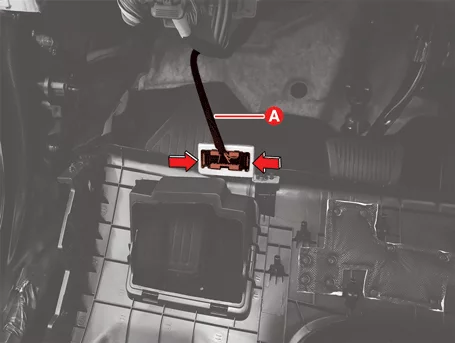
Disconnect the diagnostic tool connector (A).
|
| 1. |
Remove the crash pad lower panel.
|
| 2. |
Remove the crash pad side cover [Passenger's side].
(Refer to Crash Pad - "Crash Pad Side Cover")
|
| 3. |
Remove the glove box.
(Refer to Crash Pad - "Glove Box")
|
| 4. |
Remove the floor console assembly.
(Refer to Floor Console - "Floor Console Assembly")
|
| 5. |
Remove the heater and A/C control unit.
(Refer to Heating,Ventilation And Air Conditioning - "Heater & A/C
Control Unit (FATC)")
|
| 6. |
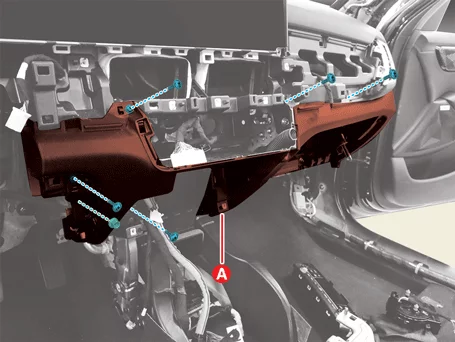
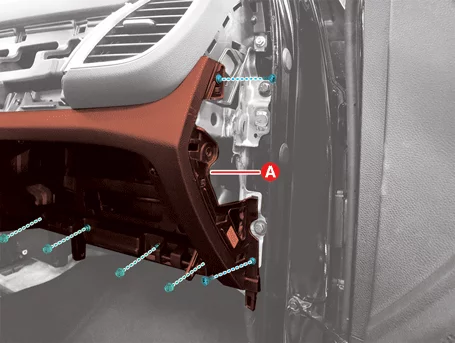
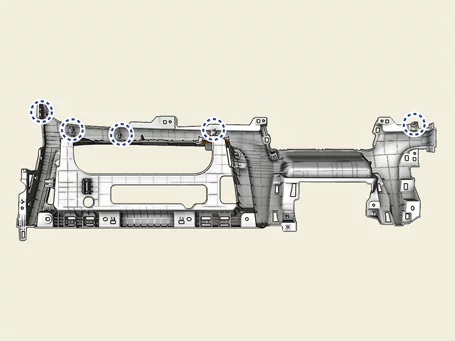
Remove the crash pad center panel (A) after removing the screws and nuts.
|
| Installation |
| 1. |
Install in reverse order of removal.
|
Crash Pad Garnish Removal and Installation
| Removal |
| 1. |
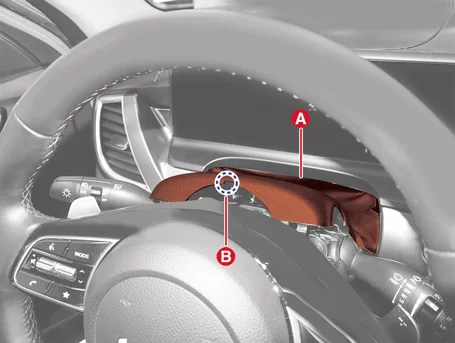
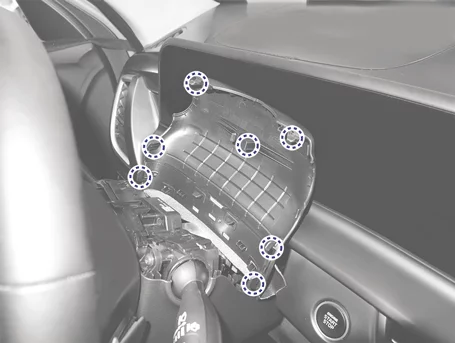
Remove the crash pad center garnish (A) by using the service hole (B).
|
| 2. |
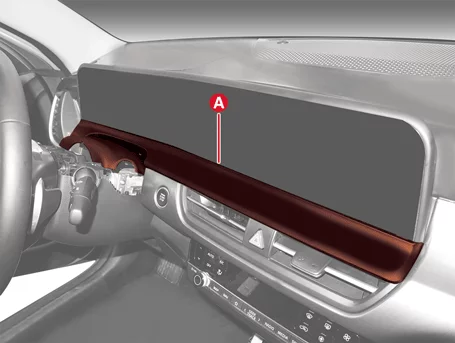
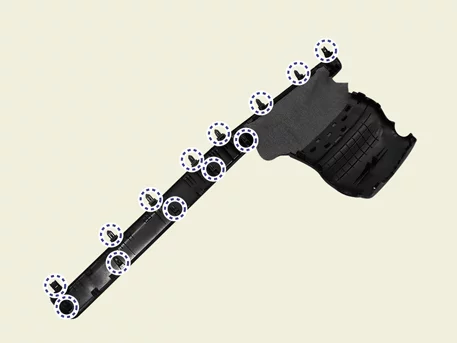
Remove the crash pad center garnish (A).
|
| 1. |
Remove the cluster.
(Refer to Body Electrical System - "Cluster")
|
| 2. |
Remove the crash pad lower panel.
(Refer to Crash Pad - "Crash Pad Panel")
|
| 3. |
Remove the crash pad garnish [Driver's side] (A).
|
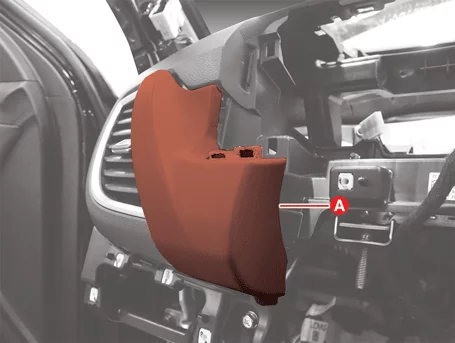
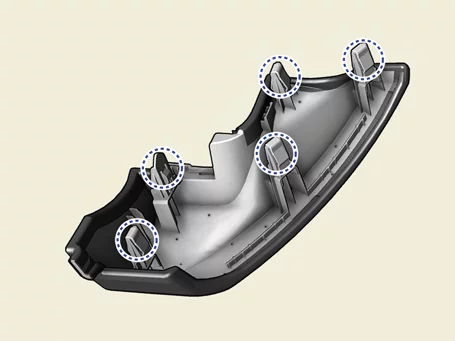
| 1. |
Remove the crash pad center garnish.
|
| 2. |
Remove the crash pad garnish [Passenger's side] (A).
|
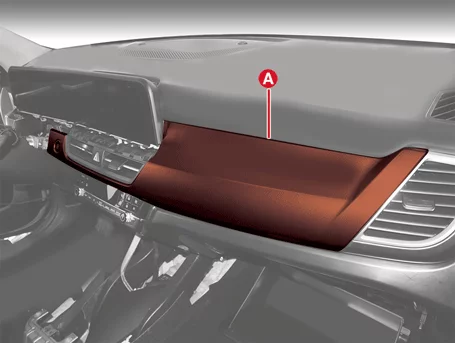
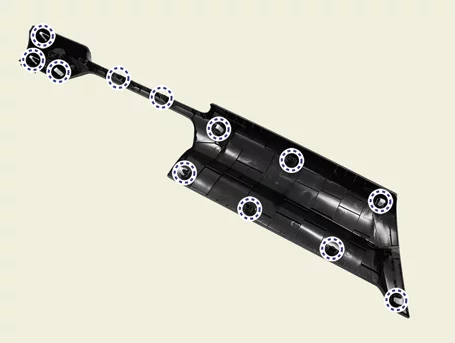
| 3. |
Disconnect the start and stop button connector (A).
|
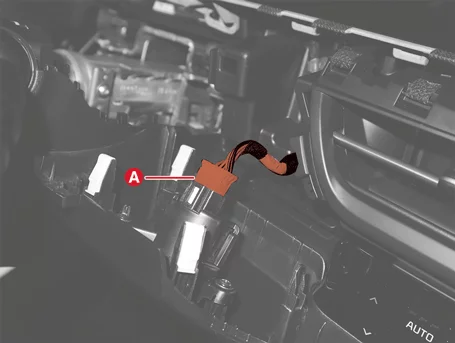
| 4. |
Disconnect the mood lamp connector (A).
|
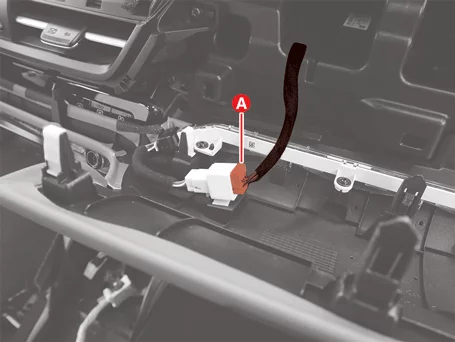
| Installation |
| 1. |
Install in reverse order of removal.
|
Steering Column Shroud Panel Removal and Installation
| Removal |
| 1. |
Remove the crash pad lower panel.
(Refer to Crash Pad - "Crash Pad Lower Panel")
|
| 2. |
Remove the crash pad center garnish (A) by using the service hole (B).
|
| 3. |
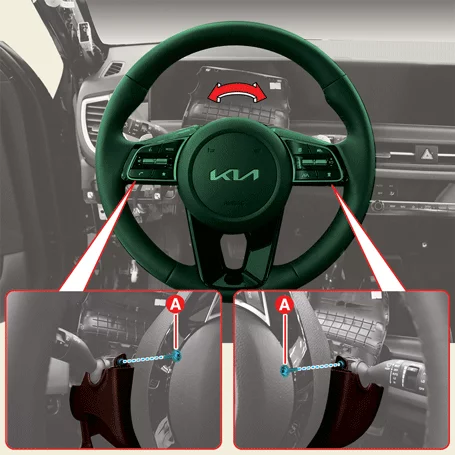
Turn the steering wheel left and right to remove the screws (A).
|
| 4. |
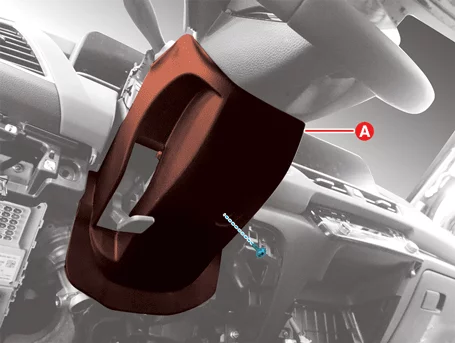
Remove the steering column shroud panel (A) after removing the screw.
|
| Installation |
| 1. |
Install in reverse order of removal.
|
Glove Box Removal and Installation
| Removal |
| 1. |
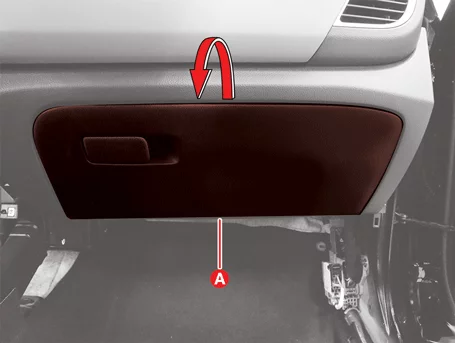
Open the glove box (A).
|
| 2. |
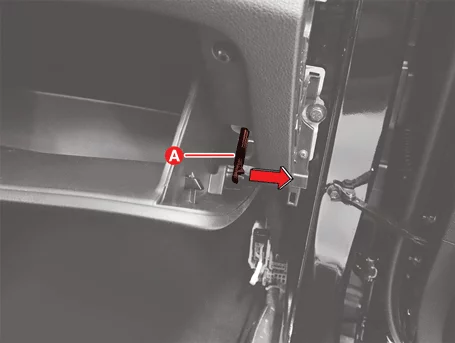
Remove the air damper (A).
|
| 3. |
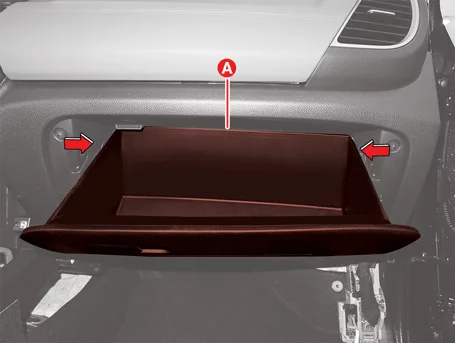
Press the stopper in the direction of the arrow and lower the glove box (A).
|
| 4. |
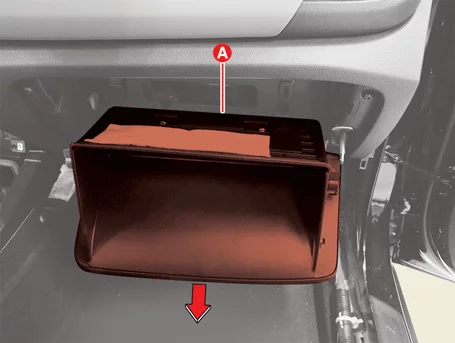
Remove the glove box (A) in the direction of the arrow.
|
| Installation |
| 1. |
Install in reverse order of removal.
|
Main Crash Pad Assembly Removal and Installation
| Removal |
| 1. |
Remove the front center speaker.
(Refer to Body Electrical System - "Speaker")
|
| 2. |
Remove the Head-Up Display (HUD) unit.
(Refer to Body Electrical System - "Head-Up Display (HUD) Unit")
|
| 3. |
Remove the crash pad antenna.
(Refer to Body Electrical System - "Antenna")
|
| 4. |
Remove the multi function switch.
(Refer to Body Electrical System - "Multifunction Switch")
|
| 5. |
Remove the crash pad center panel.
(Refer to Crash Pad - "Crash Pad Panel")
|
| 6. |
Remove the crash pad side air vent.
(Refer to Crash Pad - "Crash Pad Air Vent")
|
| 7. |
Remove the Passenger Airbag (PAB) bracket nuts (A).
|
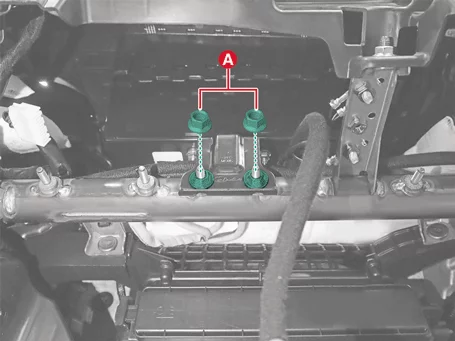
| 8. |
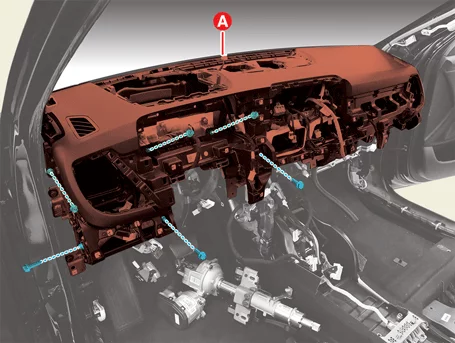
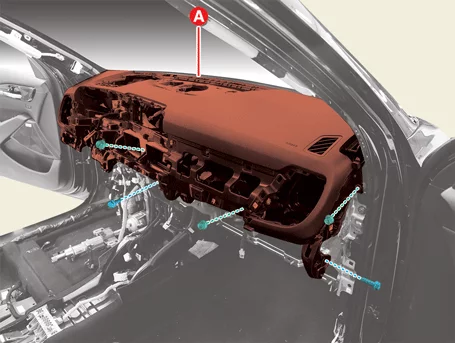
Remove the main crash pad assembly (A) after removing the bolts and nuts.
|
| 9. |
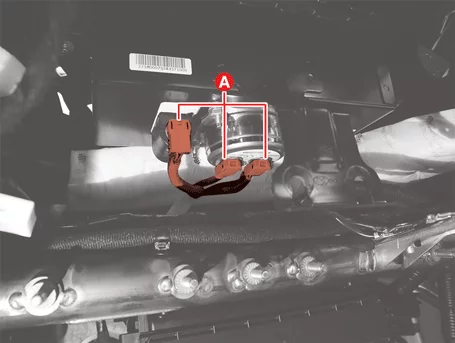
Disconnect the Passenger Airbag (PAB) connectors (A).
|
| Installation |
| 1. |
Install in reverse order of removal.
|
Cowl Cross Bar Assembly Removal and Installation
| Removal |
| 1. |
Remove the front wiper motor.
(Refer to Body Electrical System - "Wiper Motor")
|
| 2. |
Remove the main crash pad assembly.
(Refer to Crash Pad - "Main Crash Pad Assembly")
|
| 3. |
Remove the Integrated Central control Unit (ICU).
(Refer to Body Electrical System - "Integrated Central Control Unit
(ICU)")
|
| 4. |
Remove the Integrated Body Control Unit (IBU).
(Refer to Body Electrical System - "Integrated Body Control Unit
(IBU)")
|
| 5. |
Remove interior antenna 1.
(Refer to Body Electrical System - "Smart Key Antenna")
|
| 6. |
Separate the MDPS column & housing.
(Refer to Steering System - "MDPS Column & Housing")
|
| 7. |
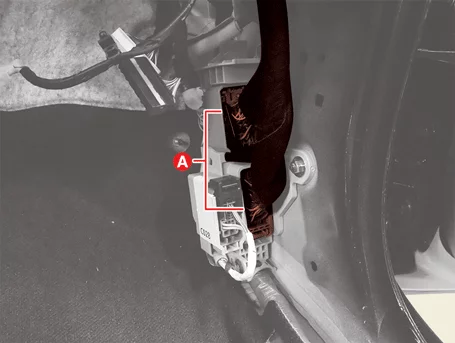
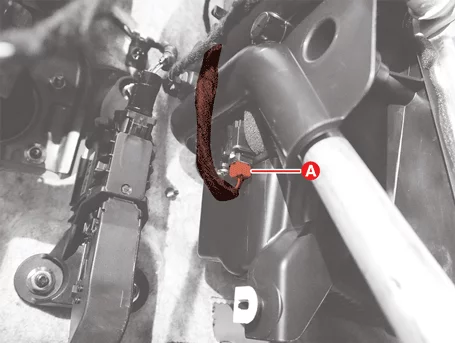
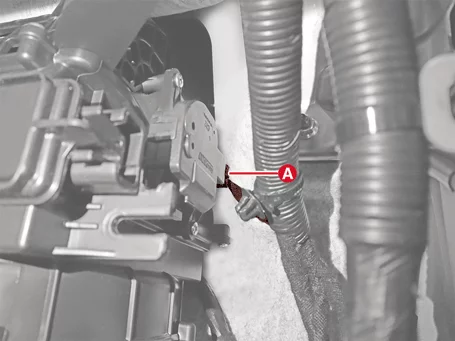
Disconnect the main wiring harness connector.
|
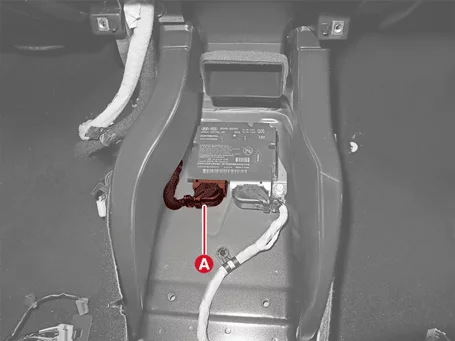
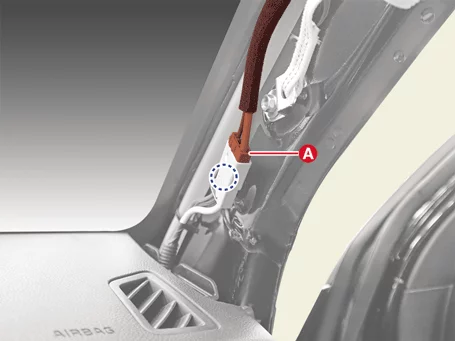
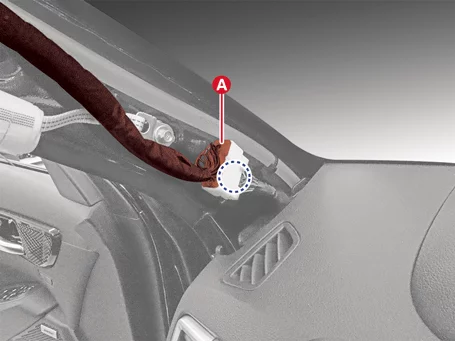
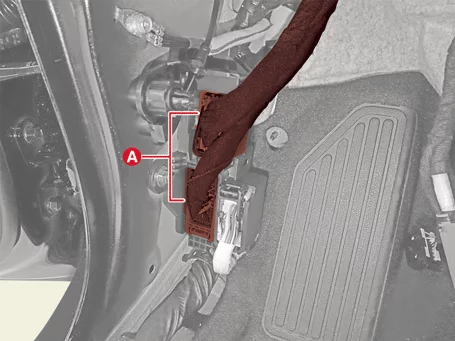
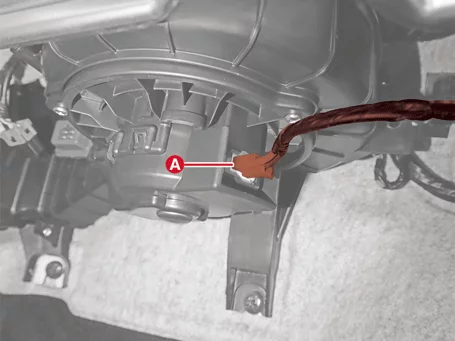
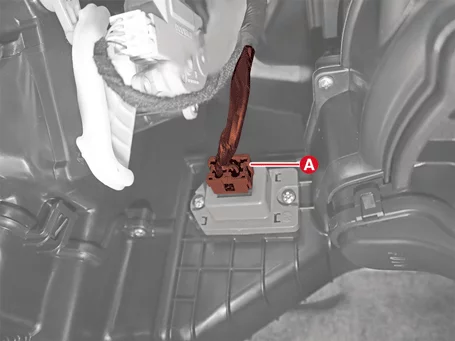
| 8. |
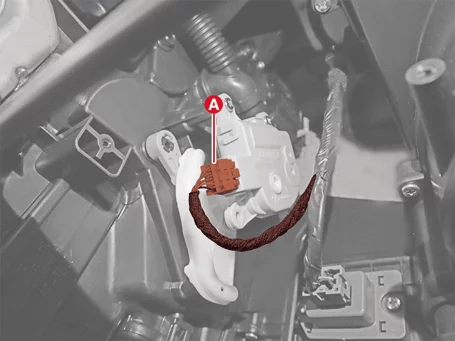
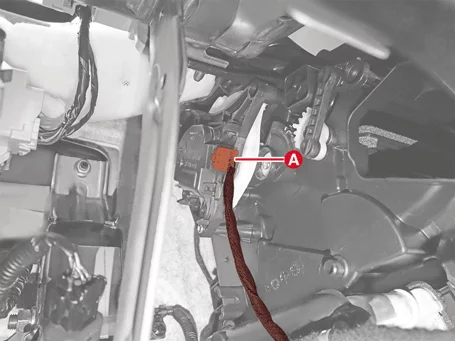
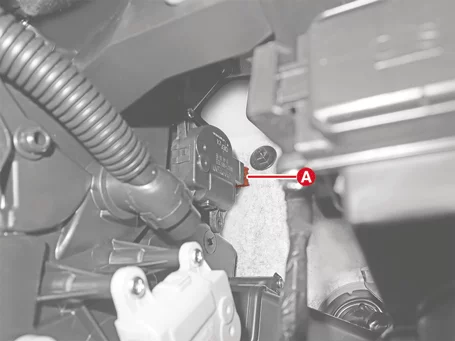
Disconnect the heater and blower unit connectors.
|
| 9. |
Remove the main wiring harness wiring clip.
|
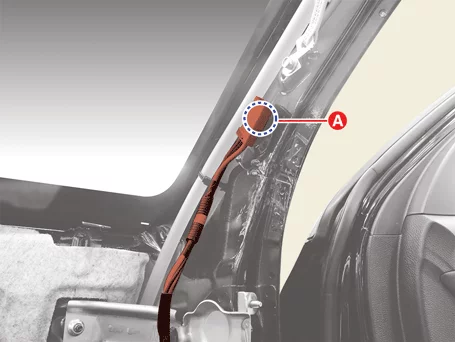
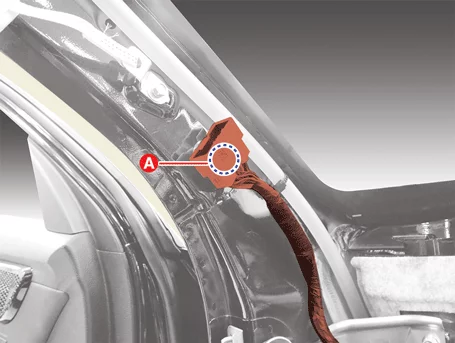
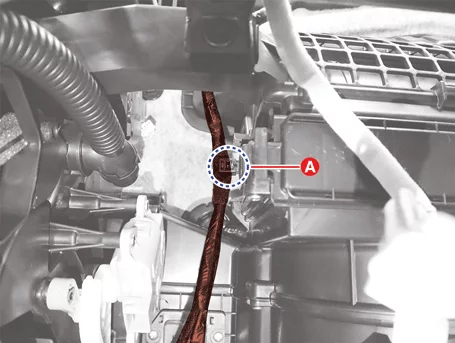
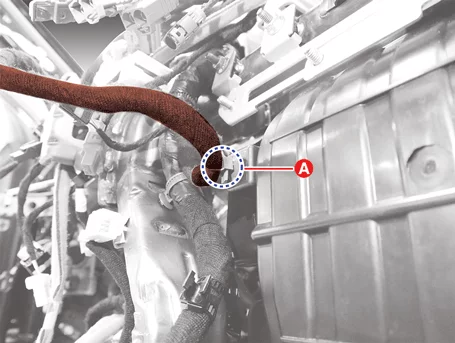
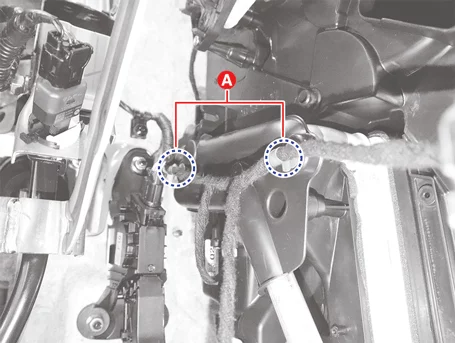
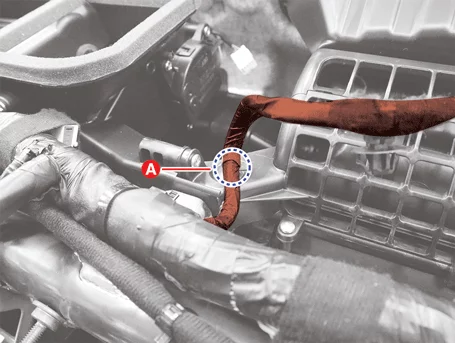
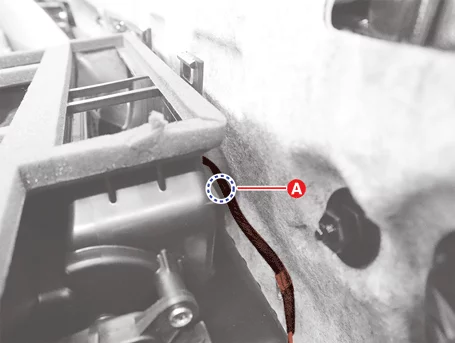
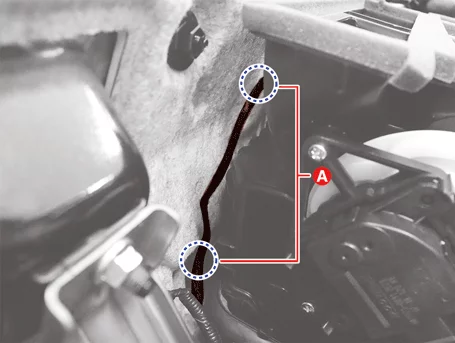
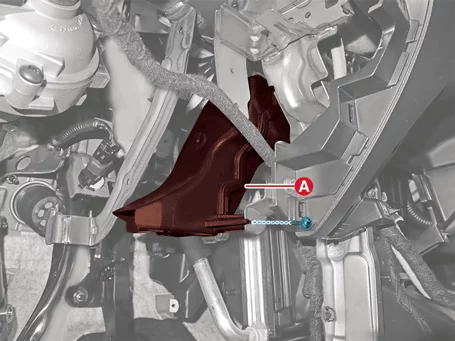
| 10. |
Remove the driver's side shower duct (A) after removing the screw.
|
| 11. |
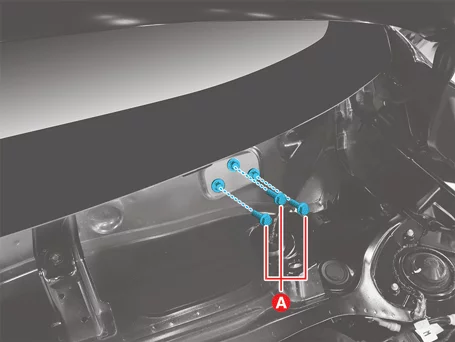
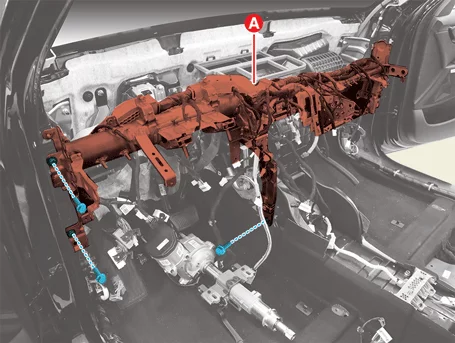
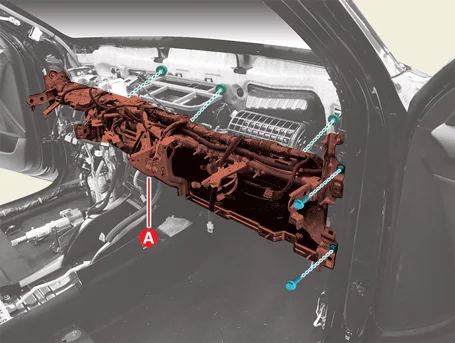
Remove the dash panel cowl cross bar bolts (A).
|
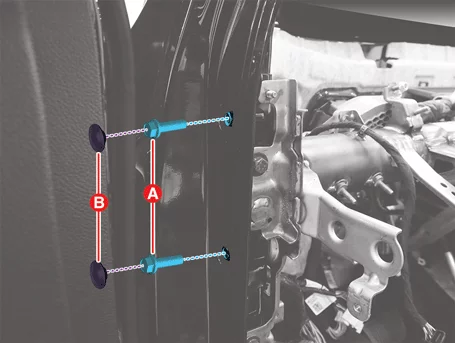
| 12. |
Remove the side panel cowl cross bar bolts (A) after removing hole plug (B).
|
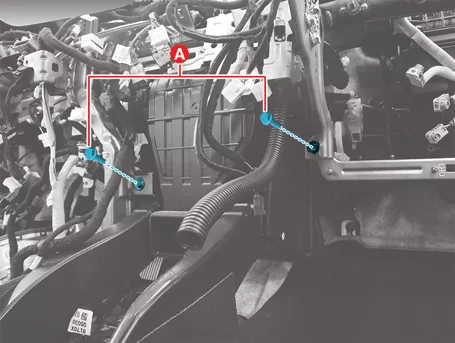
| 13. |
Remove the heater and blower unit bolts (A).
|
| 14. |
Remove the cowl cross bar assembly (A) after removing the bolts.
|
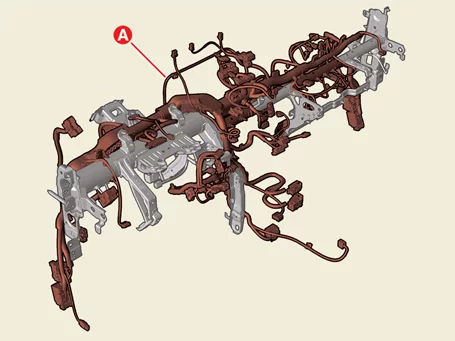
| 15. |
Remove the main wiring harness (A).
|
| Installation |
| 1. |
Install in reverse order of removal.
|


Other information:
Kia Seltos SP2 (2021-2026) Service Manual: Intelligent Speed Limit Assist (ISLA)
Intelligent Speed Limit Assist (ISLA) in the Kia Seltos uses information from detected road signs and, when equipped, the navigation system to inform the driver of the current road speed limit and related information. ISLA helps the driver stay aware of posted limits and maintain a speed appropriate for the road. CAUTION ISLA may not operate properly if the function is used in countries or regions where the system data, road signs, or navigation information are not supported.Kia Seltos SP2 (2021-2026) Service Manual: Special driving conditions
When driving conditions become worse because of poor weather, damaged roads, low visibility, or reduced traction, the Kia Seltos should be driven with extra care. Slow down, increase your following distance, and avoid sudden control inputs whenever the road surface is uncertain. Hazardous driving conditions When hazardous driving conditions are present, such as water, snow, ice, mud, sand, or similar road hazards, follow these safe driving suggestions: Drive cautiously and allow extra distance for braking.