
Kia Seltos SP2 (2021-2026) Service Manual / Emission Control System / Evaporative Emission Control System
Kia Seltos: Emission Control System / Evaporative Emission Control System
Contents:
- Description and Operation
- Inspection
- Canister Components and Components Location
- Canister Removal and Installation
- Canister Inspection
- Canister Close Valve (CCV) Specifications
- Canister Close Valve (CCV) Components and Components Location
- Canister Close Valve (CCV) Description and Operation
- Canister Close Valve (CCV) On Vehicle Inspection
- Canister Close Valve (CCV) Removal and Installation
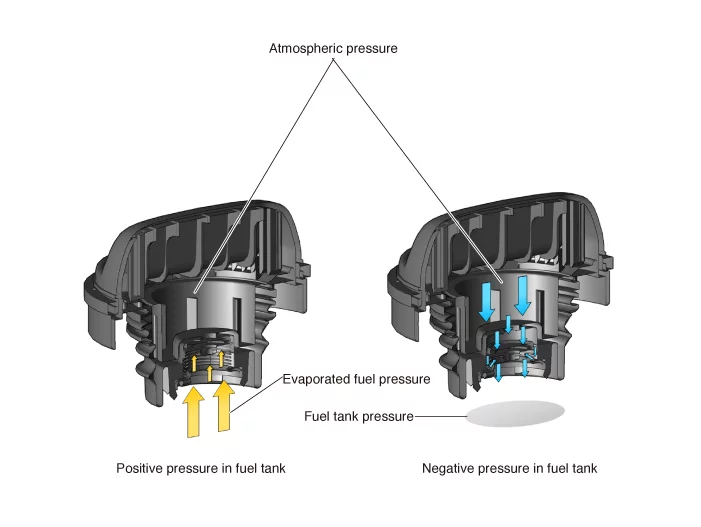
- Fuel Filler Cap Description and Operation
- Fuel Tank Air Filter Components and Components Location
- Fuel Tank Air Filter Removal and Installation
- Fuel Tank Pressure Sensor (FTPS) Specifications
- Fuel Tank Pressure Sensor (FTPS) Components and Components Location
- Fuel Tank Pressure Sensor (FTPS) Description and Operation
- Fuel Tank Pressure Sensor (FTPS) On Vehicle Inspection
- Fuel Tank Pressure Sensor (FTPS) Removal and Installation
- Purge Control Solenoid Valve (PCSV) Specification
- Purge Control Solenoid Valve (PCSV) Components and Components Location
- Purge Control Solenoid Valve (PCSV) Description and Operation
- Purge Control Solenoid Valve (PCSV) On Vehicle Inspection
- Purge Control Solenoid Valve (PCSV) Removal and Installation
Description and Operation
| Description |
| • |
Evaporative emission control system is the system that recirculates and burns evaporative gases in the
fuel tank to reduce hydrocarbons.
|
| • |
The evaporative emission control system comprises a canister to neutralize the evaporative emissions
using activated carbon, and a purge control solenoid valve to circulate the evaporative emissions to the
intake manifold.
|
| Operation |
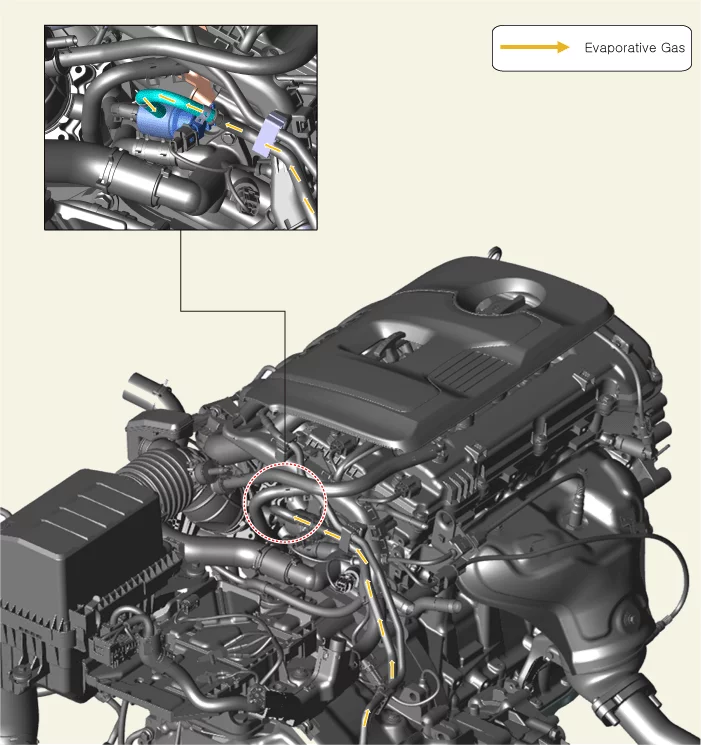
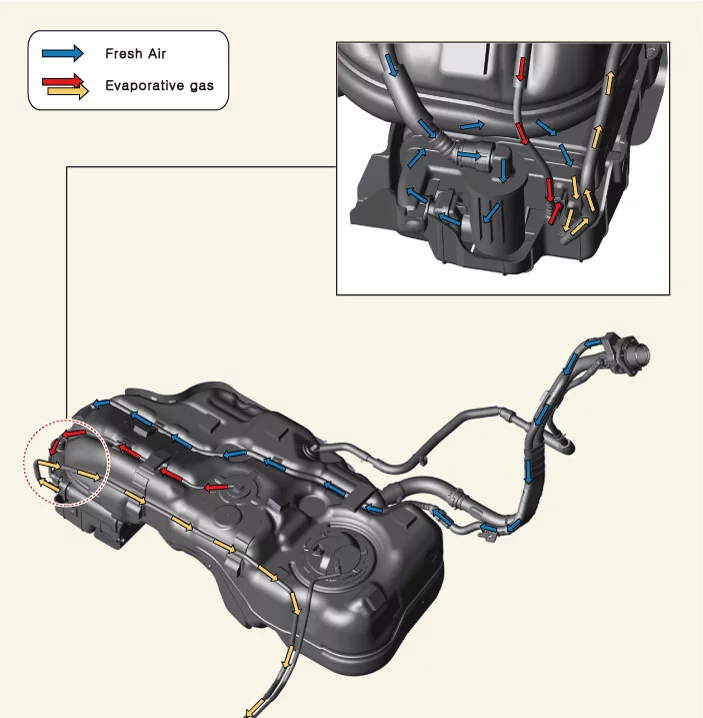
Inspection
| Inspection |
| [EVAP. Leakage Test] |
| 1. |
Perform the evaporative gas leakage test by using the KDS.
(S/W Management → Engine Control → Evap. Leakage Test)
|

Canister Components and Components Location
| Component Location |
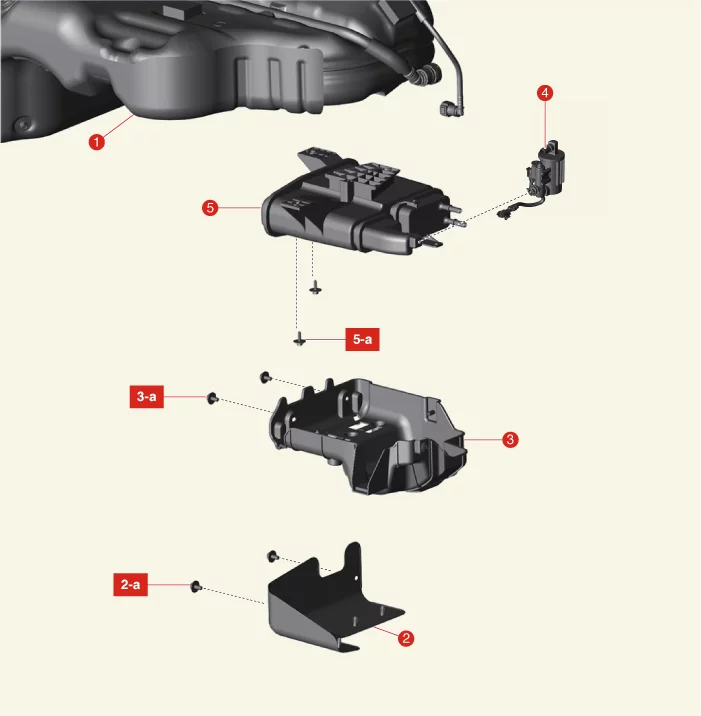
| 1. Fuel Tank 2. Canister Protector 2-a. 3.9 - 5.9 N·m (0.4 - 0.6 kgf·m, 2.9 - 4.3 lb·ft, 34.7 - 52.1 lb·in) 3. Canister Heat Protector 3-a. 3.9 - 5.9 N·m (0.4 - 0.6 kgf·m, 2.9 - 4.3 lb·ft, 34.7 - 52.1 lb·in) |
4. Canister Close Valve (CCV) & Fuel Tank Air
Filter 5. Canister 5-a. 3.9 - 5.9 N·m (0.4 - 0.6 kgf·m, 2.9 - 4.3 lb·ft, 34.7 - 52.1 lb·in) |
Canister Removal and Installation
| Removal |
| 1. |
Disconnect the battery negative ( - ) terminal.
|
| 2. |
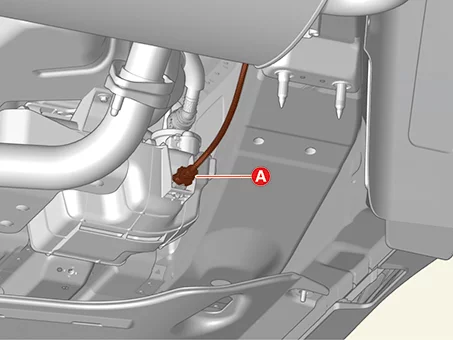
Disconnect the Canister Close Valve (CCV) connector (A).
|
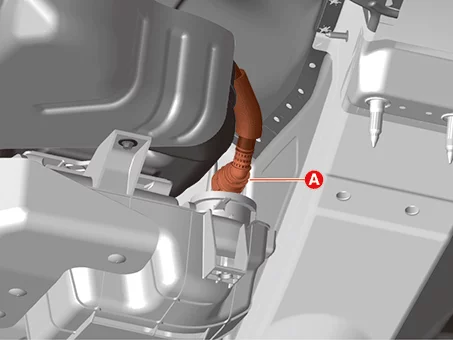
| 3. |
Separate the air ventilation hose (A).
|

| 4. |
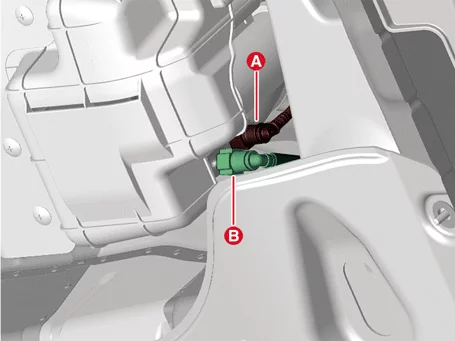
Separate the vapor hose (A, B).
|
| 5. |
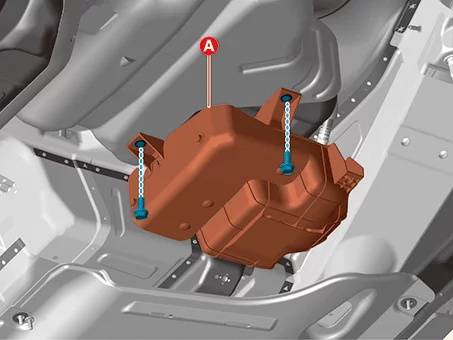
Remove the canister (A) after removing the bolts.
|
| 6. |
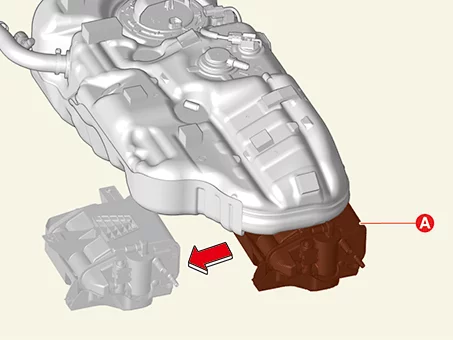
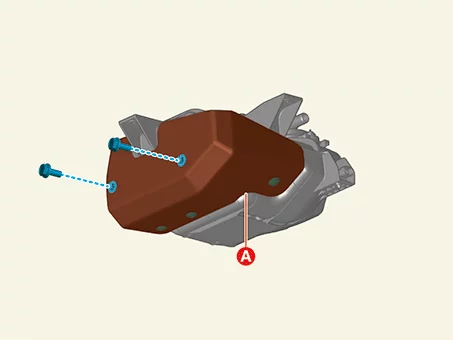
Remove the canister heat protector (A).
|
| 7. |
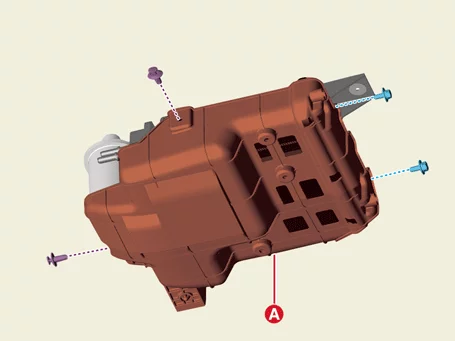
Remove the canister cover (A).
|
| 8. |
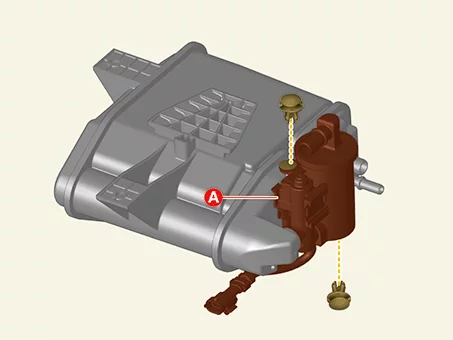
Remove the fuel tank air filter and CCV (A).
|
| Installation |
| 1. |
Install in reverse order of removal.
|
Canister Inspection
| Inspection |
| 1. |
Visually inspect the following items.
- Crack or leakage of the canister
- Loose connection, distortion, or damage of the vapor hose/tube
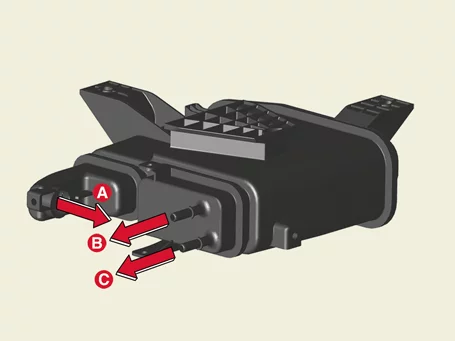
A : Canister ↔ Atmosphere
B : Canister ↔ Fuel tank
C : Canister ↔ Intake manifold
|
Canister Close Valve (CCV) Specifications
| Specification |
|
Item |
Specification |
|
Rated voltage (V) |
12 |
|
Operating voltage (V) |
10 - 16 |
|
Resistance (Ω) |
19.8 - 21.8 [20°C (68°F)] |
|
Operating pressure [kPa (kgf/cm2 , psi)] |
-2.5 (-0.02, -0.36) |
Canister Close Valve (CCV) Components and Components Location
| Component Location |
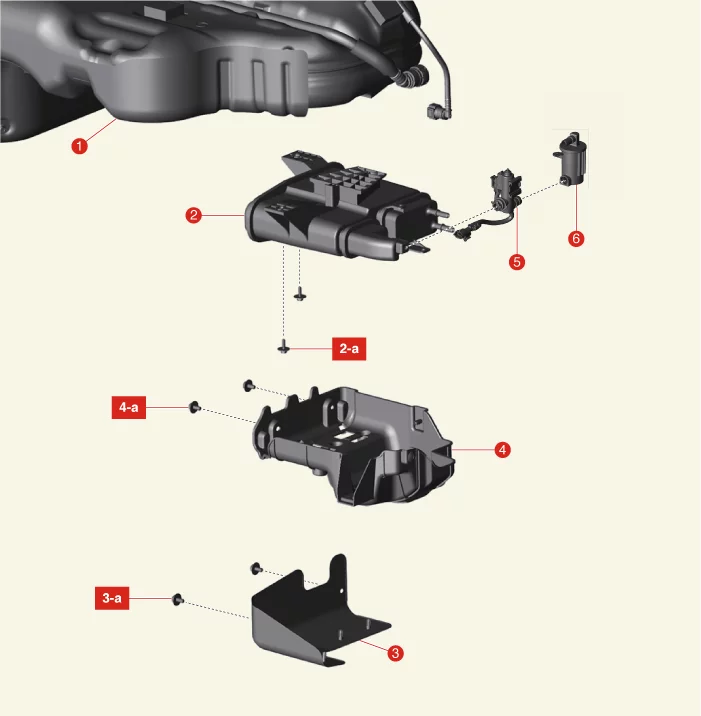
| 1. Fuel Tank 2. Canister 2-a. 3.9 - 5.9 N·m (0.4 - 0.6 kgf·m, 2.9 - 4.3 lb·ft, 34.7 - 52.1 lb·in) 3. Canister Protector 3-a. 3.9 - 5.9 N·m (0.4 - 0.6 kgf·m, 2.9 - 4.3 lb·ft, 34.7 - 52.1 lb·in) |
4. Canister Heat Protector 4-a. 3.9 - 5.9 N·m (0.4 - 0.6 kgf·m, 2.9 - 4.3 lb·ft, 34.7 - 52.1 lb·in) 5. Canister Close Valve (CCV) 6. Fuel Tank Air Filter |
Canister Close Valve (CCV) Description and Operation
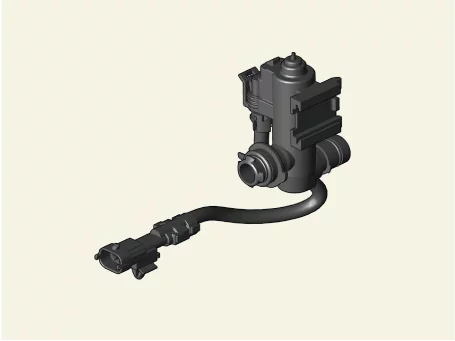
| Description |
Canister Close Valve (CCV) is installed on the canister ventilation line. It seals evaporative emission control
system by shutting the canister from the atmosphere when leak detecting system operates.
Canister Close Valve (CCV) On Vehicle Inspection
| On Vehicle Inspection |
Diagnosis with KDS
| 1. |
The evaporative emission control system can be more quickly diagnosed for problems with the KDS (Refer to
"DTC guide").
|
Component Inspection
[Resistance Measurement]
| 1. |
Turn the ignition switch OFF.
|
| 2. |
Disconnect the Canister Close Valve (CCV) connector (A).
|
| 3. |
Measure resistance between the CCV terminal 1 and 2.
|
| 4. |
Check that the resistance is within the specification.
|
[Air Tightness Test]
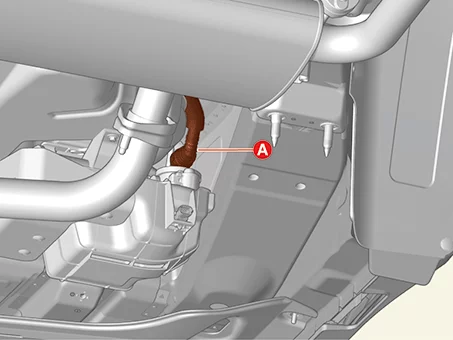
| 1. |
Separate the air ventilation hose (A).
|
| 2. |
Connect a vacuum pump to the nipple.
|
| 3. |
Ground the CCV control line and apply battery voltage to the CCV power supply line.
|
| 4. |
Apply vacuum and check the valve operation.
|
Canister Close Valve (CCV) Removal and Installation
| Removal |
| 1. |
Disconnect the battery negative ( - ) terminal.
|
| 2. |
Disconnect the Canister Close Valve (CCV) connector (A).
|
| 3. |
Separate the air ventilation hose (A).
|
| 4. |
Separate the vapor hose (A, B).
|
| 5. |
Remove the canister (A) after removing the bolts.
|
| 6. |
Remove the canister heat protector (A).
|
| 7. |
Remove the canister cover (A).
|
| 8. |
Remove the fuel tank air filter and CCV (A).
|
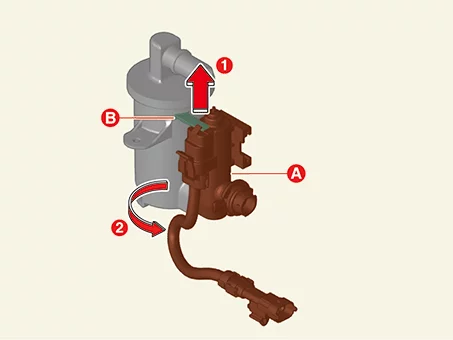
| 9. |
Remove the CCV (A) by rotating CCV about 30 degrees in the direction of the arrow while lifting the
holder (B).
|
| Installation |
| 1. |
Install in the reverse order of removal.
|
Fuel Filler Cap Description and Operation
| Description |
| • |
The fuel filler cap works as a check valve, allowing fluid to flow in only one direction.
|
| • |
It releases the vacuum getting the external air when the vacuum occurs inside the fuel tank and prevents
vapor gas in the fuel tank from going into the atmosphere.
|
Fuel Tank Air Filter Components and Components Location
| Component Location |
| 1. Fuel Tank 2. Canister 2-a. 3.9 - 5.9 N·m (0.4 - 0.6 kgf·m, 2.9 - 4.3 lb·ft, 34.7 - 52.1 lb·in) 3. Canister Protector 3-a. 3.9 - 5.9 N·m (0.4 - 0.6 kgf·m, 2.9 - 4.3 lb·ft, 34.7 - 52.1 lb·in) |
4. Canister Heat Protector 4-a. 3.9 - 5.9 N·m (0.4 - 0.6 kgf·m, 2.9 - 4.3 lb·ft, 34.7 - 52.1 lb·in) 5. Canister Close Valve (CCV) 6. Fuel Tank Air Filter |
Fuel Tank Air Filter Removal and Installation
| Removal |
| 1. |
Disconnect the battery negative ( - ) terminal.
|
| 2. |
Disconnect the Canister Close Valve (CCV) connector (A).
|
| 3. |
Separate the air ventilation hose (A).
|
| 4. |
Separate the vapor hose (A, B).
|
| 5. |
Remove the canister (A) after removing the bolts.
|
| 6. |
Remove the canister heat protector (A).
|
| 7. |
Remove the canister cover (A).
|
| 8. |
Remove the fuel tank air filter and CCV (A).
|
| 9. |
Remove the CCV (A) by rotating CCV about 30 degrees in the direction of the arrow while lifting the
holder (B).
|
| Installation |
| 1. |
Install in reverse order of removal.
|
Fuel Tank Pressure Sensor (FTPS) Specifications
| Specification |
|
Item |
Specification |
|
Rated voltage (V) |
5 |
|
Operating voltage (V) |
4.75 - 5.25 |
|
Operating temperature [°C (°F)] |
-30 to 100 (-22 to 212) |
|
Operating pressure (kPa) |
-6.67 to 6.67 |
| Item |
Specification |
|||
| Pressure |
kPa |
-6.67 |
0 |
6.67 |
|
kgf/cm² |
-0.06 |
0 |
0.06 |
|
|
psi |
-0.96 |
0 |
0.96 |
|
| Output voltage (V) |
0.5 |
2.5 |
4.5 |
|
Fuel Tank Pressure Sensor (FTPS) Components and Components Location
| Component Location |
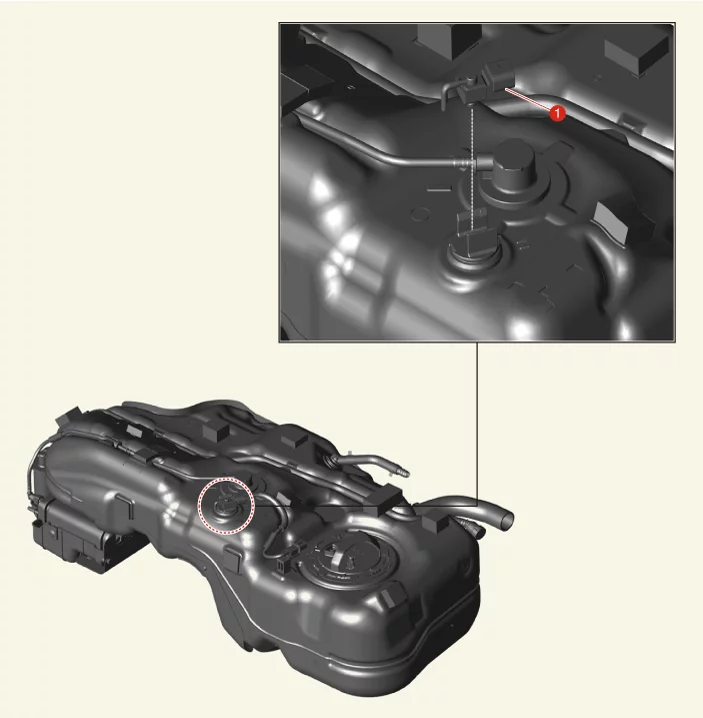
| 1. Fuel Tank Pressure Sensor (FTPS) |
Fuel Tank Pressure Sensor (FTPS) Description and Operation
| Description |
| • |
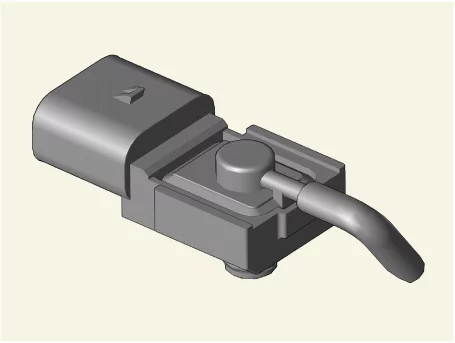
The Fuel Tank Pressure Sensor (FTPS) is a component of the evaporative emission control system and is
installed on the fuel tank.
|
| • |
It checks the Purge Control Solenoid Valve (PCSV) operation and detects a leakage of the system.
|
Fuel Tank Pressure Sensor (FTPS) On Vehicle Inspection
| On Vehicle Inspection |
Diagnosis with KDS
| 1. |
The evaporative emission control system can be more quickly diagnosed for problems with the KDS (Refer to
"DTC guide").
|
Fuel Tank Pressure Sensor (FTPS) Removal and Installation
| Removal |
| 1. |
Remove the fuel tank.
(Refer to Engine Control / Fuel System - "Fuel Tank")
|
| 2. |
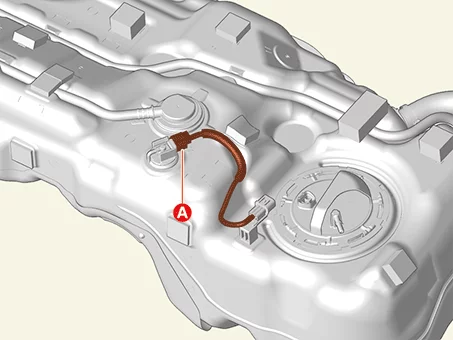
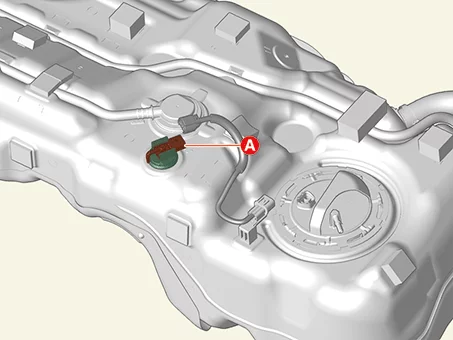
Disconnect the Fuel Tank Pressure Sensor (FTPS) connector (A).
|
| 3. |
Remove the FTPS (A) from fuel tank.
|
| Installation |
| 1. |
Install in the reverse order of removal.
|
Purge Control Solenoid Valve (PCSV) Specification
| Specification |
|
Item |
Specification |
|
Rated voltage (V) |
13.4 - 13.6 |
|
Operating voltage (V) |
9 - 16 |
|
Allowable transient voltage (V) |
24 (1 min) |
|
Minimum operating voltage (V) |
9 |
|
Deactivation voltage (V) |
1 |
|
Resistance (Ω) |
18.5 - 22.5 [23°C (73.4°F)] |
Purge Control Solenoid Valve (PCSV) Components and Components Location
| Component Location |
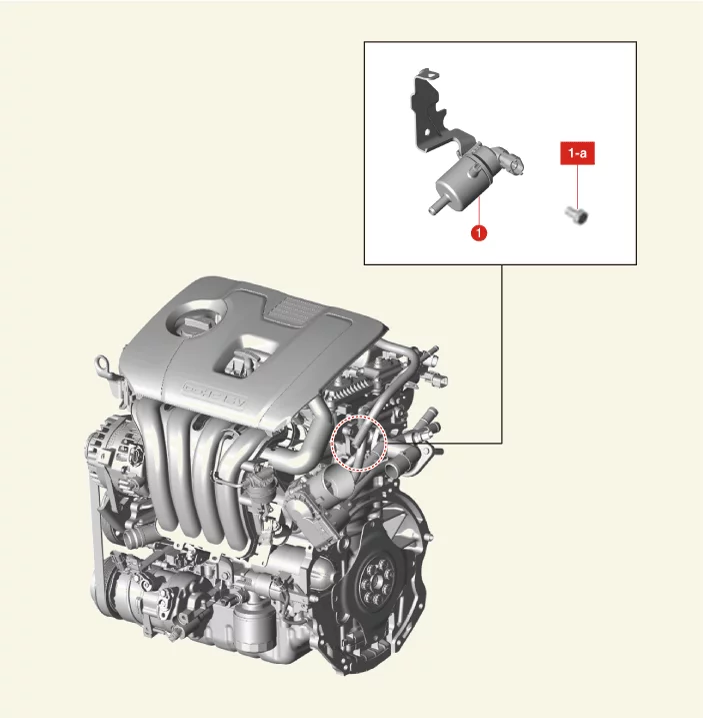
| 1. Purge Control Solenoid Valve (PCSV) 1-a. 9.8 - 11.8 N·m (1.0 - 1.2 kgf·m, 7.2 - 8.7 lb·ft) |
Purge Control Solenoid Valve (PCSV) Description and Operation
| Description |
| • |
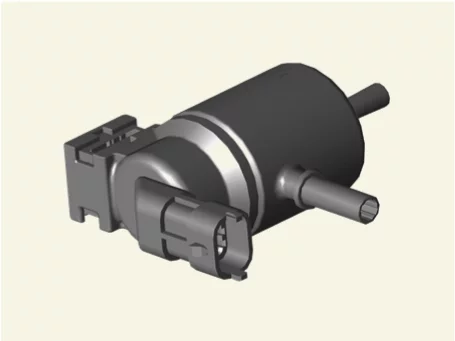
Purge Control Solenoid Valve (PCSV) controls the passage between the canister and the intake manifold.
|
| • |
Fuel evaporative gas collected in the canister is supplied to the combustion chamber by the operation of
the Purge Control Solenoid Valve (PSCV) under Engine Control Module (ECM) control.
|
Purge Control Solenoid Valve (PCSV) On Vehicle Inspection
| On Vehicle Inspection |
| 1. |
Turn the IG OFF.
|
| 2. |
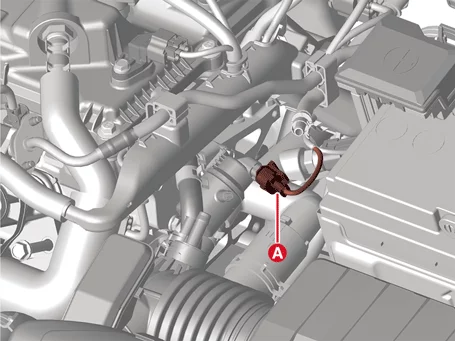
Disconnect the Purge Control Solenoid Valve (PCSV) connector (A).
|
| 3. |
Measure resistance between the PCSV terminals 1 and 2.
|
| 4. |
Check that the resistance is within the specification.
|
Purge Control Solenoid Valve (PCSV) Removal and Installation
| Removal |
| 1. |
Disconnect the negative ( - ) terminal of the battery.
|
| 2. |
Remove the engine cover.
(Refer to Engine Mechanical System - "Engine Cover")
|
| 3. |
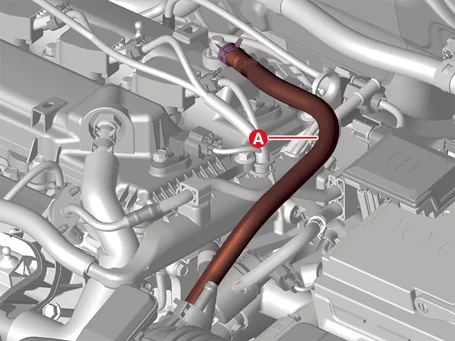
Remove the breather hose (A).
|
| 4. |
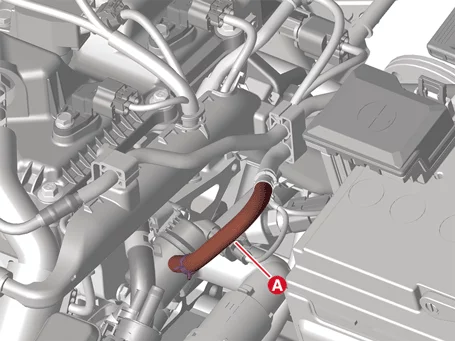
Remove the vapor hose (A).
|
| 5. |
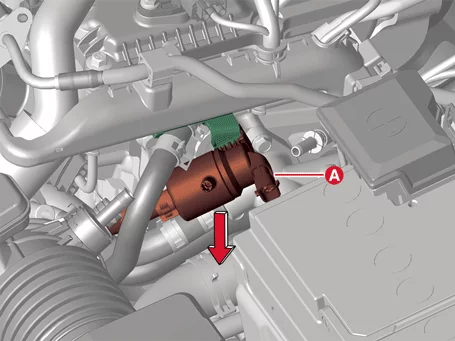
Disconnect the Purge Control Solenoid Valve (PCSV) connector (A).
|
| 6. |
Separate the PCSV (A) by pushing it in the direction of the arrow.
|
| 7. |
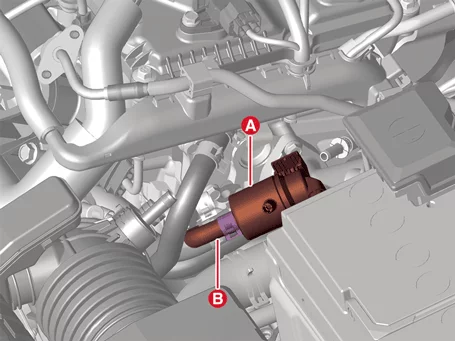
Remove the PCSV (A) after removing the vapor hose (B).
|
| Installation |
| 1. |
Install in reverse order of removal.
|


Other information:
Kia Seltos SP2 (2021-2026) Service Manual: Special driving conditions
When driving conditions become worse because of poor weather, damaged roads, low visibility, or reduced traction, the Kia Seltos should be driven with extra care. Slow down, increase your following distance, and avoid sudden control inputs whenever the road surface is uncertain. Hazardous driving conditions When hazardous driving conditions are present, such as water, snow, ice, mud, sand, or similar road hazards, follow these safe driving suggestions: Drive cautiously and allow extra distance for braking.Warning lights indicate situations that require the driver's attention. Some warnings may require immediate action, while others may indicate that the Kia Seltos should be inspected or serviced. NOTICE Warning lights After starting the engine, make sure all warning lights turn off. If any warning light remains on, it indicates a condition that needs attention.