
Kia Seltos: Body (Interior and Exterior) / Fender
Contents:
Removal and Installation
| Replacement |
| 1. |
Remove the front bumper assembly.
(Refer to Front Bumper - "Front Bumper Assembly")
|
| 2. |
Remove the A pillar garnish.
(Refer to Body Side Molding - "A Pillar Garnish")
|
| 3. |
Remove the front wheel guard.
(Refer to Body Side Molding - "Front Wheel Guard")
|
| 4. |
Remove the fender garnish.
(Refer to Body Side Molding - "Fender Garnish")
|
| 5. |
Remove the head lamps.
(Refer to Body Electrical System - "Head Lamps")
|
| 6. |
Remove the side repeater lamp [Fender].
(Refer to Body Electrical System - "Turn Sinal Lamp")
|
| 7. |
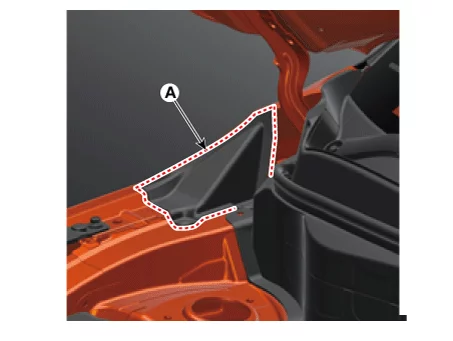
Remove the fender apron cover (A) after removing the clips.
|
| 8. |
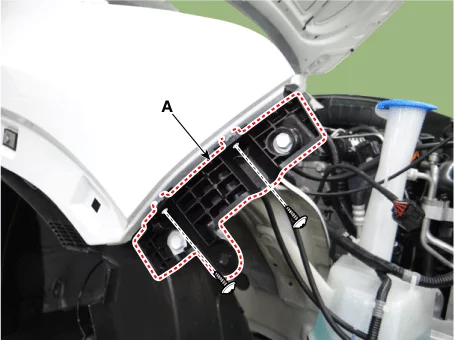
Remove the front bumper side mounting bracket (A) after removing the bolts.
|
| 9. |
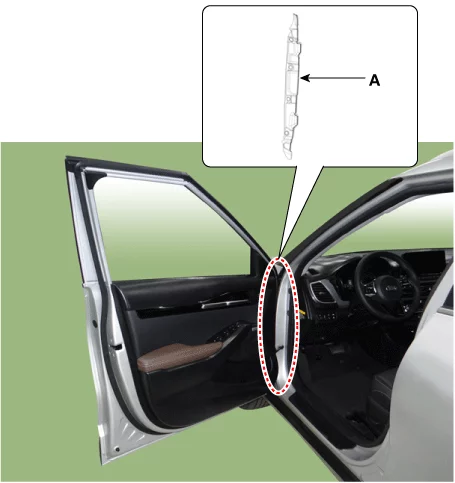
Remove the fender insulator (A) after removing the clips.
|
| 10. |
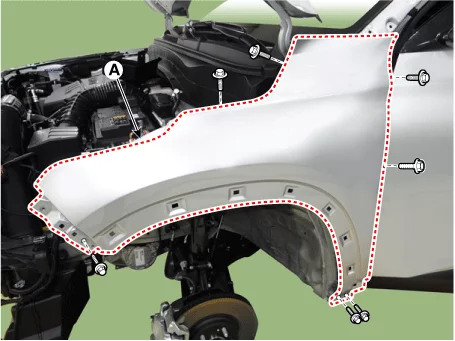
Remove the fender assembly (A) after removing the bolts.
|
| Installation |
| 1. |
Install in reverse order of removal.
|


Other information:
Kia Seltos SP2 (2021-2026) Service Manual: Closing the fuel filler door
To install the fuel cap on the Kia Seltos, turn it clockwise until it clicks one time. This click indicates that the cap is securely tightened and properly sealed. Close the fuel filler door and press it lightly to make sure it is fully closed and flush with the body of the vehicle. WARNING Refueling Always remove the fuel cap carefully and slowly.Kia Seltos SP2 (2021-2026) Service Manual: Tightening Torque
Tightening Torque Engine and Transaxle Assembly Engine Room Under Cover Item N·m kgf·m lb·ft lb·in Engine room under cover bolt 7.