
Kia Seltos SP2 (2021-2026) Service Manual / Body Electrical System / Fuses And Relays
Kia Seltos: Body Electrical System / Fuses And Relays
Contents:
- Engine Room Junction Block Removal and Installation
- Engine Room Junction Block Inspection
- Integrated Central Control Unit (ICU) Description and Operation
- Integrated Central Control Unit (ICU) Inspection
- Integrated Central Control Unit (ICU) Removal and Installation
- Integrated Circuit Module (ICM) Removal and Installation
Engine Room Junction Block Removal and Installation
| Removal |
Engine Room PCB Block
| 1. |
Disconnect the negative ( - ) battery terminal.
|
| 2. |
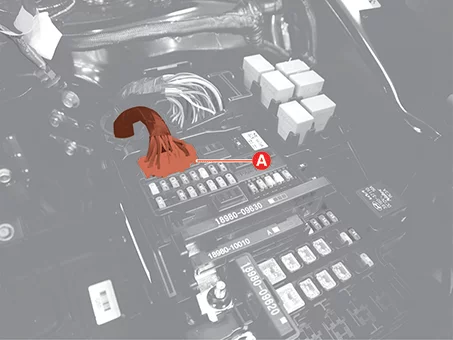
Disconnect the engine room PCB block connector (A).
|
| 3. |
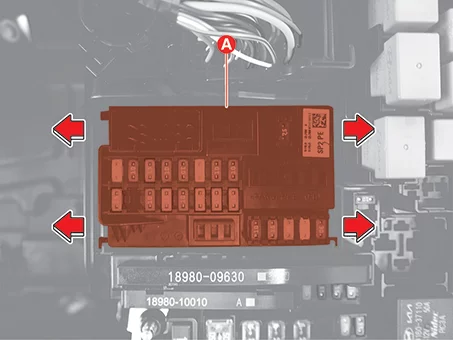
Remove the engine room PCB block (A) by pulling the hooks in the direction of the arrows.
|
| 4. |
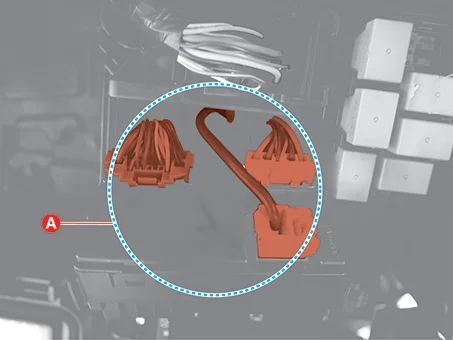
Disconnect the engine room PCB block connectors (A).
|
| Installation |
| 1. |
Install in reverse order of removal.
|
Engine Room Junction Block Inspection
| Inspection |
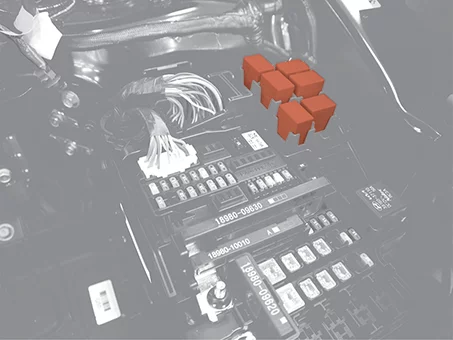
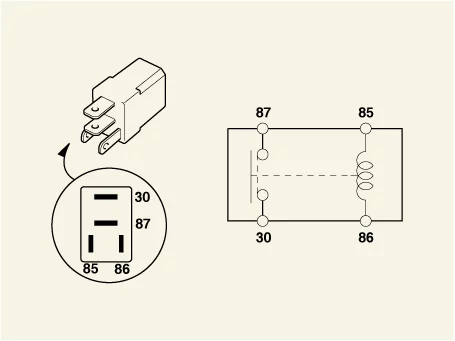
Power Relay Inspection (Type A)
Check for continuity between the terminals.
| 1. |
After supplying power between terminal No. 85 and 86, check that there is continuity between terminal No.
30 and 87.
|
| 2. |
After supplying power between terminal No. 85 and 86, check that there is no continuity between terminal
No. 30 and 87.
|
||||||||
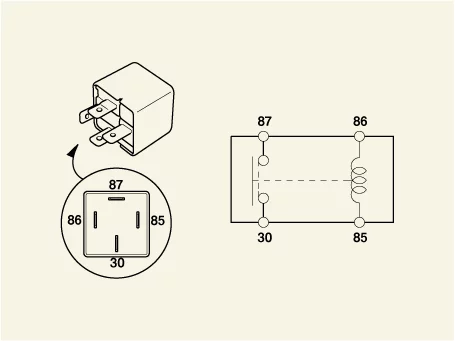
Power Relay (Type B)
Check for continuity between the terminals.
| 1. |
After supplying power between terminal No. 86 and 85, check that there is continuity between terminal No.
87 and 30.
|
| 2. |
After supplying power between terminal No. 86 and 85, check that there is no continuity between terminal
No. 87 and 30.
|
||||||||
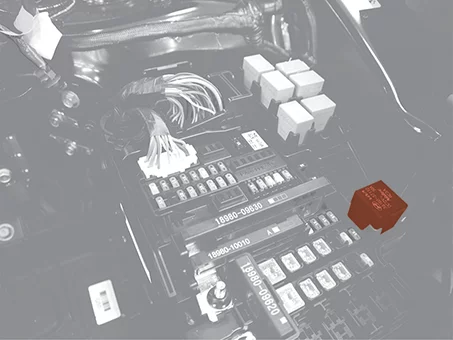
Fuse
| 1. |
Check for separation of fuse holder and check that the holder is tightly holding the fuse.
|
| 2. |
Check that each fuse circuit has the exact fuse capacity.
|
| 3. |
Check the fuses for any damage.
|

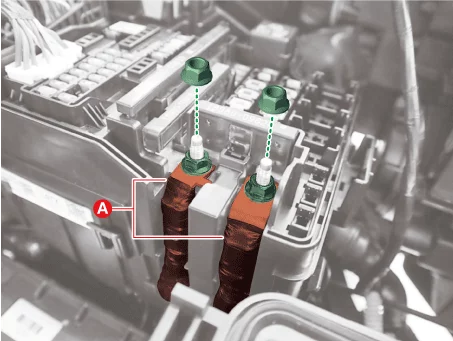
Multi-Fuse
| 1. |
Disconnect the negative ( - ) battery terminal.
|
| 2. |
Remove the terminals (A) after removing the nuts.
|
| 3. |
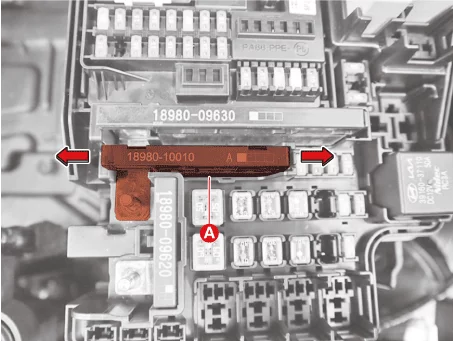
Remove the multi-fuse (A) by pulling the hooks in the direction of the arrows.
|
| 4. |
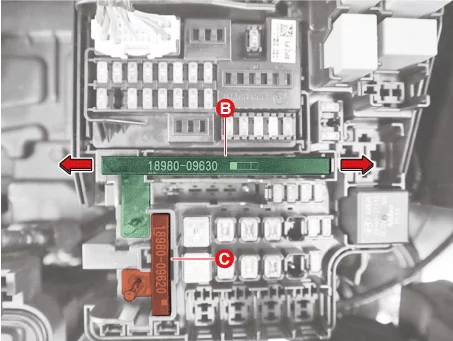
Remove the multi-fuse (B) by pulling the hooks in the direction of the arrows and then remove the
multi-fuse (C).
|
| 5. |
Check the multi-fuses for any damage.
|

Integrated Central Control Unit (ICU) Description and Operation
| Description |
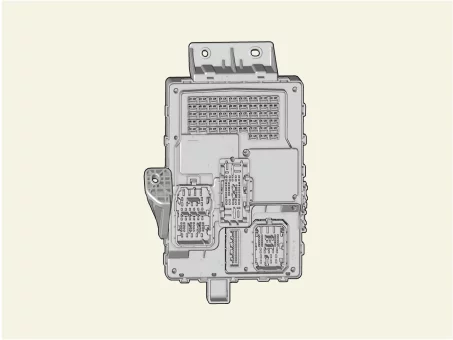
The Integrated Central Control Unit (ICU) is the next-generation model of the Integrated Gateway and Power
Control Module (IGPM).
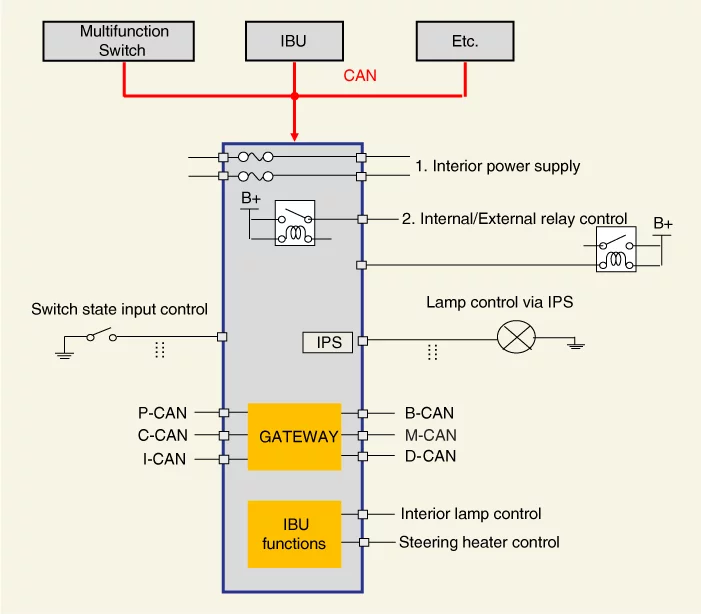
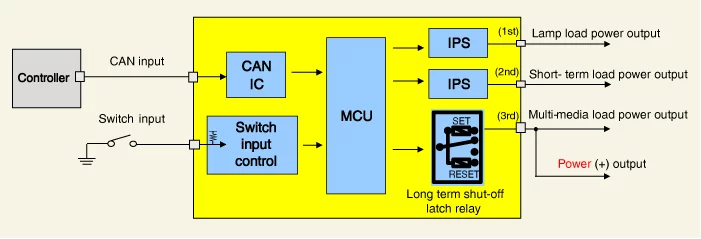
| System Block Diagram |
| ICU Operating Function |
| Item |
Function |
|
| Function |
Switch Input |
Receives switch inputs and then sends the switch status to each module via CAN message. |
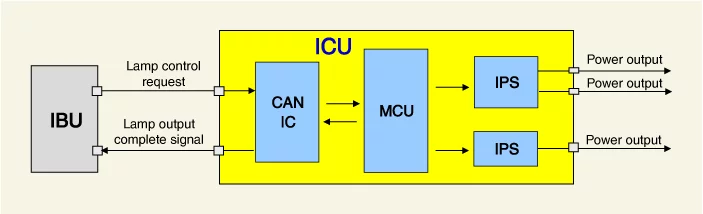
|
Lamp control |
Controls lamp with the IPS by receiving command from IBU via CAN message. |
|
|
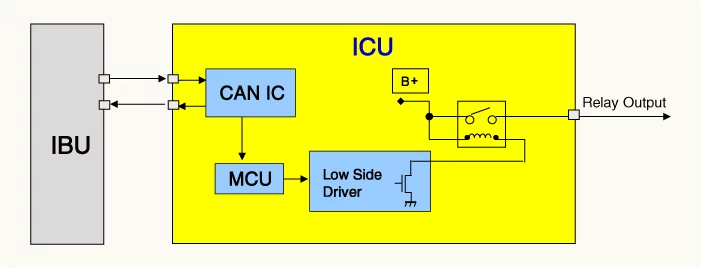
Internal relay control |
Controls internal relay by receiving command from IBU via CAN message. |
|
|
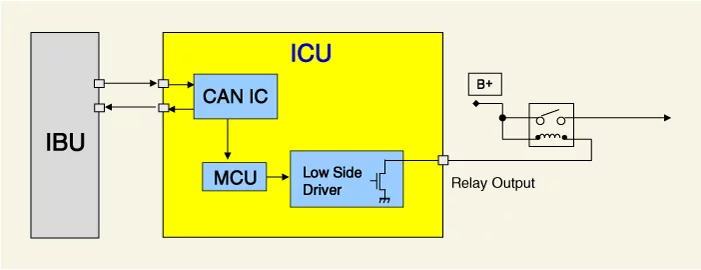
External relay control |
Controls external relay by receiving command from IBU via CAN message. |
|
|
Parasitic current shut-off system |
The system automatically shuts off the power to be provided with components for reducing useless parasitic
current according to the vehicle operating conditions such as shipment and long-term parking. |
|
|
Troubleshooting |
Diagnose status of loads controlled by IPS. |
|
|
Gateway |
Transmits signals among the modules connected to the different networks in the vehicle. |
|
※The ICU does not determine logic, it is operated only by CAN commands from other modules.
â–¶ Self-Logic Function : Hazard lamp, stop lamp, steering wheel heater
Switch Input
| 1. |
Operating Function
â–¶ Hazard lamp switch, seat belt switch, tailgate switch, door switch, etc.
|
| 2. |
Operating Description
|
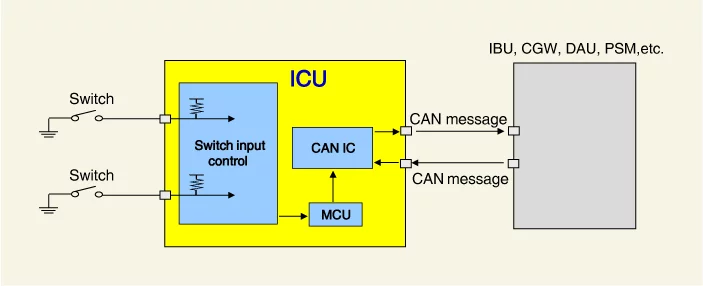
IPS Lamp control
| 1. |
Operating Function
â–¶ Headlamp low/high, turn signal lamp, DRL lamp, internal/external tail lamp, stop lamp, etc.
|
| 2. |
Operating Description
|
Internal relay control
| 1. |
Operating Function
â–¶ Burglar alarm horn, tailgate, power window, etc
|
| 2. |
Operating Description
|
External relay control
| 1. |
Operating Function
â–¶ Headlamp high solenoid, rear fog, rear glass defogger, etc.
|
| 2. |
Operating Description
|
Parasitic current shut-off system
| 1. |
Operating Description
|
Integrated Central Control Unit (ICU) Inspection
| Inspection |
fuse
| 1. |
Check for separation of fuse holder and check that the holder is tightly holding the fuse.
|
| 2. |
Check that each fuse circuit has the exact fuse capacity.
|
| 3. |
Check the fuses for any damage.
|
Integrated Central Control Unit (ICU) Removal and Installation
| Removal |
| 1. |
Remove the crash pad lower panel.
(Refer to Body - "Crash Pad Lower Panel")
|
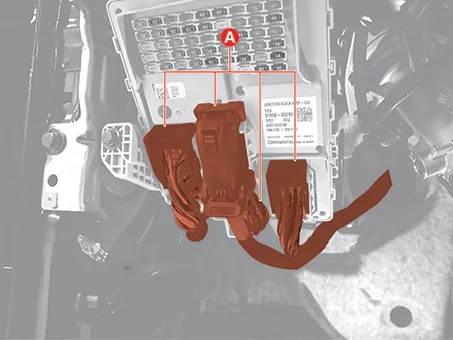
| 2. |
Disconnect the integrated central control unit (ICU) connectors (A).
|
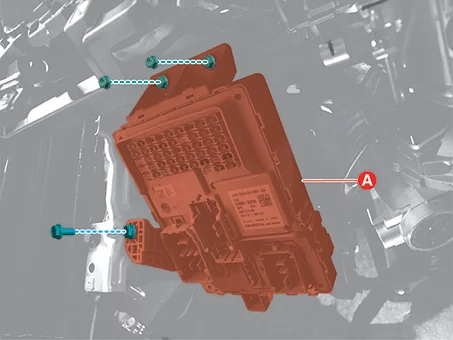
| 3. |
Remove the Integrated Central Control Unit (ICU) (A) after removing the bolt and nuts.
|
| 4. |
Disconnect the integrated central control unit (ICU) connectors (A).
|
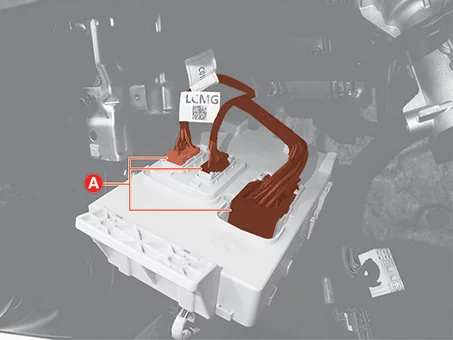
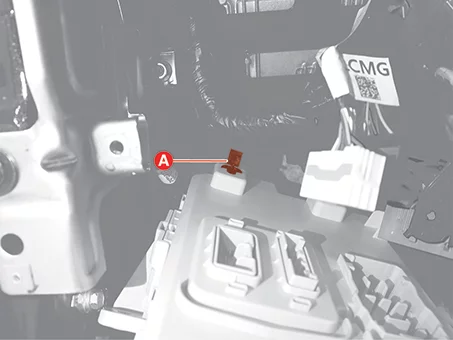
| 5. |
Remove the wiring clip (A).
|
| Installation |
| 1. |
Install in reverse order of removal.
|
Integrated Circuit Module (ICM) Removal and Installation
| Removal |
| 1. |
Remove the crash pad lower panel.
(Refer to Body - "Crash Pad Lower Panel")
|
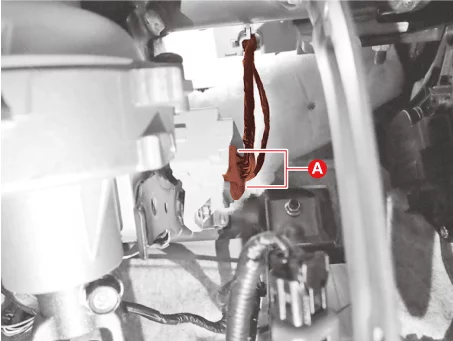
| 2. |
Disconnect the Integrated Circuit Module (ICM) connectors (A).
|
| 3. |
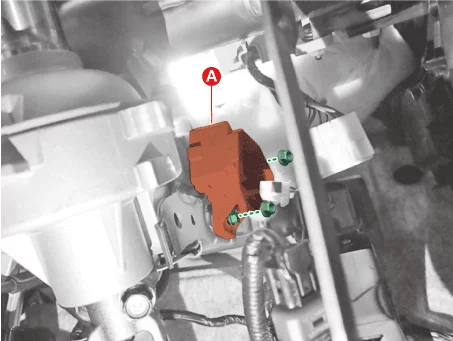
Remove the Integrated Circuit Module (ICM) (A) after removing the nuts.
|
| Installation |
| 1. |
Install in reverse order of removal.
|


Other information:
Kia Seltos SP2 (2021-2026) Service Manual: Troubleshooting
Troubleshooting Failure Diagnosis 1. In principle, ESC and TCS controls are prohibited in case of ABS failure. 2. When ESC or TCS fails, only the failed system control is prohibited. 3.Kia Seltos SP2 (2021-2026) Service Manual: Navigation-based Smart Cruise Control (NSCC)
Navigation-based Smart Cruise Control (NSCC) in the Kia Seltos can help maintain an appropriate driving speed according to road conditions when driving on highways or motorways. While Smart Cruise Control is operating, NSCC uses road information from the navigation system to support smoother and safer highway driving. NOTICE NSCC is available only on controlled-access roads of certain highways.