
Kia Seltos: Body (Interior and Exterior) / Front Door
Contents:
- Components and Components Location
- Adjustment
- Front Door Trim Removal and Installation
- Front Door Window Glass Removal and Installation
- Front Door Module Removal and Installation
- Front Door Handle Removal and Installation
- Front Door Latch Assembly Removal and Installation
- Front Door Weatherstrip Removal and Installation
Components and Components Location
| Component |
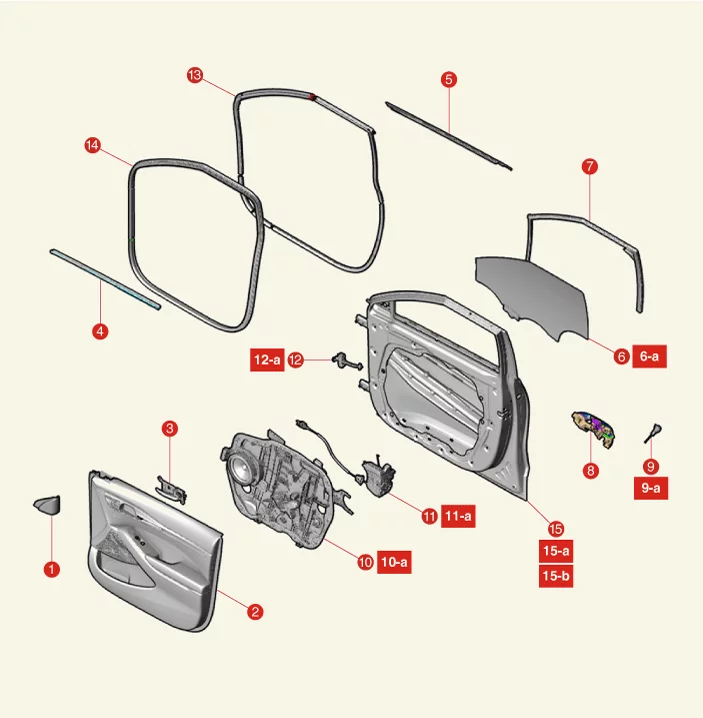
| 1. Front Door Quadrant Inner Cover 2. Front Door Trim 3. Front Door Inside Handle 4. Front Door Belt Inside Weatherstrip 5. Front Door Belt Outside Weatherstrip 6.Front Door Window Glass 6-a. 7.8 - 11.8 N·m (0.8 - 1.2 kgf·m, 5.8 - 8.7 lb·ft) 7. Front Door Glass Run 8. Front Door Outside Handle Assembly |
9. Front Door Lock Assembly 9-a. 3.9 - 5.9 N·m (0.4 - 0.6 kgf·m, 2.9 - 4.3 lb·ft, 34.7 - 52.1 lb·in) 10. Front Door Module 10-a. 8.8 - 13.7 N·m (0.9 - 1.4 kgf·m, 6.5 - 10.1 lb·ft) 11. Front Door Latch 11-a. 6-a. 6.9 - 10.8 N·m (0.7 ~ 1.1 kgf·m, 5.1 - 8 lb·ft) 12. Front Door Checker 12-a. 16.7 - 21.6 N·m (1.7 - 2.2 kgf·m, 12.3 - 15.9 lb·ft) 13. Front Door Side Weatherstrip 14. Front Door Body Side Weatherstrip 15. Front Door Assembly 15-a. 21.6 - 26.5 N·m (2.2 - 2.7 kgf·m, 15.9 - 19.5 lb·ft) 15-b. 23.5 - 31.4 N·m (2.4 - 3.2 kgf·m, 17.4 - 23.1 lb·ft) |
Adjustment
| Adjustment |
Door Adjustment
| 1. |
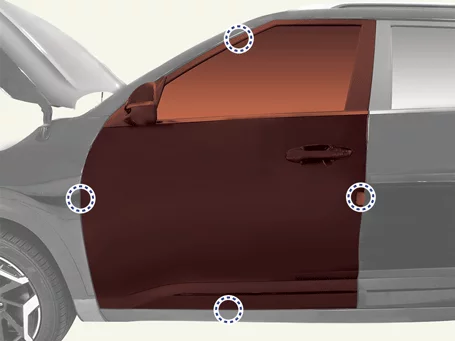
Check that the gap between the door and the body is even after parking in a flat level.
|
| 2. |
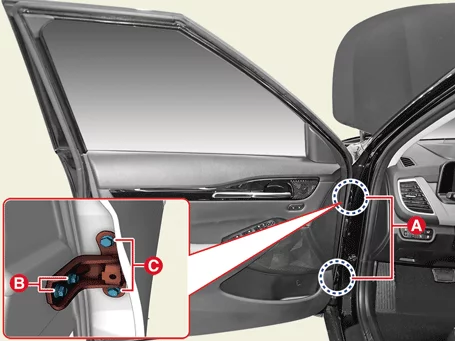
Loosen the door hinge (A) bolts, adjust the door by moving it back and forth, left and right, and then
tighten the bolts.
|
| 3. |
Check that the gap between the door and the body is even.
|
Striker Adjustment
| 1. |
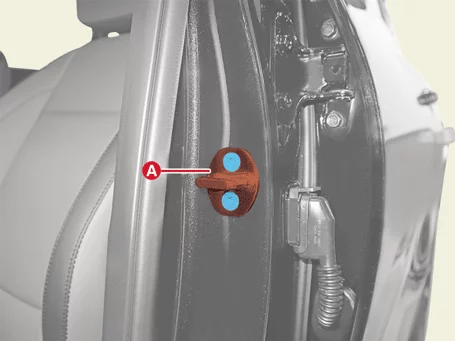
Loosen the screws and adjust the striker (A) by moving it back and forth, left and right, and then
tighten the screws.
|
| 2. |
Check that the door opens and closes properly.
|
Glass Adjustment
Check the glass run and channel for damage and replace if necessary.
|

| 1. |
Remove the front door trim.
(Refer to Front Door - "Front Door Trim")
|
| 2. |
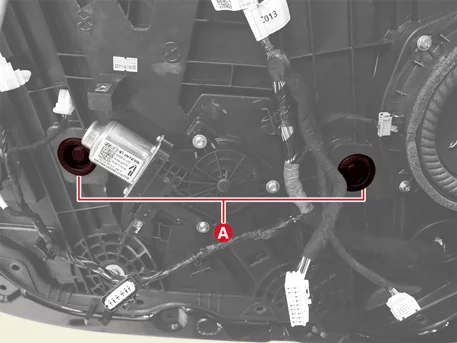
Remove the front door window glass hole plugs (A).
|
| 3. |
Operate the power window switch to lower the window glass until the window glass bolt is visible in the
service hole.
|
| 4. |
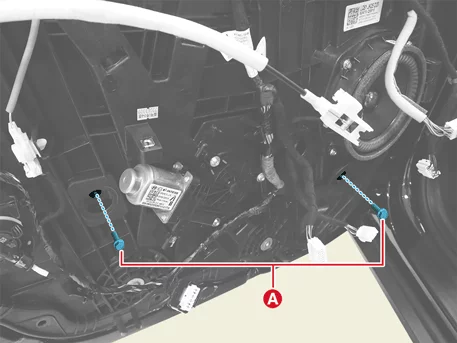
Loosen the front door window glass bolts (A).
|
| 5. |
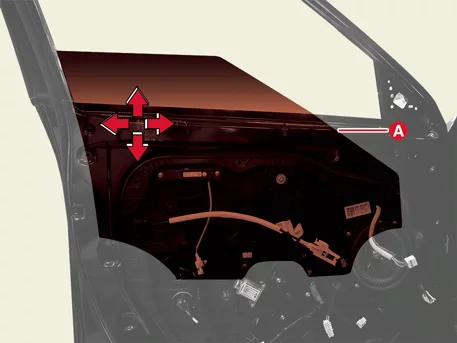
Adjust the gap by moving the front door window glass (A) up, down, left and right, and then tighten the
bolts.
|
| 6. |
Check that the glass operates properly.
|
Front Door Trim Removal and Installation
| Removal |
| 1. |
Disconnect the battery negative ( - ) terminal.
|
| 2. |
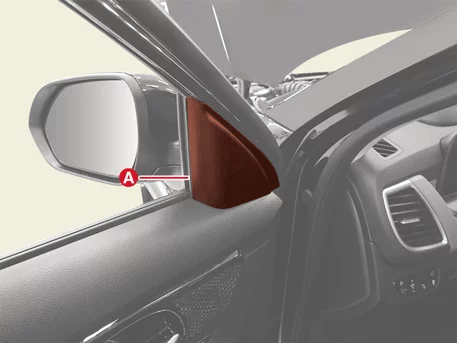
Remove the front door quadrant inner cover (A).
|


| 3. |
Remove the door screw cap (A).
|
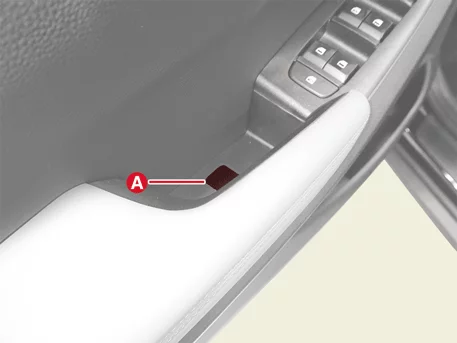
| 4. |
Remove the front door trim (A) using the service hole (B) after removing the screw.
|
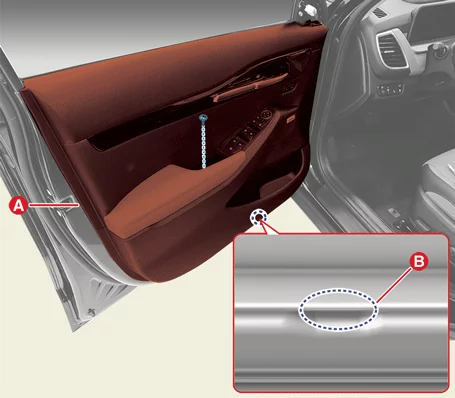
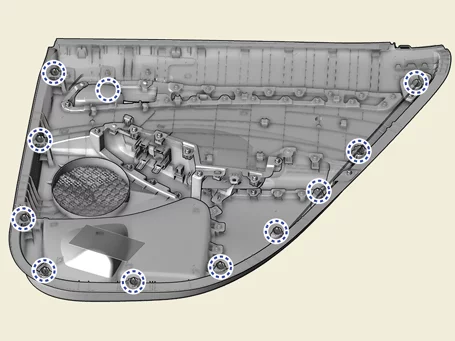
| 5. |
Separate the front door inside handle cage (A) by pressing the hook.
|
| 6. |
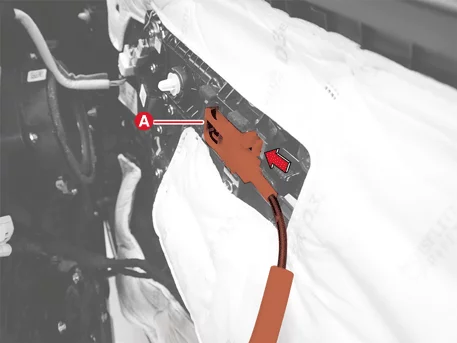
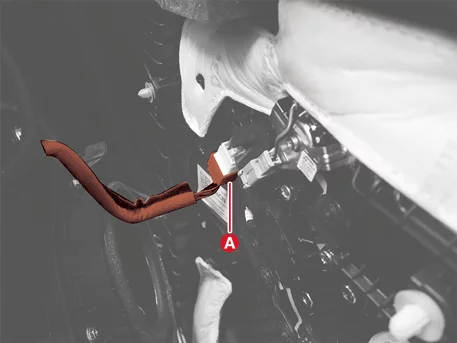
Disconnect the memory power seat switch connector (A).
|
| 7. |
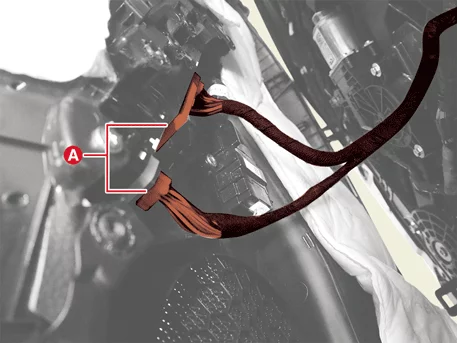
Disconnect the power window switch and power mirror switch connectors (A).
|
| Installation |
| 1. |
Install in reverse order of removal.
|
Front Door Window Glass Removal and Installation
| Removal |
Front Door Window Glass
| 1. |
Remove the front door trim.
(Refer to Front Door - "Front Door Trim")
|
| 2. |
Remove the front door belt inside and outside weatherstrips.
(Refer to Front Door - "Front Door Weatherstrip")
|
| 3. |
Remove the front door window glass hole plugs (A).
|
| 4. |
Operate the power window switch to lower the window glass until the window glass bolt is visible in the
service hole.
|
| 5. |
Remove the front door window glass bolts (A).
|
| 6. |
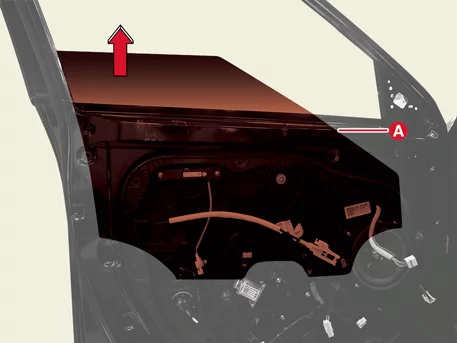
Remove the front door window glass (A) in the direction of the arrow.
|
Front Door Window Glass Run
| 1. |
Remove the front door window glass.
|
| 2. |
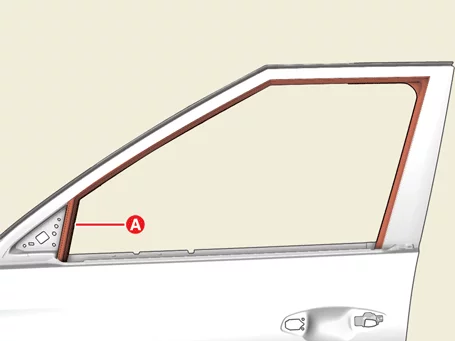
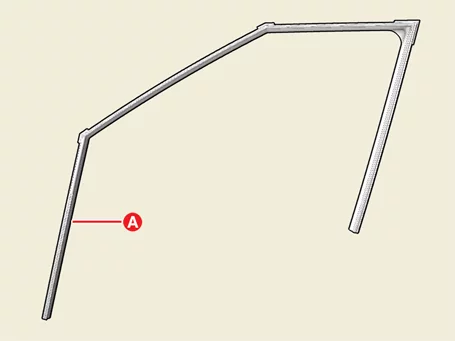
Remove the front door glass run (A).
|
| Installation |
| 1. |
Install in reverse order of removal.
|
Front Door Module Removal and Installation
| Removal |
| 1. |
Remove the front door window glass.
(Refer to Front Door - "Front Door Window Glass")
|
| 2. |
Remove the front door outside handle.
(Refer to Front Door - "Front Door Handle")
|
| 3. |
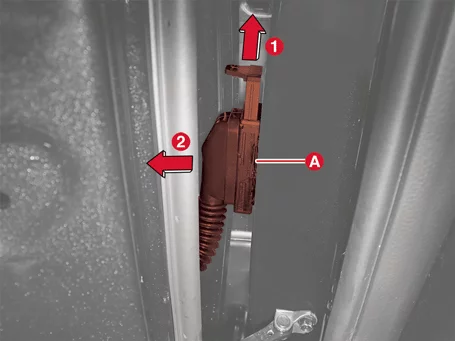
Disconnect the front door main wiring connector (A).
|
| 4. |
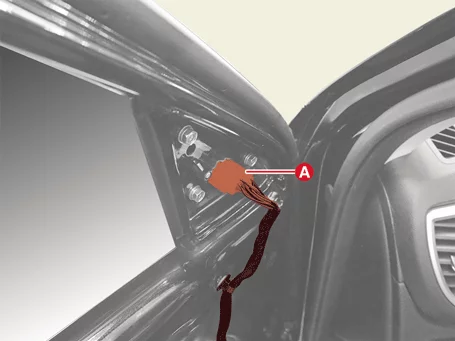
Disconnect the outside rear view mirror connector (A).
|
| 5. |
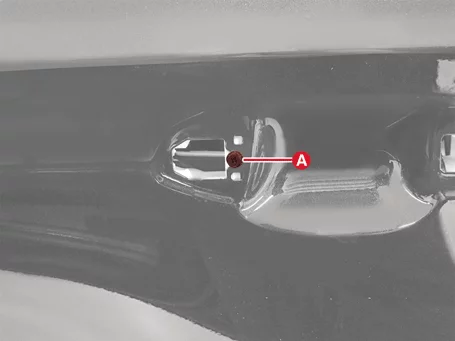
Remove the front door handle base screw (A).
|
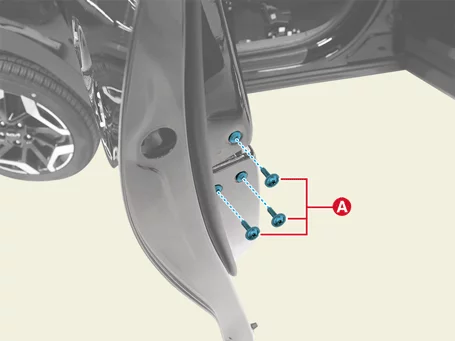
| 6. |
Remove the front door latch screws (A).
|
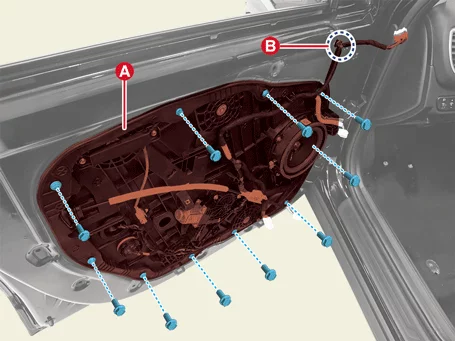
| 7. |
Remove the clip (B) and remove the front door module (A) after removing the bolts.
|
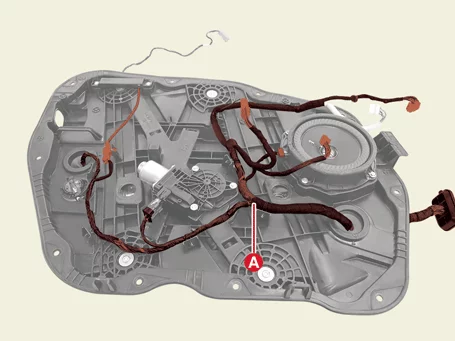
| 8. |
Remove the wiring harness (A) from the front door module.
|
| Installation |
| 1. |
Install in reverse order of removal.
|
Front Door Handle Removal and Installation
| Removal |
Front Door Inside Handle
| 1. |
Remove the front door trim.
(Refer to Front Door - "Front Door Trim")
|
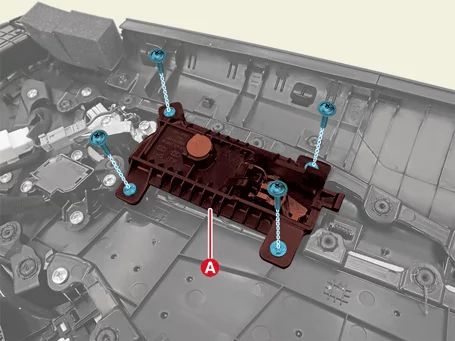
| 2. |
Remove the front door inside handle (A) after removing the screws.
|
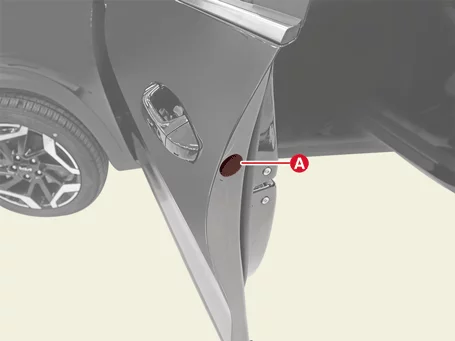
Front Door Outside Handle [Driver's side]
| 1. |
Remove the hole plug (A).
|
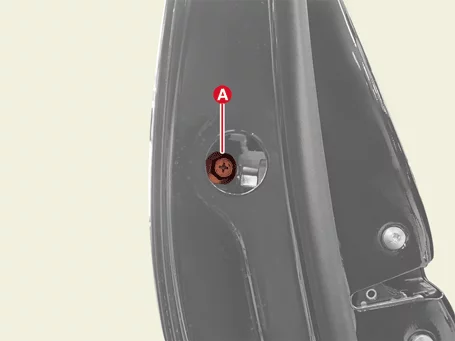
| 2. |
Fully loosen the front door lock assembly bolt (A).
|
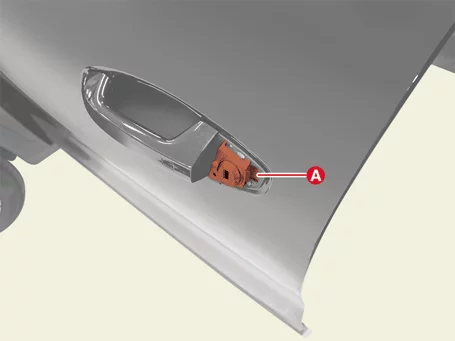
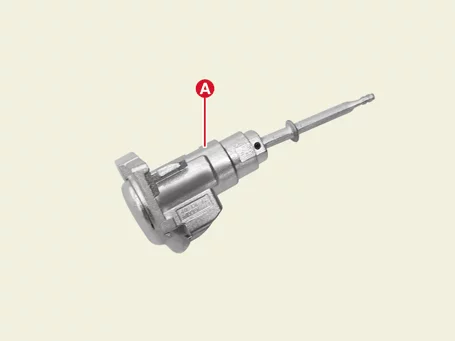
| 3. |
Remove the door lock assembly (A).
|
| 4. |
Remove the front door outside handle (A) in the direction of the arrow.
|
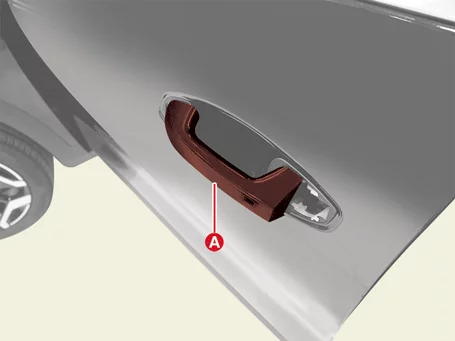
| 5. |
Disconnect the front door outside handle connector (A).
|
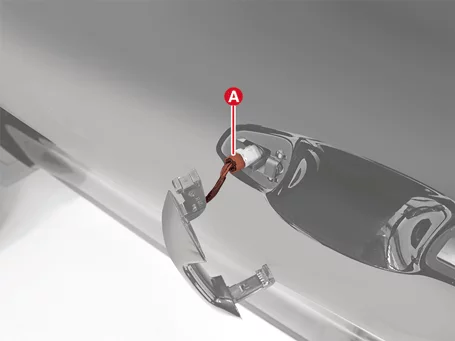
| 6. |
Remove the front door outside handle pad (A).
|
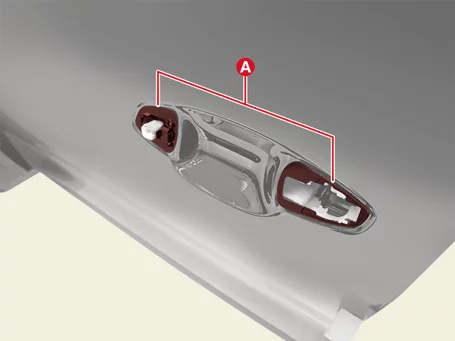
Front Door Outside Handle [Passenger's side]
| 1. |
Remove the hole plug (A).
|
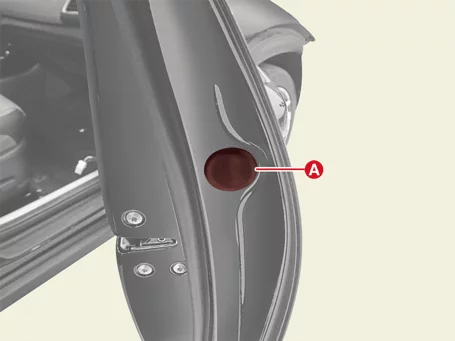
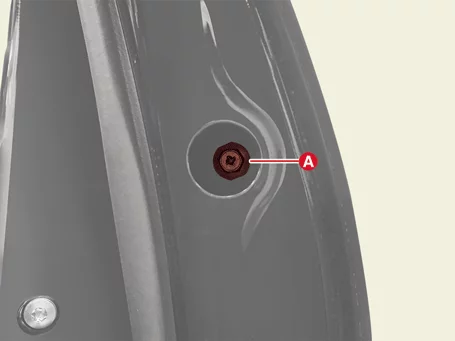
| 2. |
Fully loosen the front door outside handle bolt (A).
|
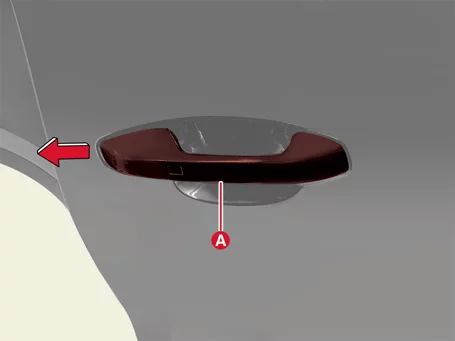
| 3. |
Remove the front door outside handle (A) in the direction of the arrow.
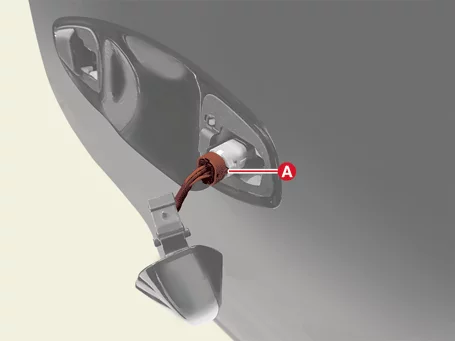
|
| 4. |
Disconnect the front door outside handle connector (A).
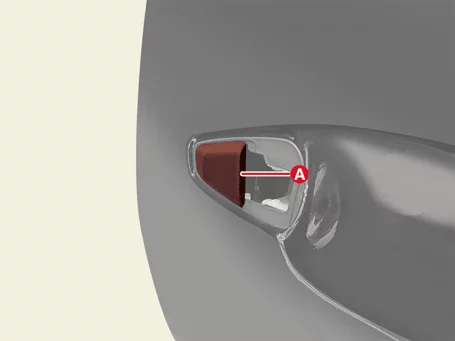
|
| 5. |
Remove the front door outside handle cover (A).
|
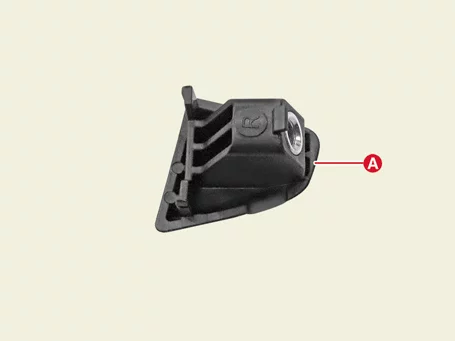
Front Door Outside Handle Base
| 1. |
Remove the front door module.
(Refer to Front Door - "Front Door Module")
|
| 2. |
Separate the front door outside handle wiring (A).
|
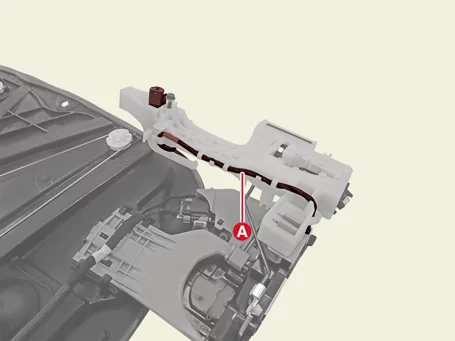
| 3. |
Separate the retainer (B) and the front door latch rod (A).
|
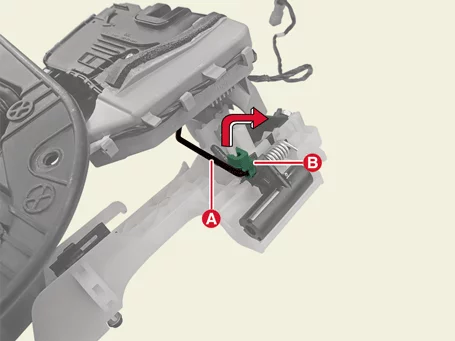
| 4. |
Remove the front door outside handle base (A) after releasing the hook (B).
|
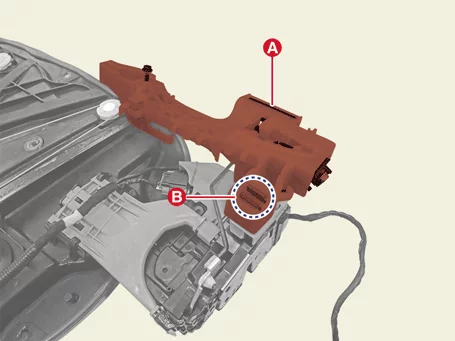
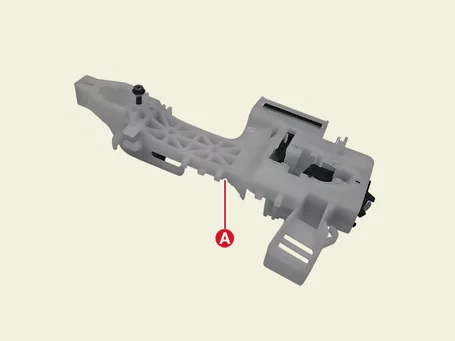
| Installation |
| 1. |
Install in reverse order of removal.
|
Front Door Latch Assembly Removal and Installation
| Removal |
| 1. |
Remove the front door outside handle base.
(Refer to Front Door - "Front Door Handle")
|
| 2. |
Disconnect the front door latch connector (A).
|
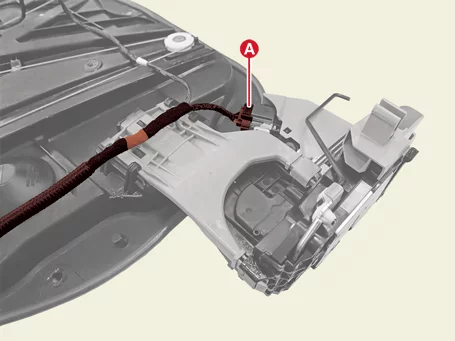
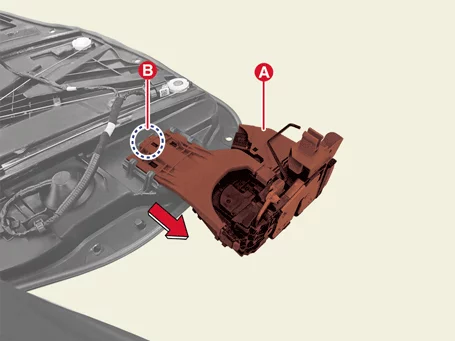
| 3. |
Remove the front door latch (A) in the direction of the arrow after releasing the retainer hook (B).
|
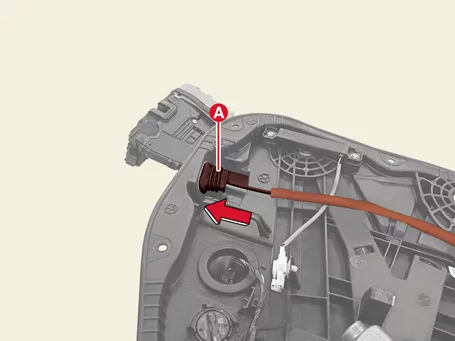
| 4. |
Remove the front door inside handle cable (A) in the direction of the arrow.
|
| Installation |
| 1. |
Install in reverse order of removal.
|
Front Door Weatherstrip Removal and Installation
| Removal |
Front Door Side Weatherstrip
| 1. |
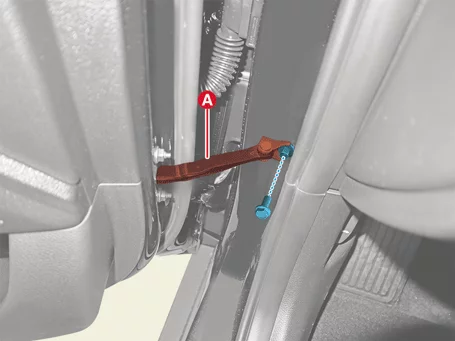
Separate the front door checker (A) after removing the bolt.
|
| 2. |
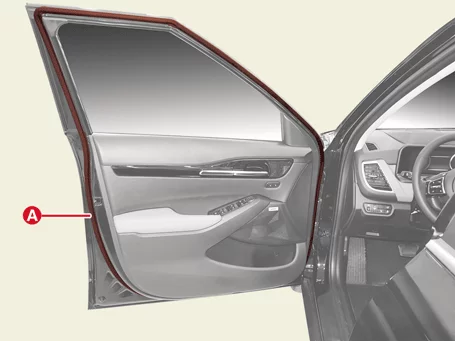
Remove the front door side weatherstrip (A).
|
Front Door Body Side Weatherstrip
| 1. |
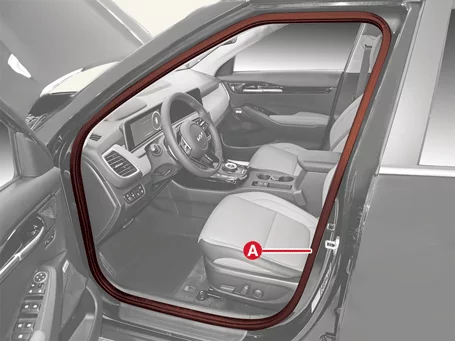
Remove the front door body side weatherstrip (A).
|
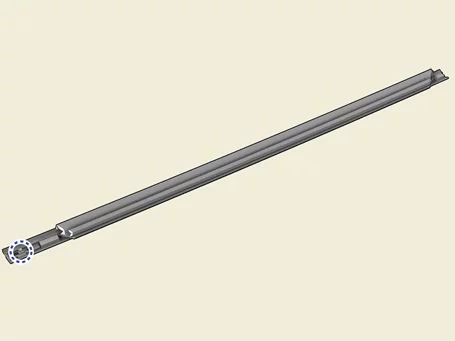
Front Door Belt Outside Weatherstrip
| 1. |
Remove the outside rear view mirror.
(Refer to Mirror - "Outside Rear View Mirror")
|
| 2. |
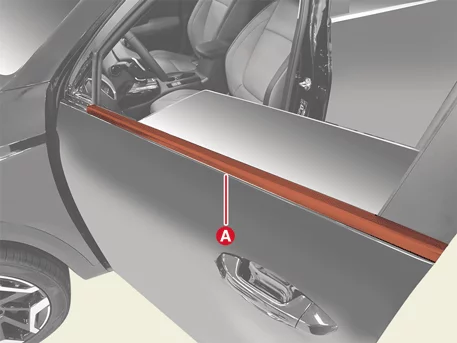
Remove the front door belt outside weatherstrip (A).
|
Front Door Belt Inside Weatherstrip
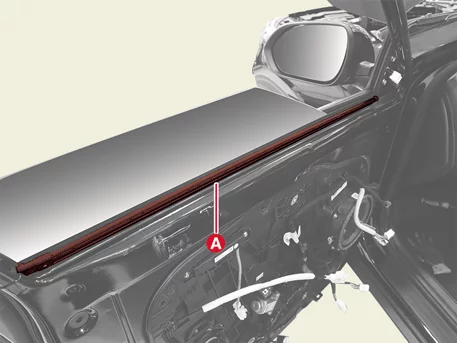
| 1. |
Remove the front door trim.
(Refer to Front Door - "Front Door Trim")
|
| 2. |
Remove the front door belt inside weatherstrip (A).
|
| Installation |
| 1. |
Install in reverse order of removal.
|


Other information:
Kia Seltos SP2 (2021-2026) Service Manual: Scheduled maintenance service
To help maintain proper emissions performance, reliability, and long-term durability of your Kia Seltos, the following maintenance services should be carried out according to the recommended schedule. Always keep receipts and service records for all maintenance work, as these documents may be required to support warranty claims and verify proper vehicle care.Kia Seltos SP2 (2021-2026) Service Manual: Wipers and washers
The Kia Seltos wipers and washers remove rain, snow, dust, and other foreign substances from the windshield and rear window. Proper use of these systems helps maintain clear visibility and safer driving in changing weather conditions. Front windshield wiper/washer Rear windshield wiper/washer A: Wiper speed control (front) MIST – Single wipe OFF – Off INT – Intermittent wipe AUTO* – Auto