
Kia Seltos: Body (Interior and Exterior) / Tailgate
Contents:
- Components and Components Location
- Description and Operation
- Adjustment
- Tailgate Lid Trim Removal and Installation
- Tailgate Assembly Removal and Installation
- Tailgate Latch Removal and Installation
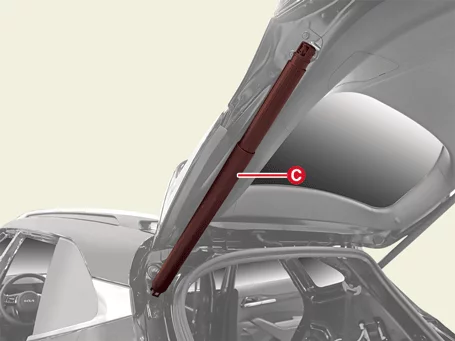
- Tailgate Lifter Removal and Installation
- Tailgate Weatherstrip Removal and Installation
- Tailgate Outside Handle Removal and Installation
- Power Tailgate Unit Removal and Installation
- Power Tailgate Drive Unit Removal and Installation
- Power Tailgate Buzzer Removal and Installation
- Power Tailgate Switch Removal and Installation
- Power Tailgate Strip Removal and Installation
Components and Components Location
| Component |
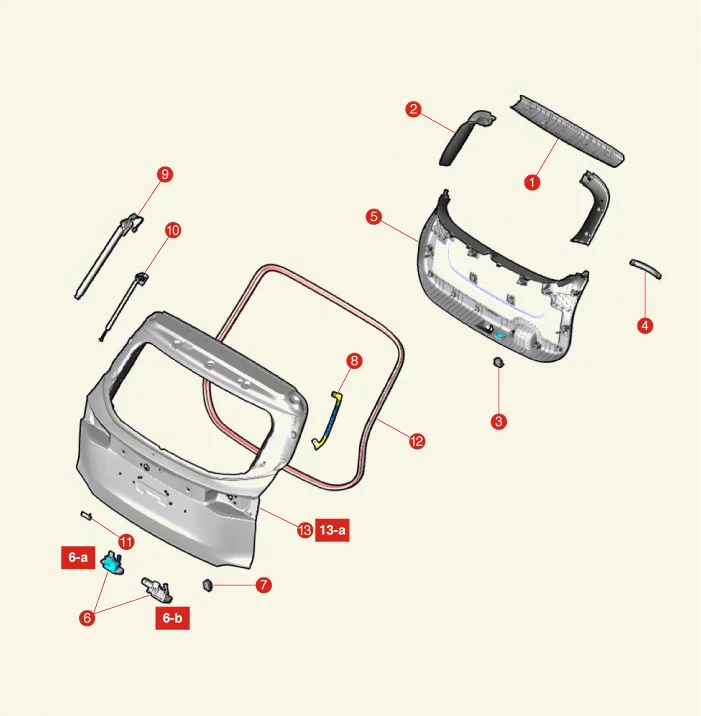
| 1. Tailgate Lid Upper Trim 2. Tailgate Lid Side Trim 3. Power Tailgate Switch 4. Tailgate Lid Handle Grip 5. Tailgate Lid Lower Trim 6. Tailgate Latch 6-a. 21.6 - 26.5 N·m (2.2 - 2.7 kgf·m, 15.9 - 19.5 lb·ft) 6-b. 21.6 - 32.4 N·m (2.2 - 3.3 kgf·m, 15.9 - 23.9 lb·ft) 7. Power Tailgate Buzzer |
8. Power Tailgate Strip 9. Power Tailgate Drive Unit 10. Tailgate Lift 11. Tailgate Outside Handle Switch 12. Tailgate Weatherstrip 13. Tailgate Assembly 13-a. 7.8 - 11.8 N·m (0.8 - 1.2 kgf·m, 5.8 - 8.7 lb·ft) |
Description and Operation
| Description |
| • |
Power tailgate system is an electro-mechanical system that can open and close the tailgate automatically,
by using local switch (push button switch inside of the tailgate, and outside handle switch), and wireless
remote key (FOB), or can halt the tailgate. The Power Tailgate Module (PTGM) sends and receives the
vehicle’s information via IBU, ICU, instrument cluster and CAN communication, so that it can decide the
opening/closing of the tailgate and self diagnosis.
|
| • |
There’s a safety function to reverse its direction, when an obstacle is detected during the operation of
the power tailgate. Also if power mode is disabled due to discharged battery or disabled Power Tailgate
Module (PTGM), manual opening/closing is possible by using the emergency lever on the tailgate latch after
unlocking the tailgate.
|
Location and Direction of the Tailgate
| • |
Power Tailgate system measures the location of the tailgate through the total hall sensor inside the
spindle operation unit motor.
|
| • |
Also, the moving direction of the tailgate can be confirmed through analyzing the direction of spindle
operation unit motor.
|
| • |
The signal counting (location confirmation) of the hall sensor is valid both in power operation mode and
general operation mode.
|
Component element
| 1. |
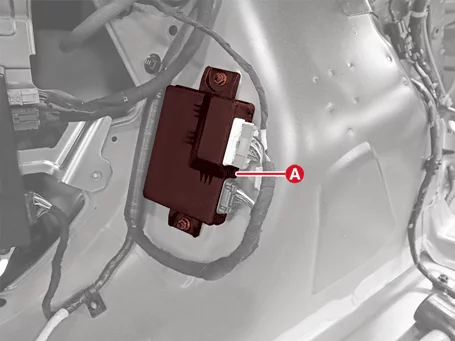
Power Tailgate Module (PTGM) (A)
|
| 2. |
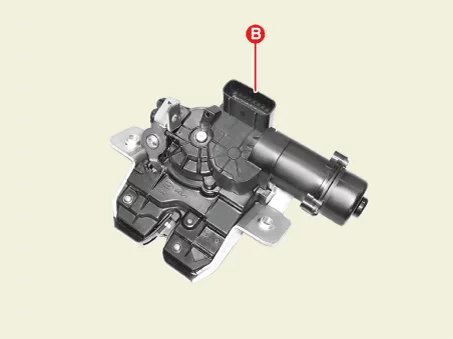
Power tailgate latch assembly (B)
Power tailgate latch assembly is installed at the end of the tailgate and operates power lock/unlock mode
according to the PTGM control output.
|
| 3. |
Power tailgate drive unit (C)
|
| 4. |
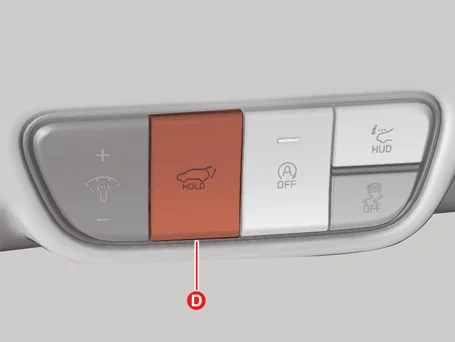
Crash pad side switch (D)
If the switch inside of the tailgate is pushed, the tailgate will start the power closing function.
|
| 5. |
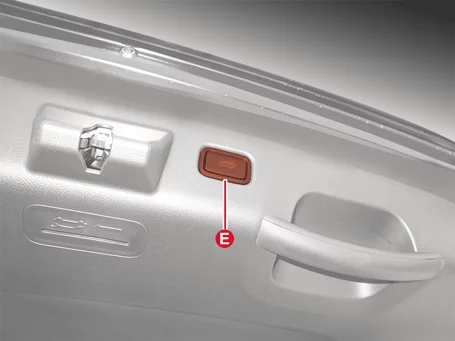
Power tailgate inner switch (E)
If the power tailgate inner switch is pushed, the tailgate will operate the power closing function.
|
| 6. |
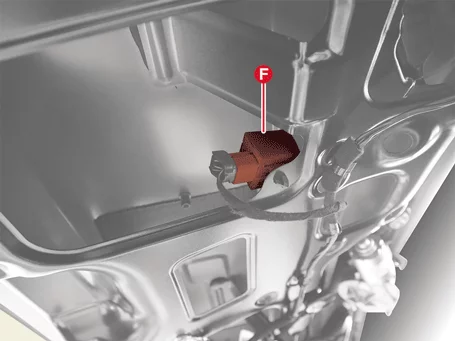
Power tailgate buzzer (F)
When an obstacle is detected or power function is not performed properly according to user's order, alarm
buzzer sound will be heard.
|
Adjustment
| Adjustment |
| 1. |
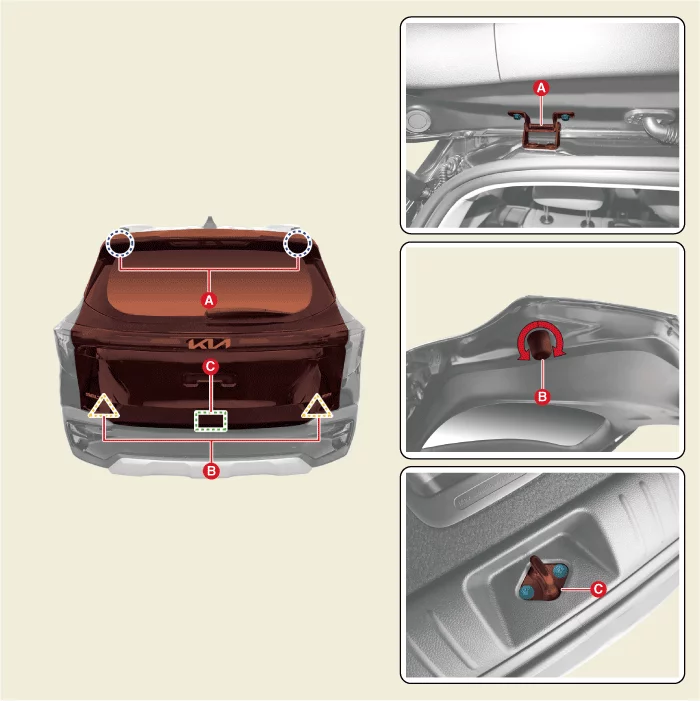
After parking the vehicle on the flat surface, check that the distance between the tailgate and the body
is even.
|
| 2. |
Loosen the tailgate hinge (A) bolts, adjust the gap by moving the tailgate back and forth, left and
right, and then tighten the bolts.
|
| 3. |
Adjust the gap between the tailgate and body by turning the overslam bumpers (B).
|
| 4. |
Loosen the striker (C) screws, adjust the striker by moving the striker back and forth, left and right,
and then tighten the screws.
|
| 5. |
Check that the tailgate opens and closes properly.
|
Tailgate Lid Trim Removal and Installation
| Removal |
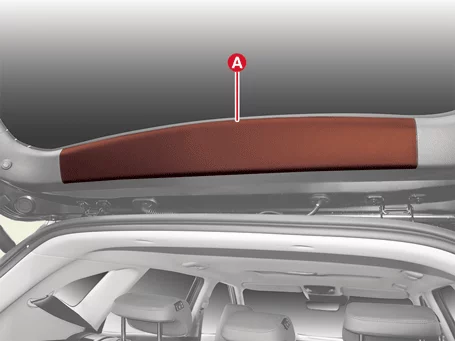
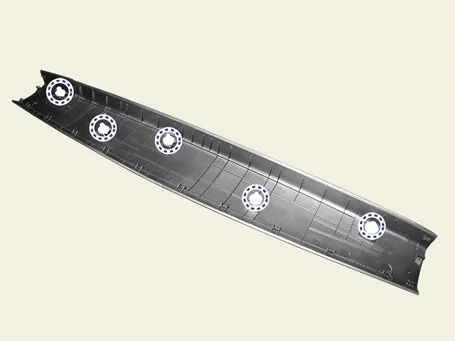
Tailgate Lid Upper Trim
| 1. |
Remove the tailgate lid upper trim (A).
|


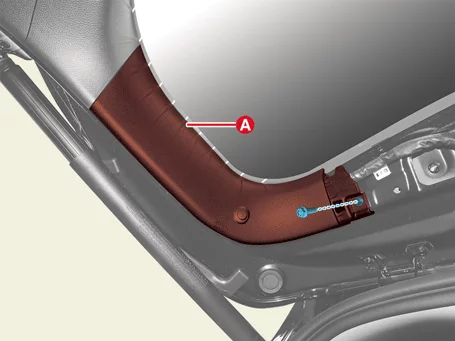
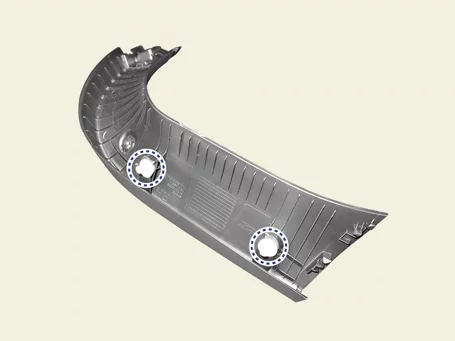
Tailgate Lid Side Trim
| 1. |
Remove the tailgate lid upper trim.
|
| 2. |
Remove the tailgate lid side trim (A) after removing the screw.
|
Tailgate Lid Lower Trim
| 1. |
Remove the tailgate lid side trim.
|
| 2. |
Remove the power tailgate switch.
(Refer to Tailgate - "Power Tailgate Switch")
|
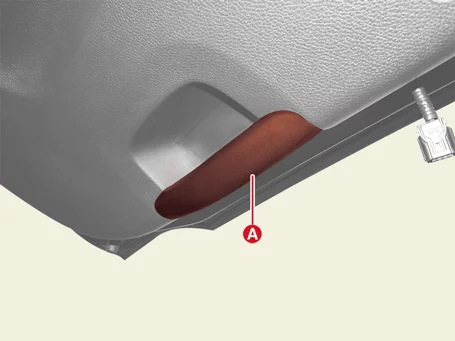
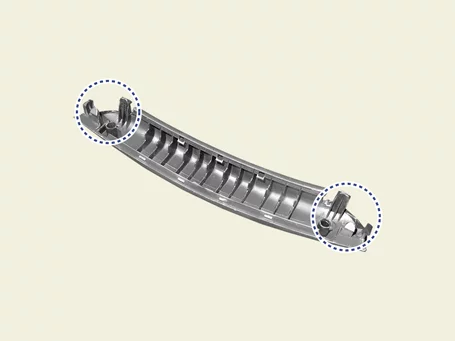
| 3. |
Remove the tailgate lid hand grip (A).
|

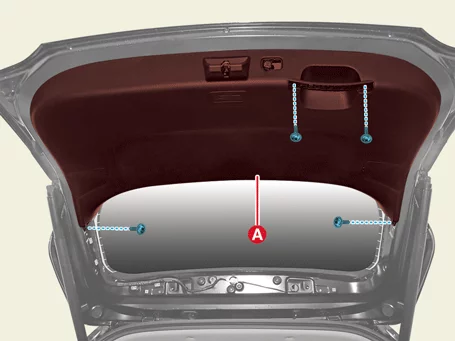
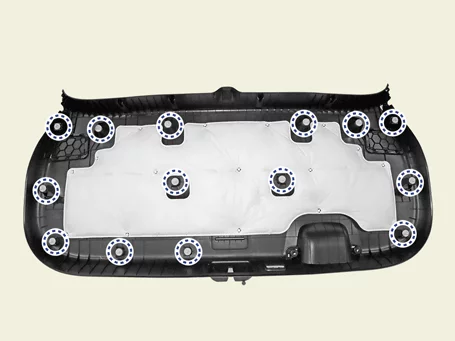
| 4. |
Remove the tailgate lid lower trim (A) after removing the screws.
|
| Installation |
| 1. |
Install in reverse order of removal.
|
Tailgate Assembly Removal and Installation
| Removal |
| 1. |
Remove the tailgate lid trim.
(Refer to Tailgate - "Tailgate Lid Trim")
|
| 2. |
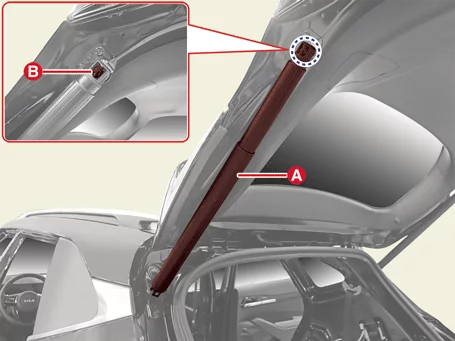
Remove the tailgate lift (A) after removing the clips (B).
|
| 3. |
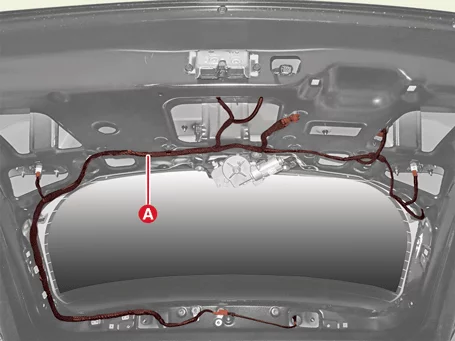
Disconnect connectors and wiring (A).
|
| 4. |
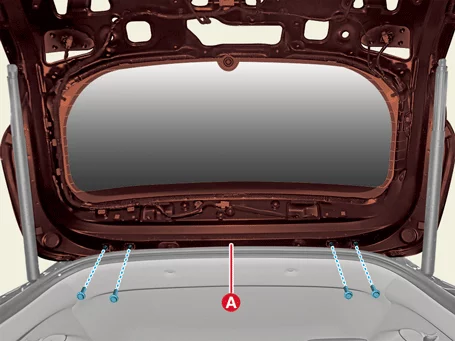
Remove the tailgate assembly (A) after removing the bolts.
|
| Installation |
| 1. |
Install in reverse order of removal.
|
Tailgate Latch Removal and Installation
| Removal |
| 1. |
Remove the tailgate lid lower trim.
(Refer to Tailgate - "Tailgate Lid Trim")
|
| 2. |
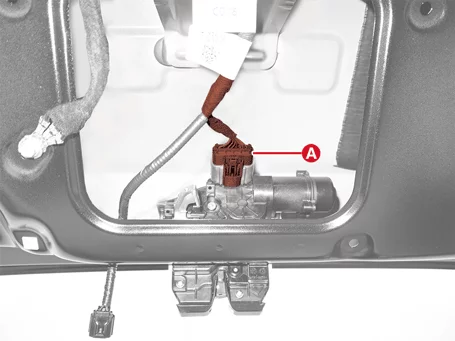
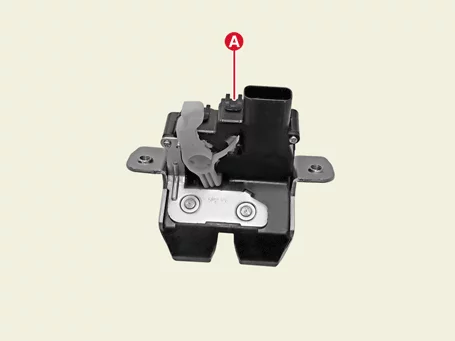
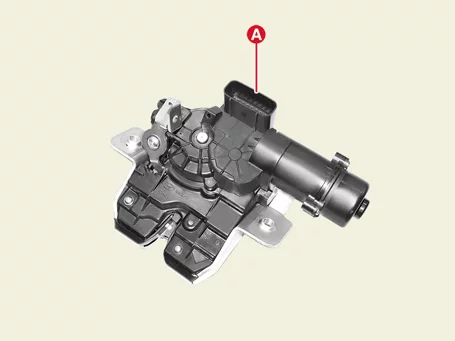
Disconnect the tailgate latch connector (A).
|
| 3. |
Remove the tailgate latch (A) after removing the bolts.
[Tailgate Latch]
[Power Tailgate Latch]
|
| Installation |
| 1. |
Install in reverse order of removal.
|
Tailgate Lifter Removal and Installation
| Removal |
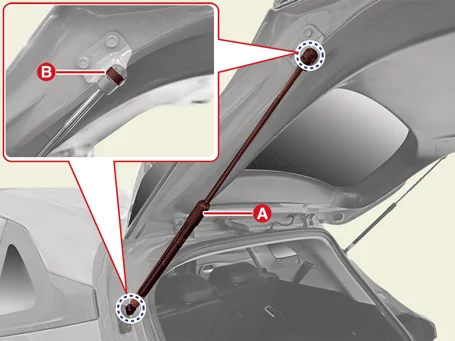
Work with at least 2 people when removing the part.
|
| 1. |
Remove the lifter (A) from the bracket after removing the clips (B).
|
| Installation |
| 1. |
Install in reverse order of removal.
|
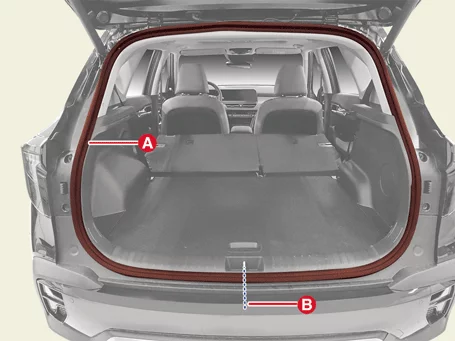
Tailgate Weatherstrip Removal and Installation
| Removal |
Be careful not to get sealant on the body surface.
|
| 1. |
Remove the tailgate weatherstrip (A).
|
| Installation |
| 1. |
Install in reverse order of removal.
|
Tailgate Outside Handle Removal and Installation
| Removal |
| 1. |
Remove the tailgate lower garnish.
(Refer to Body Side Molding - "Tailgate Garnish")
|
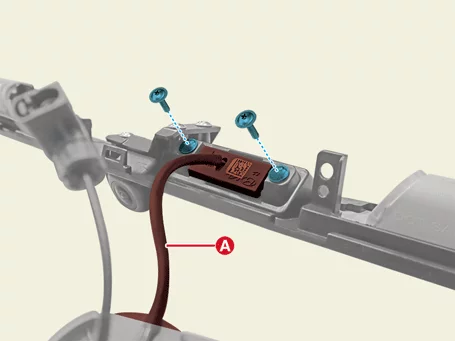
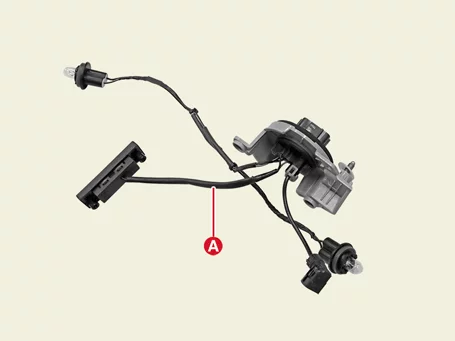
| 2. |
Remove the tailgate handle switch (A) after removing screws.
|
| Installation |
| 1. |
Install in reverse order of removal.
|
Power Tailgate Unit Removal and Installation
| Removal |
| 1. |
Remove the luggage side trim [Driver's side].
(Refer to Tailgate Trim - "Luggage Side Trim")
|
| 2. |
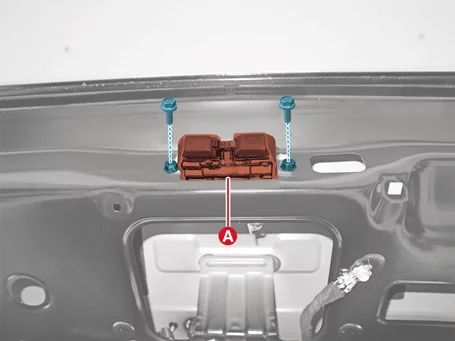
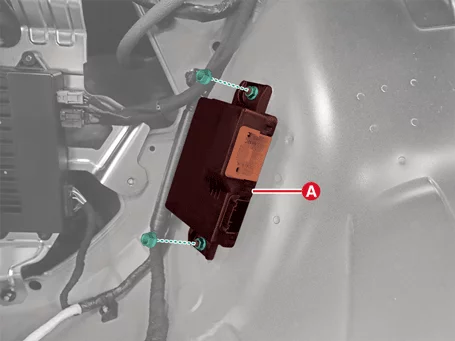
Disconnect the power tailgate module connectors (A).
|
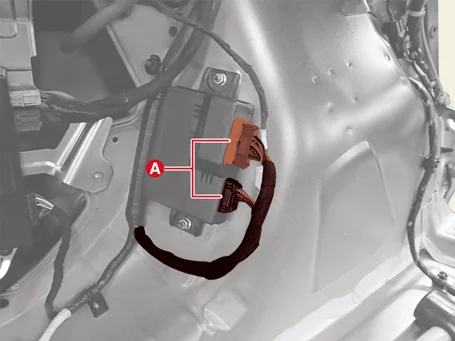
| 3. |
Remove the power tailgate module (A) after removing the nuts.
|
| Installation |
| 1. |
Install in reverse order of removal.
|
| 2. |
Perform the order below with the KDS when replacing the power tailgate unit.
(S/W Management → Power Tailgate → Power Tailgate Mode Configuration)
|
| 3. |
Perform power tailgate initialization according to the procedure below.
|
Power Tailgate Drive Unit Removal and Installation
| Removal |
| 1. |
Disconnect the battery negative ( - ) terminal.
|
| 2. |
Remove the rear pillar trim.
(Refer to Interior Trim - "Rear Pillar Trim")
|
| 3. |
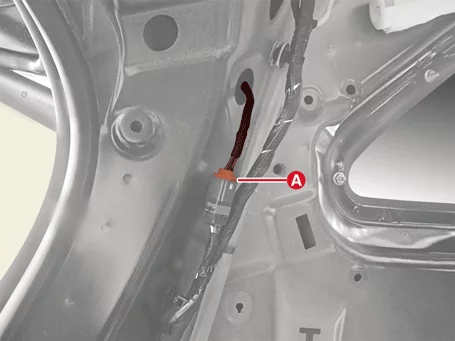
Disconnect the power tailgate drive unit connector (A).
|
| 4. |
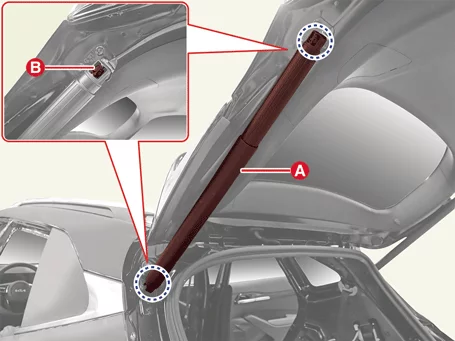
Remove the power tailgate drive unit assembly (A) after removing the clips (B).
|
| Installation |
| 1. |
Install in reverse order of removal.
|
Power Tailgate Buzzer Removal and Installation
| Removal |
| 1. |
Remove the tailgate lid lower trim.
(Refer to Tailgate - "Tailgate Lid Trim")
|
| 2. |
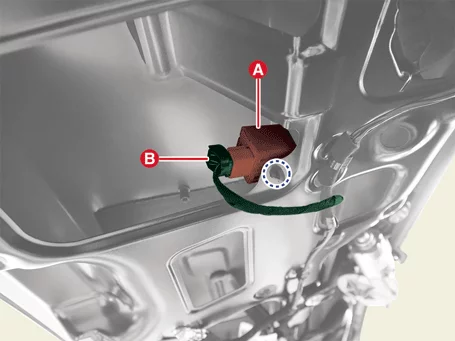
Remove the power tailgate buzzer (A) after disconnecting the connector (B).
|
| Installation |
| 1. |
Install in reverse order of removal.
|
Power Tailgate Switch Removal and Installation
| Removal |
| 1. |
Disconnect the battery negative ( - ) terminal.
|
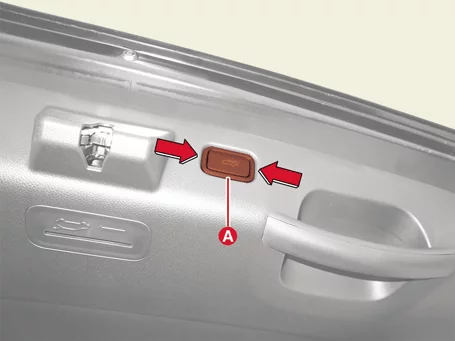
| 2. |
Remove the power tailgate switch (A).
|
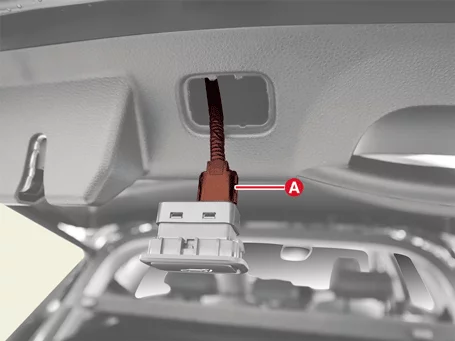
| 3. |
Disconnect the connector (A).
|
| Installation |
| 1. |
Install in reverse order of removal.
|
Power Tailgate Strip Removal and Installation
| Removal |
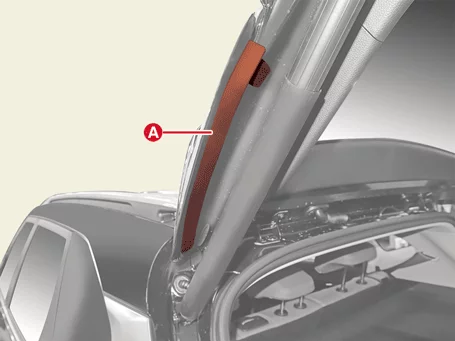
| 1. |
Remove the power tailgate strip (A).
|
| Installation |
| 1. |
Install in reverse order of removal.
|

