Owner's library Kia Seltos Manuals Owner's manual pages, service notes, maintenance references and practical Kia Seltos help in one clean library.

Kia Seltos reference pages

Manuals, maintenance notes and quick owner help.

Find Kia Seltos operating instructions, warning light explanations, service information and owner guidance without digging through a full PDF.

Kia Seltos: Body (Interior and Exterior) / Rear Door

Contents:

Components and Components Location

Component

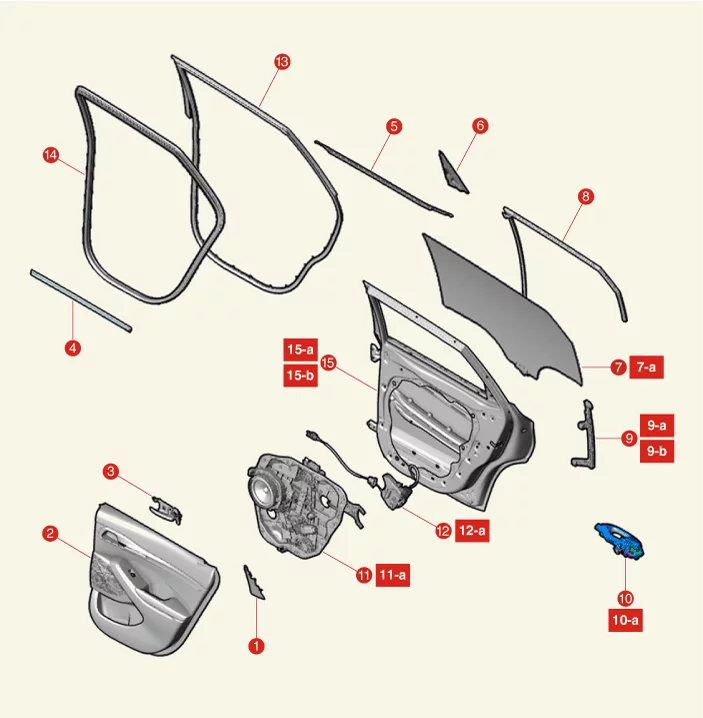
Body (Interior and Exterior) — Rear Door / Components and Components Location / Component illustration

1. Rear Door Delta Inner Cover
2. Rear Door Trim
3. Rear Door Inside Handle
4. Rear Door Belt Inside Weatherstrip
5. Rear Door Belt Outside Weatherstrip
6. Rear Door Outer Delta Molding
7. Rear Door Window Glass
7-a. 7.8 - 11.8 N·m (0.8 - 1.2 kgf·m, 5.8 - 8.7 lb·ft)
8. Rear Door Window Glass Run
9. Rear Door Channel
9-a. 3.9 - 5.9 N·m (0.4 - 0.6 kgf·m, 2.9 - 4.3 lb·ft, 34.7 - 52.1 lb·in)
9-b. 8.8 - 13.7 N·m (0.9 - 1.4 kgf·m, 6.5 - 10.1 lb·ft)
10. Rear Door Outside Handle Assembly
10-a. 3.9 - 5.9 N·m (0.4 - 0.6 kgf·m, 2.9 - 4.3 lb·ft)
11. Rear Door Module
11-a. 8.8 - 13.7 N·m (0.9 - 1.4 kgf·m, 6.5 - 10.1 lb·ft)
12. Rear Door Latch
12-a. 6.9 - 10.8 N·m (0.7 - 1.1 kgf·m, 5.1 - 8 lb·ft)
13. Rear Door Side Weatherstrip
14. Rear Door Body Side Weatherstrip
15. Rear Door Assembly
15-a. 21.6 - 26.5 N·m (2.2 - 2.7 kgf·m, 15.9 - 19.5 lb·ft)
15-b. 23.5 - 31.4 N·m (2.4 - 3.2 kgf·m, 17.4 - 23.1 lb·ft)

Adjustment

Adjustment
Door Adjustment
1.
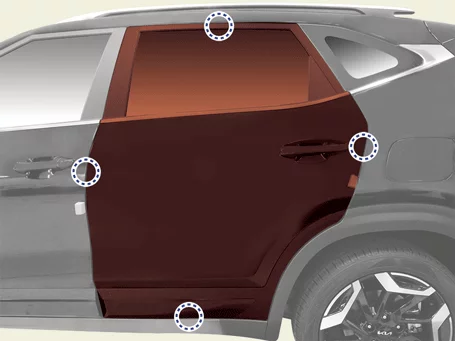
Check that the gap between the door and the body is even after parking in a flat level.

Body (Interior and Exterior) — Rear Door / Adjustment illustration

2.
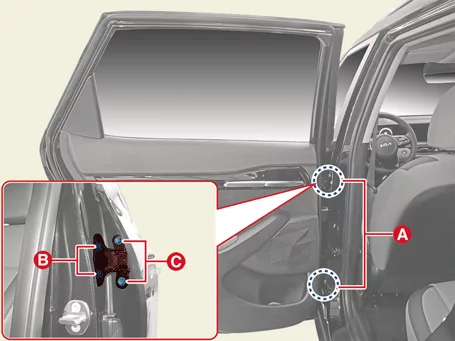
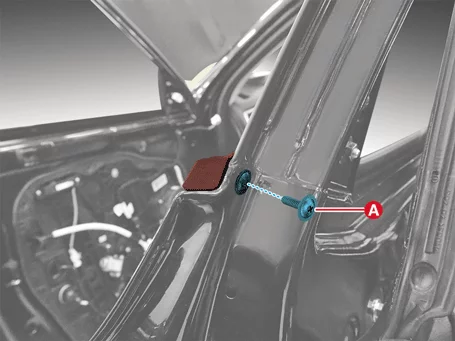
Loosen the door hinge (A) bolts, adjust the door by moving it back and forth, left and right, and then tighten the bolts.

Tightening torque
(B) : 23.5 - 31.4 N·m (2.4 - 3.2 kgf·m, 17.4 - 23.1 lb·ft)
(C) : 21.6 - 26.5 N·m (2.2 - 2.7 kgf·m, 15.9 - 19.5 lb·ft)

Body (Interior and Exterior) — Rear Door / Adjustment illustration

3.
Check that the gap between the door and the body is even.
Striker Adjustment
1.
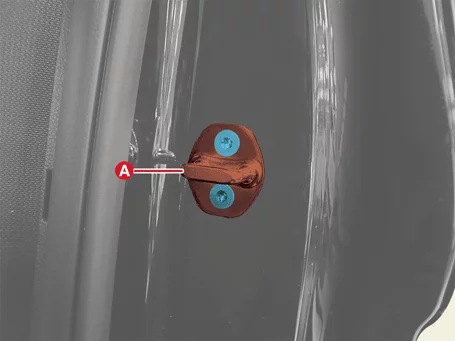
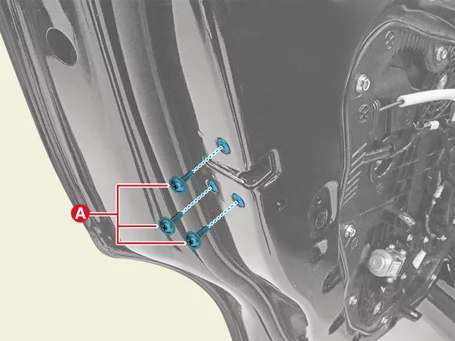
Loosen the screws and adjust the striker (A) by moving it back and forth, left and right, and then tighten the screws.

Tightening torque :
16.7 - 21.6 N·m (1.7 - 2.2 kgf·m, 12.3 - 15.9 lb·ft)

Body (Interior and Exterior) — Rear Door / Adjustment illustration

2.
Check that the door opens and closes properly.
Glass Adjustment
1.
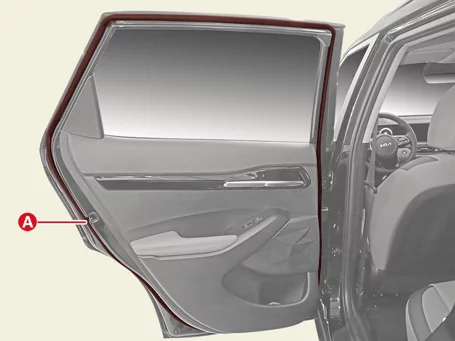
Remove the rear door trim.
(Refer Rear Door - "Rear Door Trim")
2.
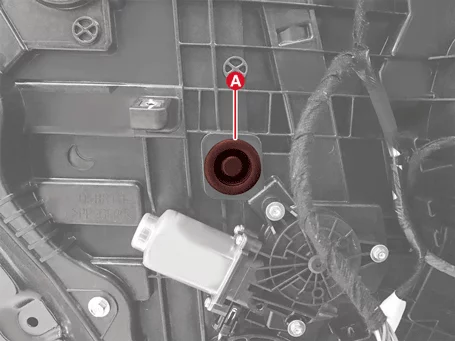
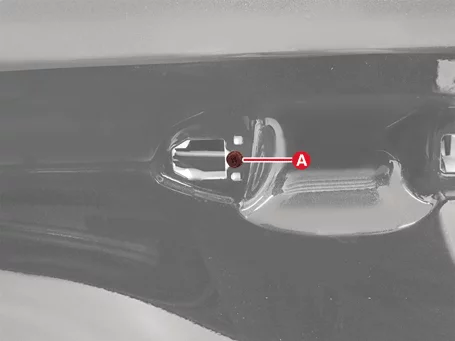
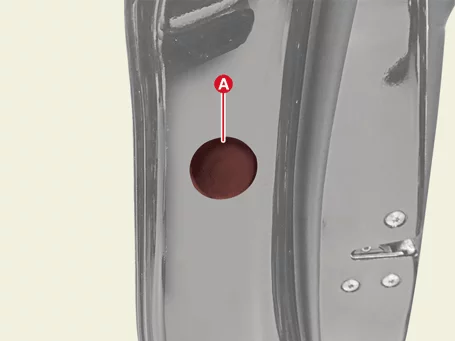
Remove the rear door window glass hole plug (A).

Body (Interior and Exterior) — Rear Door / Adjustment illustration

3.
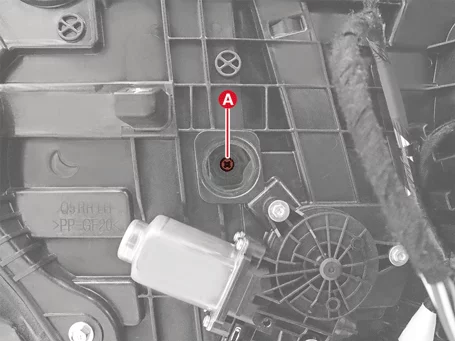
Operate the power window switch to lower the window glass until the window glass bolt is visible in the service hole.
4.
Loosen the rear door window glass bolt (A).

Tightening torque :
7.8 - 11.8 N·m (0.8 - 1.2 kgf·m, 5.8 - 8.7 lb·ft)

Body (Interior and Exterior) — Rear Door / Adjustment illustration

5.
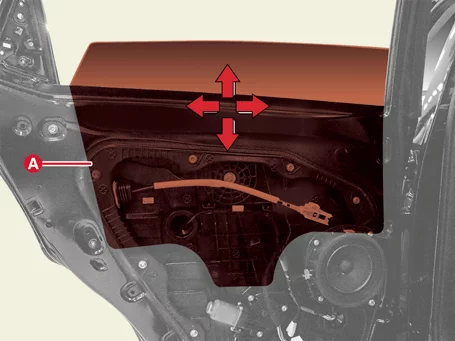
Adjust the gap by moving the rear door window glass (A) up, down, left and right, and then tighten the bolts.

Body (Interior and Exterior) — Rear Door / Adjustment illustration

6.
Check that the glass operates properly.

Rear Door Trim Removal and Installation

Removal
1.
Disconnect the battery negative ( - ) terminal.
2.
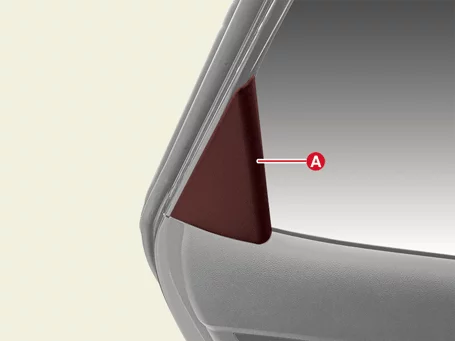
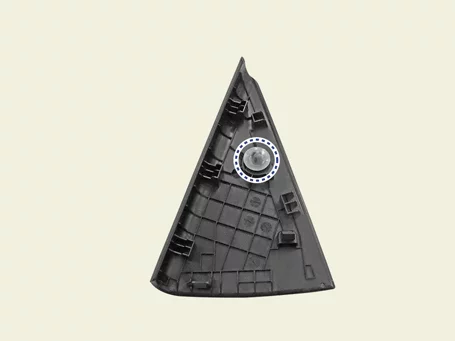
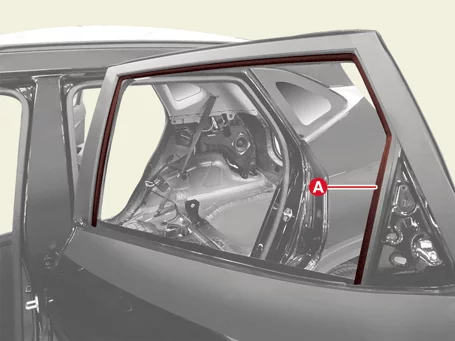
Remove the rear door delta inner cover (A).

Body (Interior and Exterior) — Rear Door / Rear Door Trim / Removal and Installation / Removal illustration

Body (Interior and Exterior) — Rear Door / Rear Door Trim / Removal and Installation / Removal illustration

Information    
Clip position :

Body (Interior and Exterior) — Rear Door / Rear Door Trim / Removal and Installation / Removal illustration

3.
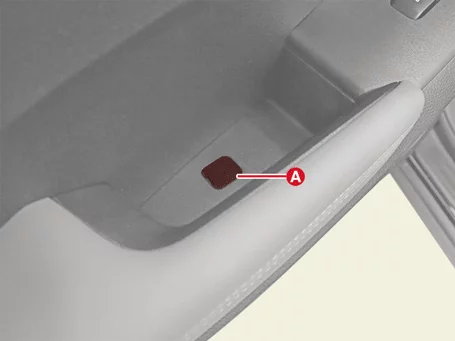
Remove the rear door screw cap (A).

Body (Interior and Exterior) — Rear Door / Rear Door Trim / Removal and Installation / Removal illustration

4.
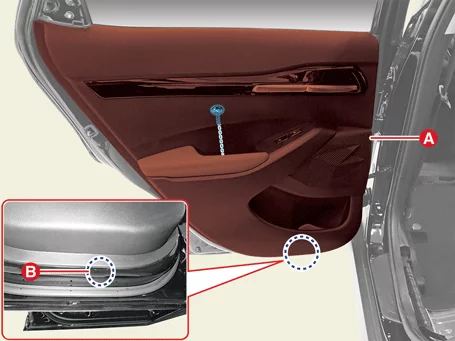
Remove the rear door trim (A) using the service hole (B) after removing the screw.

Body (Interior and Exterior) — Rear Door / Rear Door Trim / Removal and Installation / Removal illustration

Body (Interior and Exterior) — Rear Door / Rear Door Trim / Removal and Installation / Removal illustration

Information    
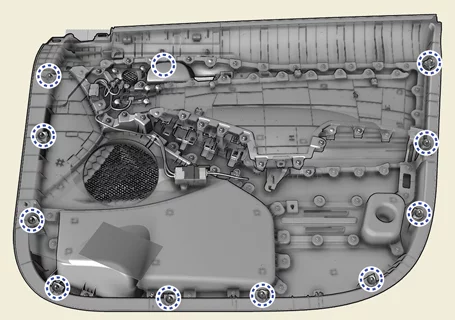
Clip position :

Body (Interior and Exterior) — Rear Door / Rear Door Trim / Removal and Installation / Removal illustration

5.
Separate the rear door inside handle cage (A).

Body (Interior and Exterior) — Rear Door / Rear Door Trim / Removal and Installation / Removal illustration

Note    
When mounting the cage on the inside handle, assemble it until there is a "click" sound.
6.
Disconnect the power window switch connector (A).

Body (Interior and Exterior) — Rear Door / Rear Door Trim / Removal and Installation / Removal illustration

Installation
1.
Install in reverse order of removal.

Rear Door Window Glass Removal and Installation

Removal
1.
Remove the rear door trim.
(Refer Rear Door - "Rear Door Trim")
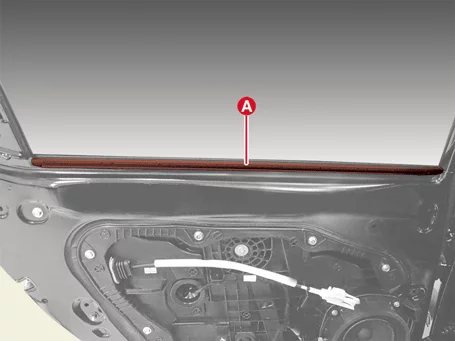
2.
Remove the rear door belt inside and outside weatherstrips (A).
(Refer to Rear Door - "Rear Door Weatherstrip")
3.
Remove the rear door outer delta molding screw (A).

Body (Interior and Exterior) — Rear Door / Rear Door Window Glass / Removal and Installation / Removal illustration

4.
Remove the rear door outer delta garnish (A).

Body (Interior and Exterior) — Rear Door / Rear Door Window Glass / Removal and Installation / Removal illustration

5.
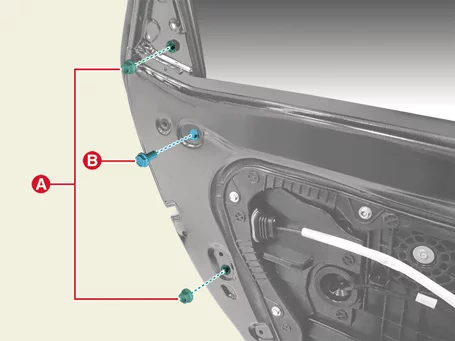
Loosen the rear door channel nuts (A) and bolt (B).

Tightening torque
Bolt : 8.8 - 13.7 N·m (0.9 - 1.4 kgf·m, 6.5 - 10.1 lb·ft)
Nut : 3.9 - 5.9 N·m (0.4 - 0.6 kgf·m, 2.9 - 4.3 lb·ft)

Body (Interior and Exterior) — Rear Door / Rear Door Window Glass / Removal and Installation / Removal illustration

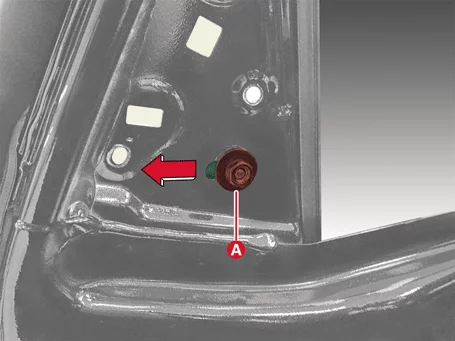
6.
Separate the rear door channel (A) in the direction of the arrow.

Body (Interior and Exterior) — Rear Door / Rear Door Window Glass / Removal and Installation / Removal illustration

7.
Remove the rear door window glass hole plug (A).

Body (Interior and Exterior) — Rear Door / Rear Door Window Glass / Removal and Installation / Removal illustration

8.
Operate the power window switch to lower the rear window glass until the window glass bolt is visible in the service hole.
9.
Remove the rear door window glass bolt (A).

Tightening torque : 7.8 - 11.8 N·m (0.8 - 1.2 kgf·m, 5.8 - 8.7 lb·ft)

Body (Interior and Exterior) — Rear Door / Rear Door Window Glass / Removal and Installation / Removal illustration

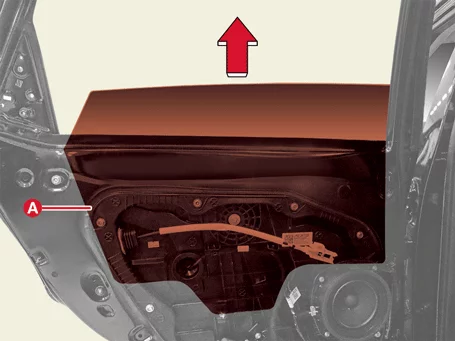
10.
Remove the rear door window glass (A) in the direction of the arrow.

Body (Interior and Exterior) — Rear Door / Rear Door Window Glass / Removal and Installation / Removal illustration

11.
Remove the rear door channel nuts (A) and bolt (B).

Tightening torque
Bolt : 8.8 - 13.7 N·m (0.9 - 1.4 kgf·m, 6.5 - 10.1 lb·ft)
Nut : 3.9 - 5.9 N·m (0.4 - 0.6 kgf·m, 2.9 - 4.3 lb·ft)

Body (Interior and Exterior) — Rear Door / Rear Door Window Glass / Removal and Installation / Removal illustration

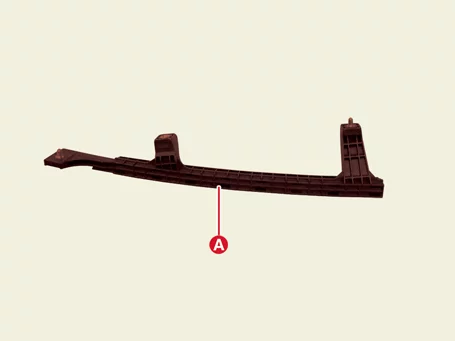
12.
Remove the rear door channel (A).

Body (Interior and Exterior) — Rear Door / Rear Door Window Glass / Removal and Installation / Removal illustration

13.
Remove the rear door glass run (A).

Body (Interior and Exterior) — Rear Door / Rear Door Window Glass / Removal and Installation / Removal illustration

Installation
1.
Install in reverse order of removal.

Rear Door Module Removal and Installation

Removal
1.
Remove the rear door window glass.
(Refer to Rear Door - "Rear Door Window Glass")
2.
Remove the rear door outside handle.
(Refer to Rear Door - "Rear Door Handle")
3.
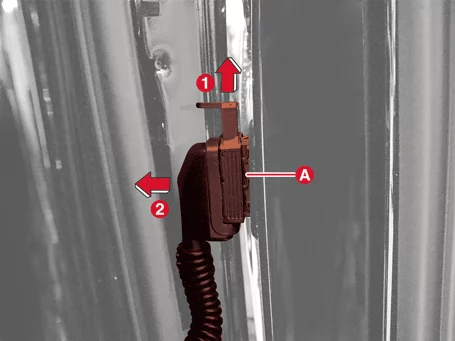
Disconnect the rear door main wiring connector (A).

Body (Interior and Exterior) — Rear Door / Rear Door Module / Removal and Installation / Removal illustration

4.
Remove the rear door latch screws (A).

Tightening torque :
6.9 - 10.8 N·m (0.7 - 1.1 kgf·m, 5.1 - 8.0 lb·ft)

Body (Interior and Exterior) — Rear Door / Rear Door Module / Removal and Installation / Removal illustration

5.
Remove the rear door handle base screw (A).

Body (Interior and Exterior) — Rear Door / Rear Door Module / Removal and Installation / Removal illustration

6.
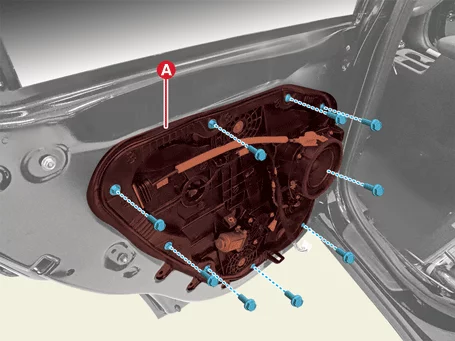
Remove the rear door module (A) after removing the bolts.

Tightening torque :
8.8 - 13.7 N·m (0.9 - 1.4 kgf·m, 6.5 - 10.1 lb·ft)

Body (Interior and Exterior) — Rear Door / Rear Door Module / Removal and Installation / Removal illustration

7.
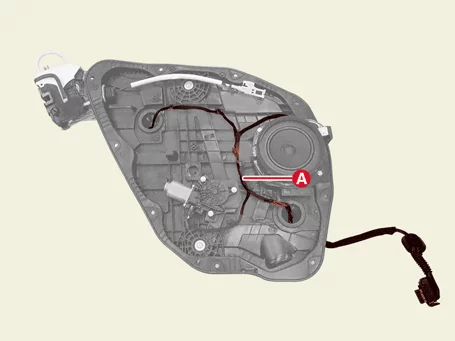
Remove the wiring harness (A) from the rear door module.

Body (Interior and Exterior) — Rear Door / Rear Door Module / Removal and Installation / Removal illustration

Installation
1.
Install in reverse order of removal.

Rear Door Handle Removal and Installation

Removal
Rear Door Inside Handle
1.
Remove the rear door trim.
(Refer Rear Door - "Rear Door Trim")
2.
Remove the rear door inside handle (A) after removing the screws.

Body (Interior and Exterior) — Rear Door / Rear Door Handle / Removal and Installation / Removal illustration

Rear Door Outside Handle
1.
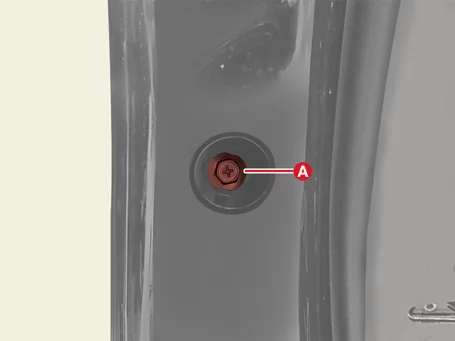
Remove the hole plug (A).

Body (Interior and Exterior) — Rear Door / Rear Door Handle / Removal and Installation / Removal illustration

2.
Fully loosen the rear door outside handle bolt (A).

Tightening torque :
3.9 - 5.9 N·m (0.4 - 0.6 kgf·m, 2.9 - 4.3 lb·ft, 34.7 - 52.1 lb·in)

Body (Interior and Exterior) — Rear Door / Rear Door Handle / Removal and Installation / Removal illustration

3.
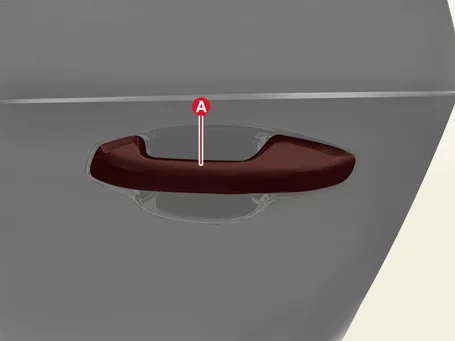
Remove the door outside handle (A) in the direction of the arrow.

Body (Interior and Exterior) — Rear Door / Rear Door Handle / Removal and Installation / Removal illustration

4.
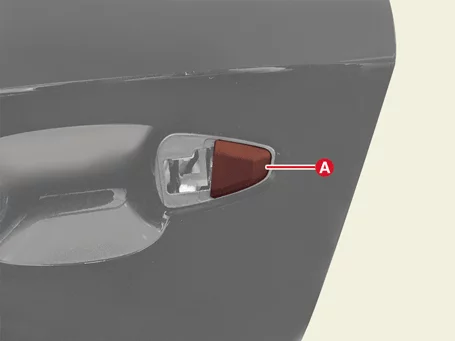
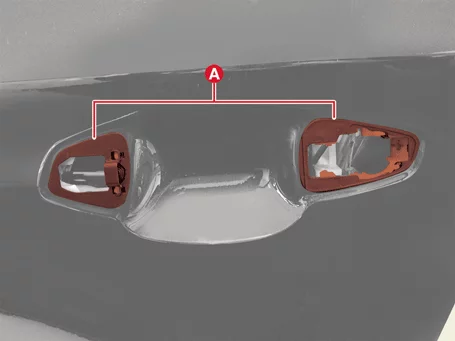
Remove the rear door outside handle cover (A).

Body (Interior and Exterior) — Rear Door / Rear Door Handle / Removal and Installation / Removal illustration

Body (Interior and Exterior) — Rear Door / Rear Door Handle / Removal and Installation / Removal illustration

5.
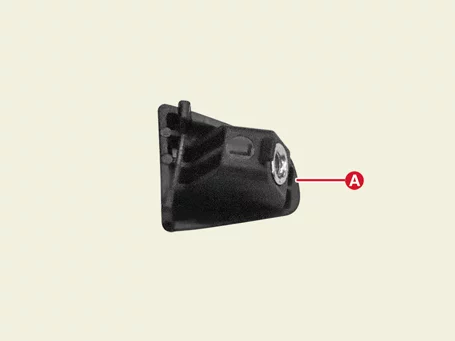
Remove the rear door outside handle pad (A).

Body (Interior and Exterior) — Rear Door / Rear Door Handle / Removal and Installation / Removal illustration

Rear Door Outside Handle Base
1.
Remove the rear door module.
(Refer to Rear Door - "Rear Door Module")
2.
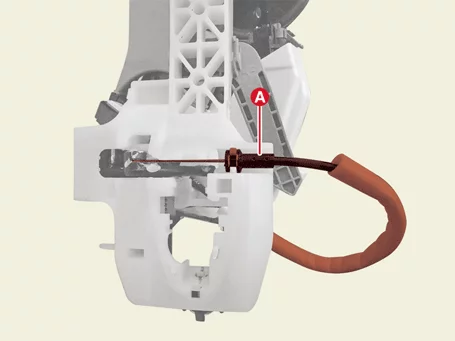
Separate the rear door handle cable (A).

Body (Interior and Exterior) — Rear Door / Rear Door Handle / Removal and Installation / Removal illustration

3.
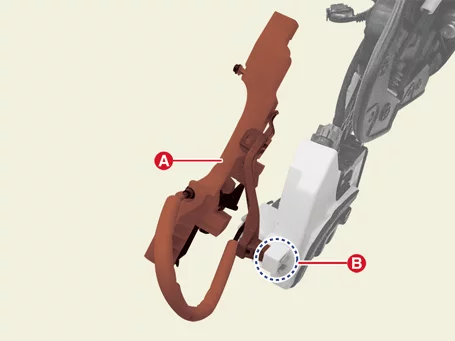
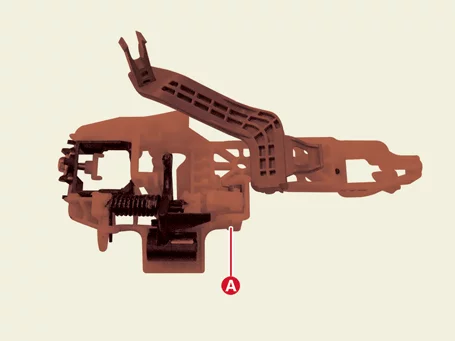
Remove the rear door outside handle base (A) after releasing the retainer hook (B).

Body (Interior and Exterior) — Rear Door / Rear Door Handle / Removal and Installation / Removal illustration

Body (Interior and Exterior) — Rear Door / Rear Door Handle / Removal and Installation / Removal illustration

Installation
1.
Install in reverse order of removal.

Rear Door Latch Removal and Installation

Removal
1.
Remove the rear door outside handle base.
(Refer to Rear Door - "Rear Door Handle")
2.
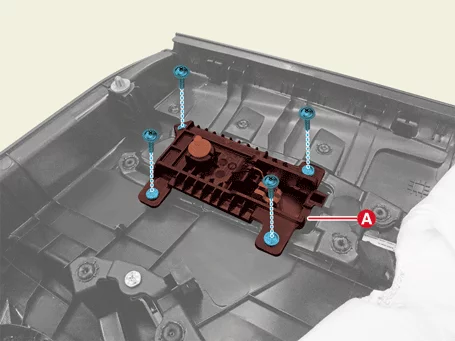
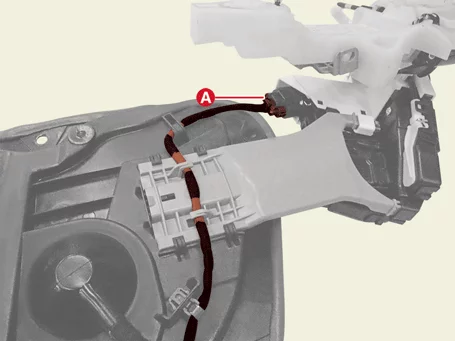
Disconnect the rear door latch connector (A).

Body (Interior and Exterior) — Rear Door / Rear Door Latch / Removal and Installation / Removal illustration

3.
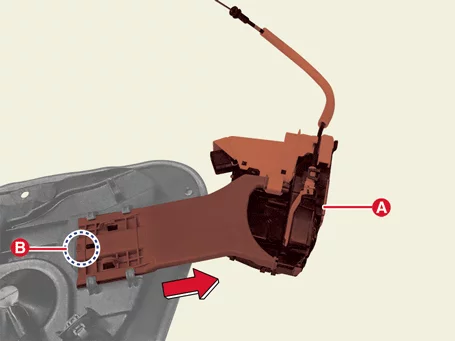
Remove the rear door latch (A) in the direction of the arrow after releasing the retainer hook (B).

Body (Interior and Exterior) — Rear Door / Rear Door Latch / Removal and Installation / Removal illustration

4.
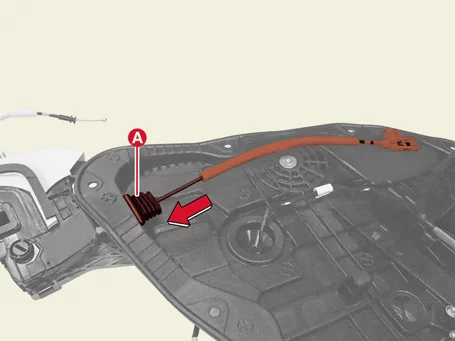
Remove the rear door inside handle cable (A) in the direction of the arrow.

Body (Interior and Exterior) — Rear Door / Rear Door Latch / Removal and Installation / Removal illustration

Installation
1.
Install in reverse order of removal.

Rear Door Weatherstrip Removal and Installation

Removal
Rear Door Side Weatherstrip
1.
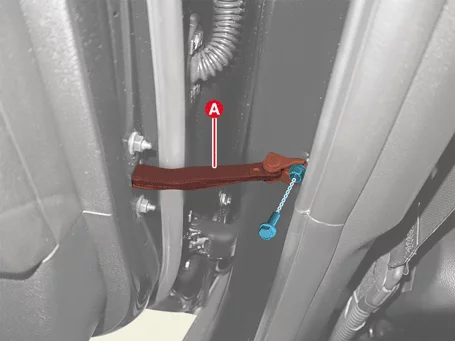
Separate the rear door checker (A) after removing the bolt.

Tightening torque :
16.7 - 21.6 N·m (1.7 - 2.2 kgf·m, 12.3 - 15.9 lb·ft)

Body (Interior and Exterior) — Rear Door / Rear Door Weatherstrip / Removal and Installation / Removal illustration

2.
Remove the rear door side weatherstrip (A).

Body (Interior and Exterior) — Rear Door / Rear Door Weatherstrip / Removal and Installation / Removal illustration

Rear Door Body Side Weatherstrip
1.
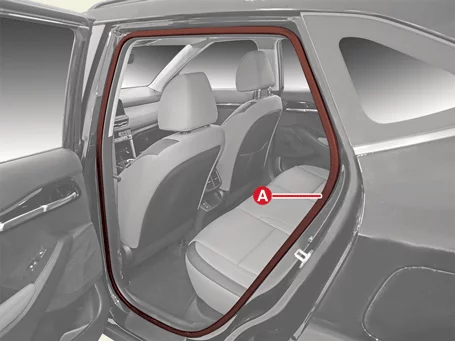
Remove the rear door body side weatherstrip (A).

Body (Interior and Exterior) — Rear Door / Rear Door Weatherstrip / Removal and Installation / Removal illustration

Rear Door Belt Outside Weatherstrip
1.
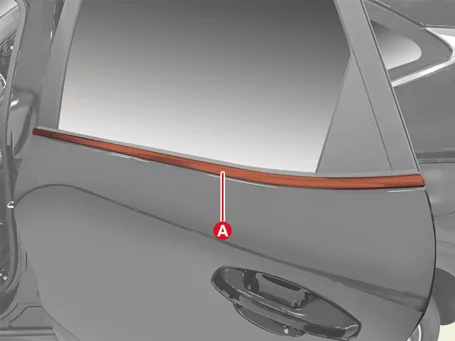
Remove the rear door belt outside weather strip screw (A).

Body (Interior and Exterior) — Rear Door / Rear Door Weatherstrip / Removal and Installation / Removal illustration

2.
Remove the rear door belt outside weatherstrip (A).

Body (Interior and Exterior) — Rear Door / Rear Door Weatherstrip / Removal and Installation / Removal illustration

Rear Door Belt Inside Weatherstrip
1.
Remove the rear door belt inside weatherstrip (A).

Body (Interior and Exterior) — Rear Door / Rear Door Weatherstrip / Removal and Installation / Removal illustration

Installation
1.
Install in reverse order of removal.

Other information:

Kia Seltos SP2 (2021-2026) Service Manual: Installation

Special Service Tool Tool Name / Number Illustration Description Oil seal installer09452 - 26100 Used for IVT transmission case and housing oil seal installation [2WD](Used with the handle) Oil seal installer09453 - 3L241 Used for IVT transmission case oil seal installation [4WD](Used with the handle) Oil seal installer09453 - 2W100 Used for IVT transmission housing oil seal installation [4WD](Used with the handle) Handle09231 - H1100 Used with the oil seal installer Installation 1.

Kia Seltos SP2 (2021-2026) Service Manual: Installing a CRS

After selecting the correct child seat for your child, check that it fits properly in the Kia Seltos seating position where it will be used. Follow all instructions provided by the child restraint manufacturer when installing the seat. These general steps can help when installing a CRS in your Kia Seltos: Properly secure the child restraint to the vehicle.