Owner's library Kia Seltos Manuals Owner's manual pages, service notes, maintenance references and practical Kia Seltos help in one clean library.

Kia Seltos reference pages

Manuals, maintenance notes and quick owner help.

Find Kia Seltos operating instructions, warning light explanations, service information and owner guidance without digging through a full PDF.

Kia Seltos: Body (Interior and Exterior) / Front Seat

Contents:

Front Seat Assembly Removal and Installation

Removal
Information    
•
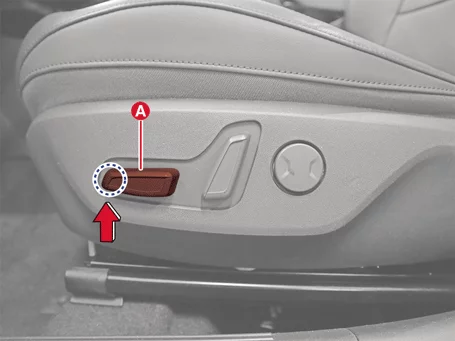
When removing the front seat unit, work after raising the seat height as much as possible.
•
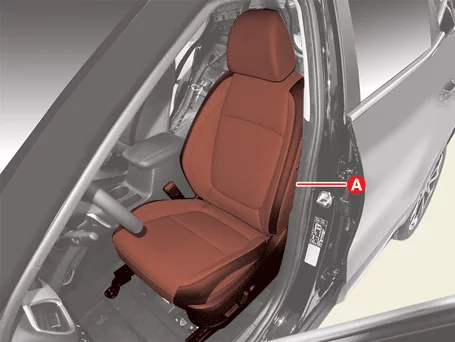
It can control the seat height by operating the seat cushion power switch (A) as shown below.

Body (Interior and Exterior) — Front Seat / Front Seat Assembly / Removal and Installation / Removal illustration

1.
Disconnect the battery negative ( - ) terminal.
2.
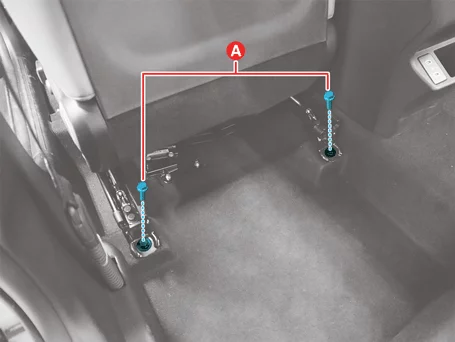
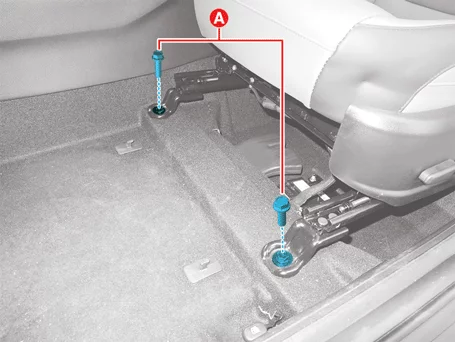
Remove the front seat assembly bolts (A).

Tightening torque :
44.1 - 58.8 N·m (4.5 - 6.0 kgf·m, 32.5 - 43.4 lb·ft)

Body (Interior and Exterior) — Front Seat / Front Seat Assembly / Removal and Installation / Removal illustration

Body (Interior and Exterior) — Front Seat / Front Seat Assembly / Removal and Installation / Removal illustration

3.
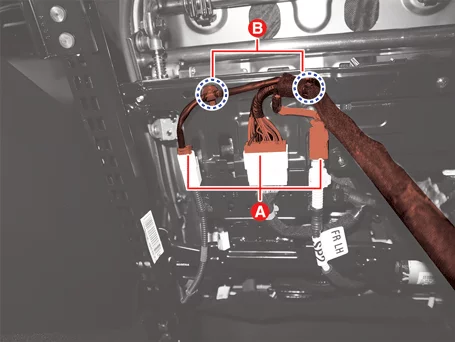
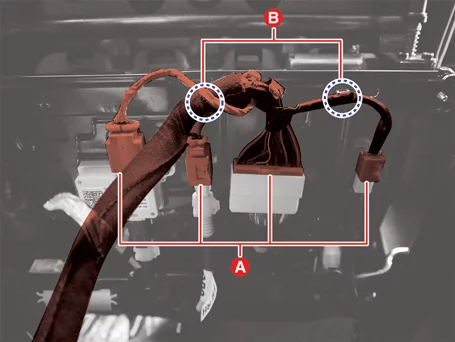
Disconnect the connectors (A) and separate the clips (B).
[Driver's side]

Body (Interior and Exterior) — Front Seat / Front Seat Assembly / Removal and Installation / Removal illustration

[Passenger's side]

Body (Interior and Exterior) — Front Seat / Front Seat Assembly / Removal and Installation / Removal illustration

4.
Remove the front seat (A).

Body (Interior and Exterior) — Front Seat / Front Seat Assembly / Removal and Installation / Removal illustration

Installation
1.
Install in reverse order of removal.
Note    
Seat bolts tightening procedure
•
Place the seat in the rearmost position, check that both sides of the slide are locked, and then lightly tighten the front bolt.
•
Move the seat to the frontmost, check that both sides of the slide are locked, and then completely tighten the rear bolt.
•
Move the seat back to the rearmost position and completely tighten the front bolt.
•
Check that the seat is flexibly operated back and forth and is locked in the locked position of every sections.

Front Seat Shield Cover Removal and Installation

Removal
Front Seat Shield Outer Cover
1.
Remove the front seat assembly.
(Refer to Front Seat - "Front Seat Assembly")
2.
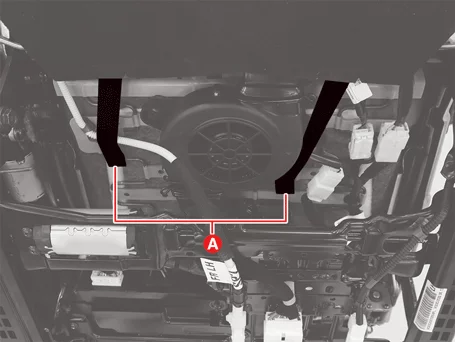
Remove the front seat back board protectors (A).

Body (Interior and Exterior) — Front Seat / Front Seat Shield Cover / Removal and Installation / Removal illustration

3.
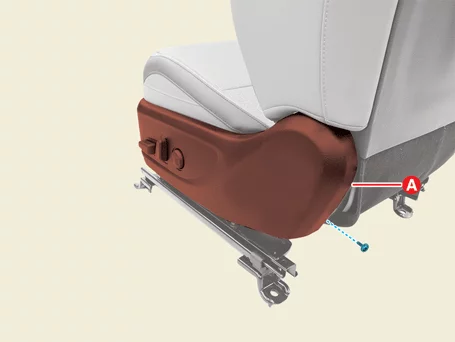
Remove the shield outer cover (A) after removing the screw.

Body (Interior and Exterior) — Front Seat / Front Seat Shield Cover / Removal and Installation / Removal illustration

Body (Interior and Exterior) — Front Seat / Front Seat Shield Cover / Removal and Installation / Removal illustration

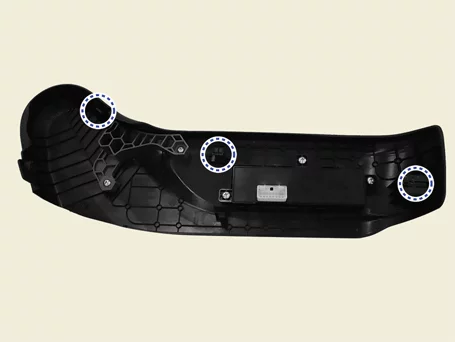
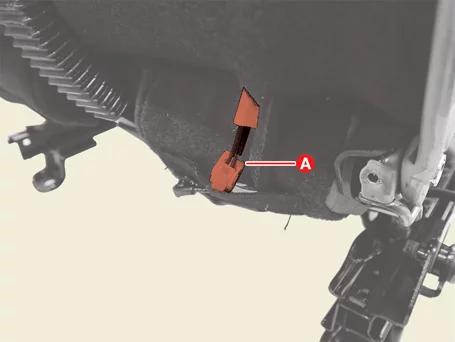
Information    
Clip position :

Body (Interior and Exterior) — Front Seat / Front Seat Shield Cover / Removal and Installation / Removal illustration

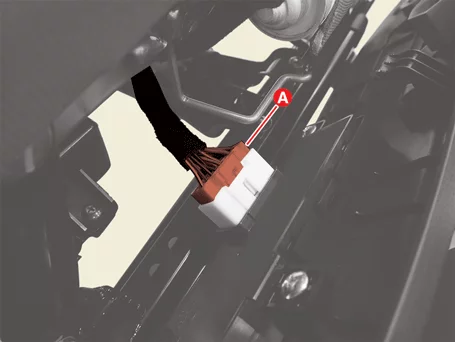
4.
Disconnect the front seat power switch connector (A).

Body (Interior and Exterior) — Front Seat / Front Seat Shield Cover / Removal and Installation / Removal illustration

Front Seat Shield Inner Cover
1.
Remove the front seat assembly.
(Refer to Front Seat - "Front Seat Assembly")
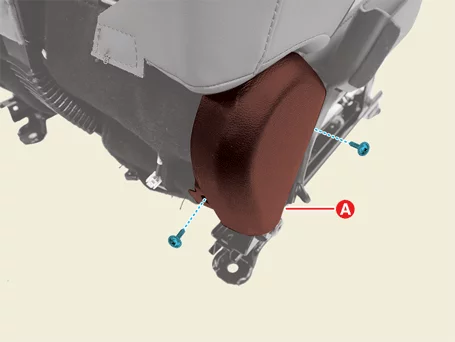
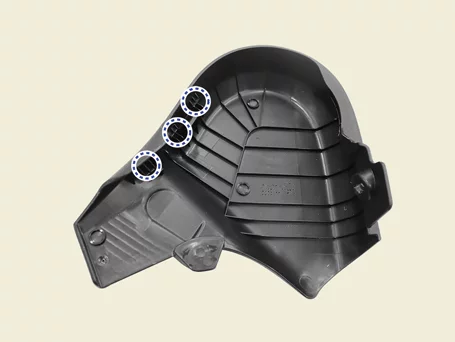
2.
Remove the shield inner cover (A) after removing the screws.

Body (Interior and Exterior) — Front Seat / Front Seat Shield Cover / Removal and Installation / Removal illustration

Body (Interior and Exterior) — Front Seat / Front Seat Shield Cover / Removal and Installation / Removal illustration

Installation
1.
Install in reverse order of removal.

Front Seat Back Cover Removal and Installation

Removal
1.
Remove the front seat shield cover.
(Refer to Front Seat - "Front Seat Shield Cover")
2.
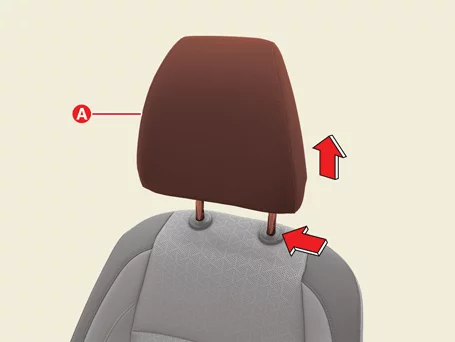
Remove the headrest (A) by pressing the hook.

Body (Interior and Exterior) — Front Seat / Front Seat Back Cover / Removal and Installation / Removal illustration

3.
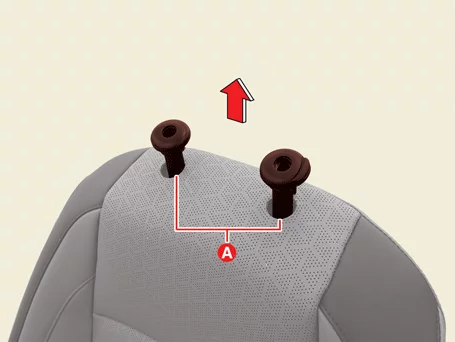
Remove the headrest guide (A) in the direction of the arrow.

Body (Interior and Exterior) — Front Seat / Front Seat Back Cover / Removal and Installation / Removal illustration

4.
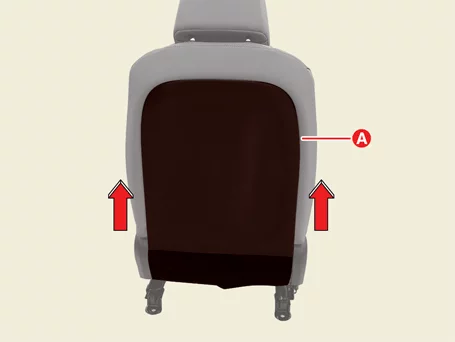
Remove the front seat back board (A) in the direction of the arrow.

Body (Interior and Exterior) — Front Seat / Front Seat Back Cover / Removal and Installation / Removal illustration

Body (Interior and Exterior) — Front Seat / Front Seat Back Cover / Removal and Installation / Removal illustration

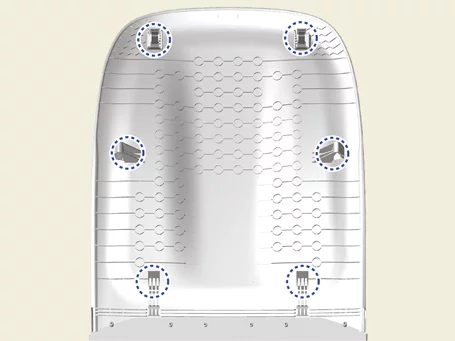
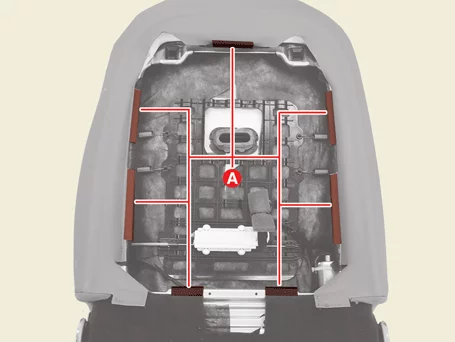
Information    
Clip position :

Body (Interior and Exterior) — Front Seat / Front Seat Back Cover / Removal and Installation / Removal illustration

Proper Removal Direction for the Front Seat Back Board (Play ▶)Body (Interior and Exterior) — Front Seat / Front Seat Back Cover / Removal and Installation / Removal illustration
Notes When Refering Video
This video helps clearly identify areas that are hard to distinguish in manual images, such as component locations or assembly structures.
It also allows visual confirmation of areas that are difficult to see directly due to restricted visibility caused by surrounding components, from a technician’s perspective.
•
This video is created using common specifications and may differ from the actual vehicle.
•
The location and repair procedures of the parts may vary depending on vehicle model, model year, region, and specifications.
•
Check the KDS guide for detailed information on how to use the KDS.
•
Check the manual for detailed maintenance procedures.
•
Unauthorized reproduction, distribution, or sharing of this video is prohibited.
5.
Disconnect the front seat back connectors (A).

Body (Interior and Exterior) — Front Seat / Front Seat Back Cover / Removal and Installation / Removal illustration

6.
Remove the seat back protectors (A).

Body (Interior and Exterior) — Front Seat / Front Seat Back Cover / Removal and Installation / Removal illustration

7.
Remove the front seat back assembly (A) from the front seat back frame.

Body (Interior and Exterior) — Front Seat / Front Seat Back Cover / Removal and Installation / Removal illustration

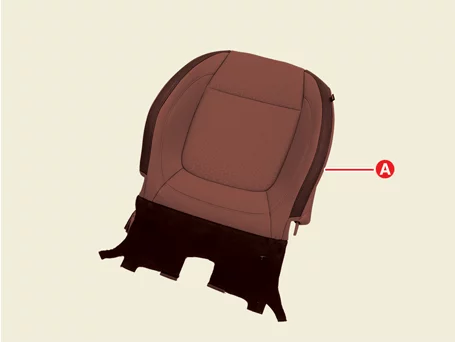
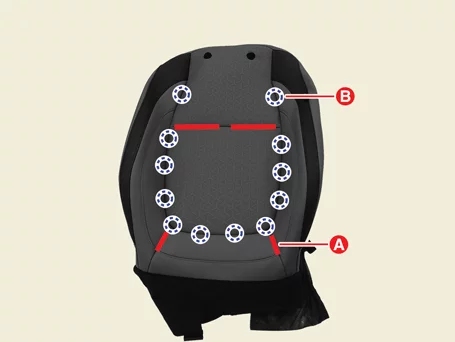
8.
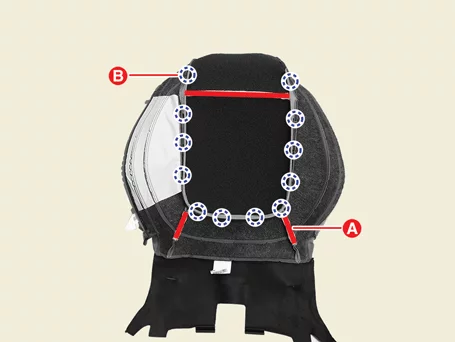
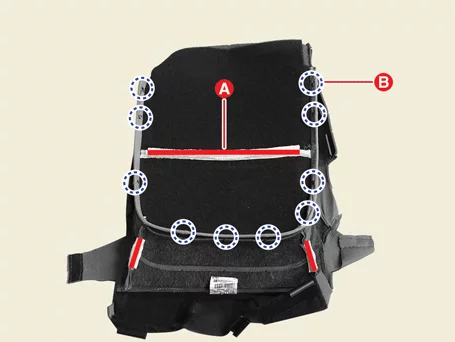
Remove the seat back cover after removing the velcro tapes (A) and the hog ring clips (B).

Body (Interior and Exterior) — Front Seat / Front Seat Back Cover / Removal and Installation / Removal illustration

Body (Interior and Exterior) — Front Seat / Front Seat Back Cover / Removal and Installation / Removal illustration

Body (Interior and Exterior) — Front Seat / Front Seat Back Cover / Removal and Installation / Removal illustration

Installation
1.
Install in reverse order of removal.

Front Seat Cushion Cover Removal and Installation

Removal
1.
Remove the front seat shield cover.
(Refer to Front Seat - "Front Seat Shield Cover")
2.
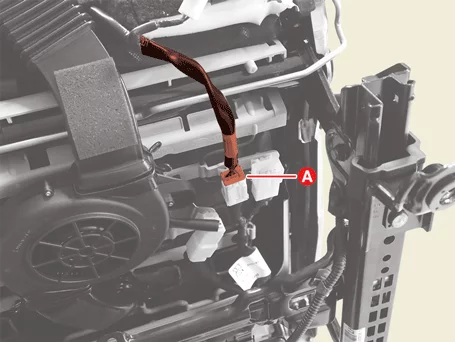
Disconnect the front seat heating wire connector (A).

Body (Interior and Exterior) — Front Seat / Front Seat Cushion Cover / Removal and Installation / Removal illustration

3.
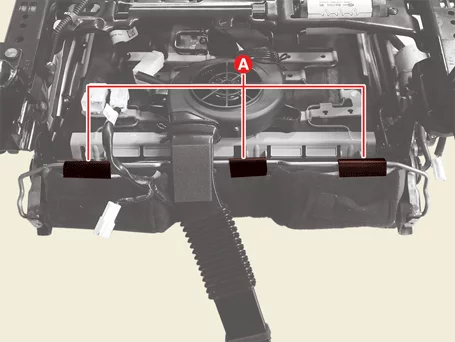
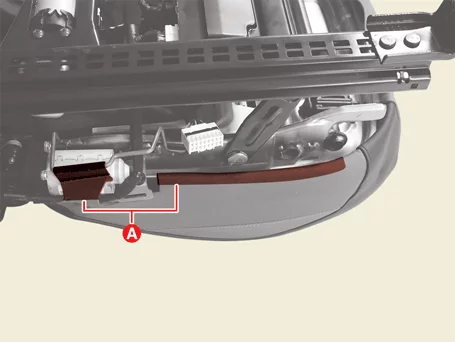
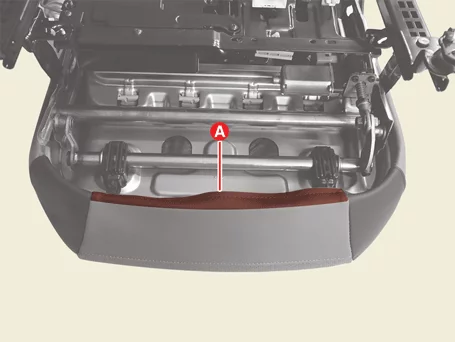
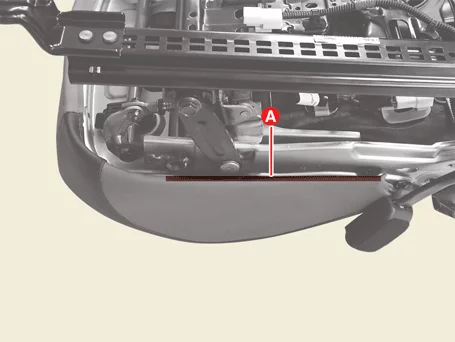
Remove the seat cushion protectors (A).

Body (Interior and Exterior) — Front Seat / Front Seat Cushion Cover / Removal and Installation / Removal illustration

Body (Interior and Exterior) — Front Seat / Front Seat Cushion Cover / Removal and Installation / Removal illustration

Body (Interior and Exterior) — Front Seat / Front Seat Cushion Cover / Removal and Installation / Removal illustration

Body (Interior and Exterior) — Front Seat / Front Seat Cushion Cover / Removal and Installation / Removal illustration

4.
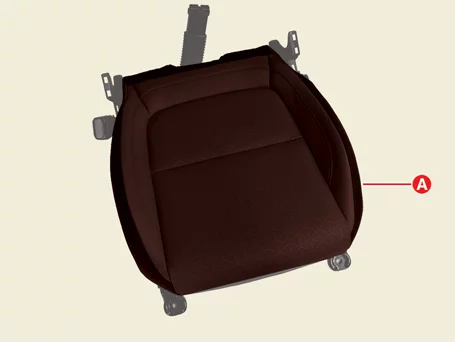
Remove the front seat cushion assembly (A) from the front seat cushion frame.

Body (Interior and Exterior) — Front Seat / Front Seat Cushion Cover / Removal and Installation / Removal illustration

5.
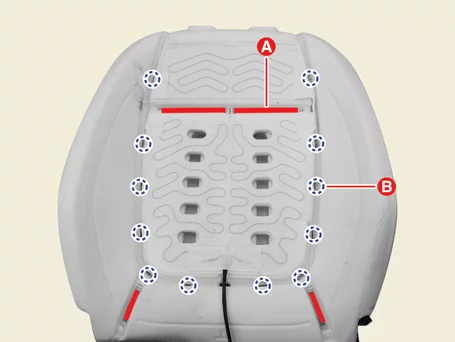
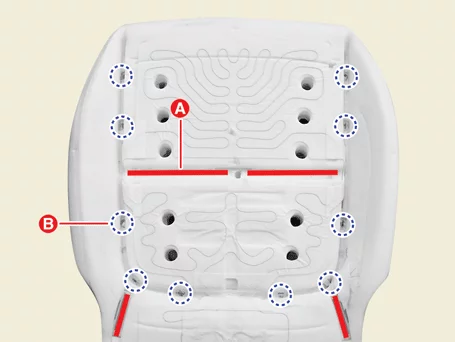
Remove the seat cushion cover after removing the velcro tapes (A) and the hog ring clips (B).

Body (Interior and Exterior) — Front Seat / Front Seat Cushion Cover / Removal and Installation / Removal illustration

Body (Interior and Exterior) — Front Seat / Front Seat Cushion Cover / Removal and Installation / Removal illustration

Installation
1.
Install in reverse order of removal.

Lumbar Support Removal and Installation

Removal
1.
Remove the front seat back cover.
(Refer to Front Seat - "Front Seat Back Cover")
2.
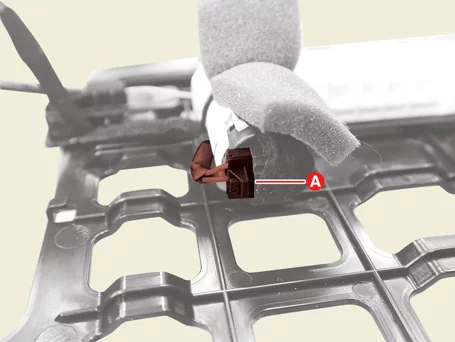
Remove the lumbar support connector (A).

Body (Interior and Exterior) — Front Seat / Lumbar Support / Removal and Installation / Removal illustration

3.
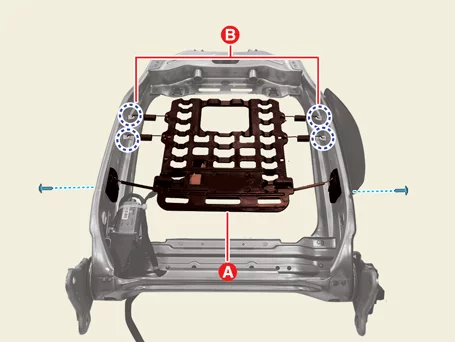
Remove the lumbar support (A) after removing the screws and hooks (B).

Body (Interior and Exterior) — Front Seat / Lumbar Support / Removal and Installation / Removal illustration

Installation
1.
Install in reverse order of removal.

Front Seat Frame Assembly Removal and Installation

Removal
Front Seat Back Frame
1.
Remove the front seat shield cover.
(Refer to Front Seat - "Front Seat Shield Cover")
2.
Remove the lumbar support.
(Refer to Front Seat - "Lumber Support")
3.
Remove the Side Airbag (SAB) module.
(Refer to Restraint - "Side Airbag (SAB) Module")
Front Seat Cushion Frame
1.
Remove the front seat cushion assembly from the front seat cushion frame.
(Refer to Front Seat - "Front Seat Cushion Cover")
Installation
1.
Install in reverse order of removal.

Other information:

Kia Seltos SP2 (2021-2026) Service Manual: Tire terminology and definitions

Refer to the following definitions for tire-related terms commonly found in the Kia Seltos tire description, tire placard, sidewall markings, and maintenance information. Air Pressure: The amount of air inside the tire pressing outward against the tire structure. Air pressure is measured in pounds per square inch (psi) or kilopascals (kPa). Accessory Weight: The combined weight of optional accessories installed on the vehicle.

Kia Seltos SP2 (2021-2026) Service Manual: Shift lock system

The automatic transmission in the Kia Seltos is equipped with a shift lock system. This safety feature helps prevent the transmission from being shifted from P (Park) into R (Reverse) unless the brake pedal is pressed. To shift the transmission from P (Park) into R (Reverse), follow these steps: Depress and hold the brake pedal. Start the engine or turn the ignition switch to the ON position.