Owner's library Kia Seltos Manuals Owner's manual pages, service notes, maintenance references and practical Kia Seltos help in one clean library.

Kia Seltos reference pages

Manuals, maintenance notes and quick owner help.

Find Kia Seltos operating instructions, warning light explanations, service information and owner guidance without digging through a full PDF.

Kia Seltos: Body (Interior and Exterior) / Rear Seat

Contents:

Rear Seat Assembly Removal and Installation

Removal
Rear Seat Cushion Assembly
1.
Disconnect the battery negative ( - ) terminal.
2.
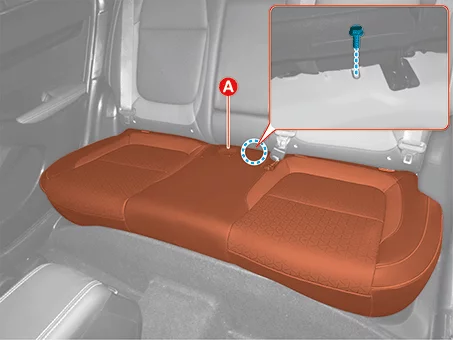
Remove the rear seat cushion assembly (A) bolt.

Tightening torque :
21.6 - 31.4 N·m (2.2 - 3.2 kgf·m, 15.9 - 23.1 lb·ft)

Body (Interior and Exterior) — Rear Seat / Rear Seat Assembly / Removal and Installation / Removal illustration

3.
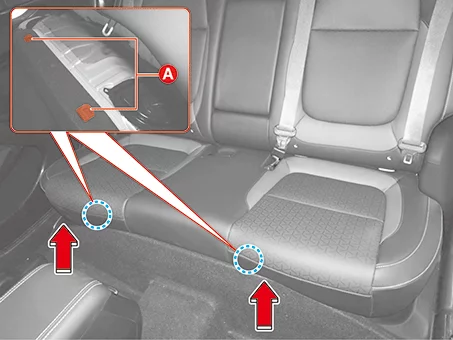
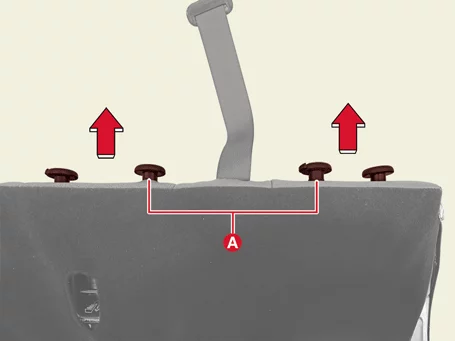
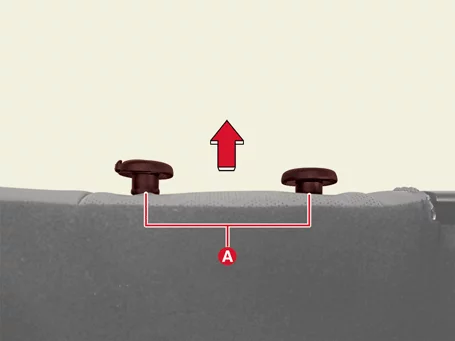
Remove the grommet (A) mounting part by lifting the rear seat cushion in the direction of the arrow.

Body (Interior and Exterior) — Rear Seat / Rear Seat Assembly / Removal and Installation / Removal illustration

4.
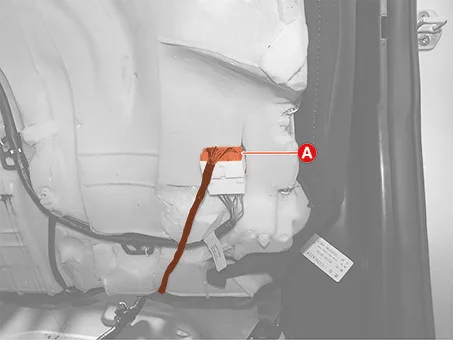
Disconnect the rear seat cushion heating wire connector (A). [Option Type]

Body (Interior and Exterior) — Rear Seat / Rear Seat Assembly / Removal and Installation / Removal illustration

Rear Seat Back Assembly
1.
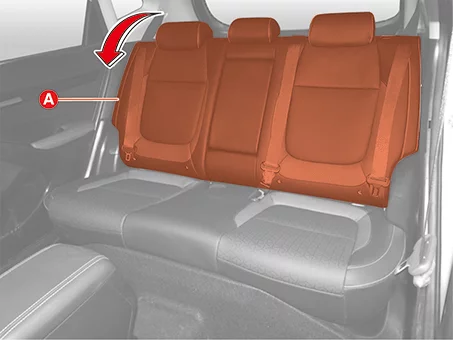
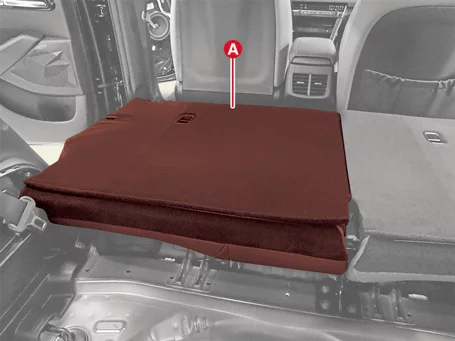
Fold the rear seat back assembly (A) in the direction of the arrow.

Body (Interior and Exterior) — Rear Seat / Rear Seat Assembly / Removal and Installation / Removal illustration

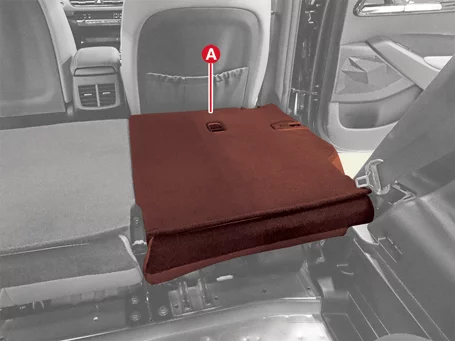
2.
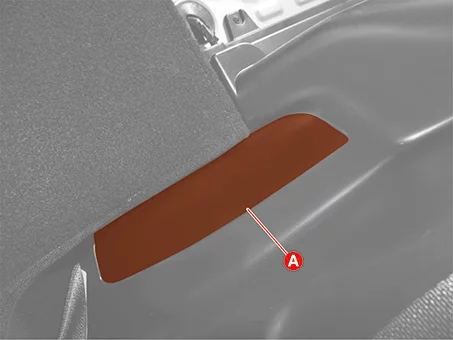
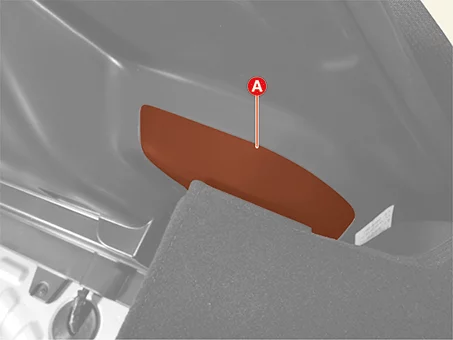
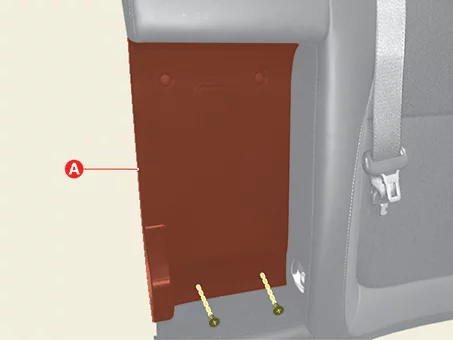
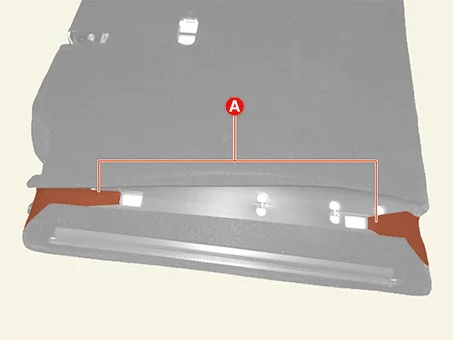
Remove the luggage side covers (A).

Body (Interior and Exterior) — Rear Seat / Rear Seat Assembly / Removal and Installation / Removal illustration

Body (Interior and Exterior) — Rear Seat / Rear Seat Assembly / Removal and Installation / Removal illustration

3.
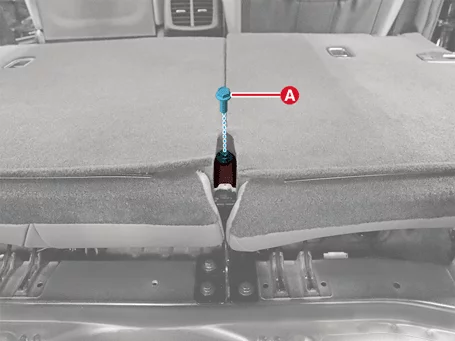
Remove the rear seat center bracket bolt (A).

Tightening torque :
21.6 - 31.4 N·m (2.2 - 3.2 kgf·m, 15.9 - 23.1 lb·ft)

Body (Interior and Exterior) — Rear Seat / Rear Seat Assembly / Removal and Installation / Removal illustration

4.
Remove the rear seat back assembly (A).

Body (Interior and Exterior) — Rear Seat / Rear Seat Assembly / Removal and Installation / Removal illustration

Body (Interior and Exterior) — Rear Seat / Rear Seat Assembly / Removal and Installation / Removal illustration

Note    
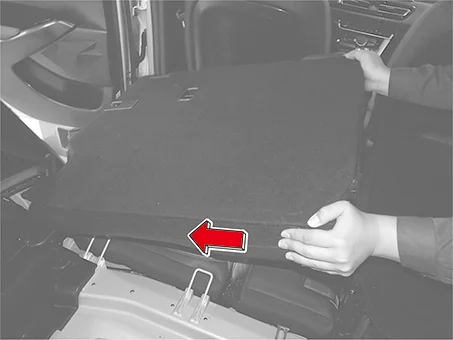
How to remove the rear seat back assembly
1)
After releasing the rear seat back center hinge pin from the center bracket, push the rear seat back toward the door.

Body (Interior and Exterior) — Rear Seat / Rear Seat Assembly / Removal and Installation / Removal illustration

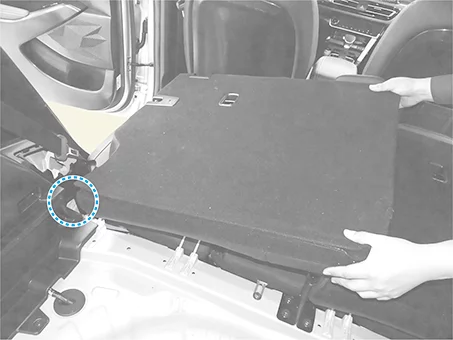
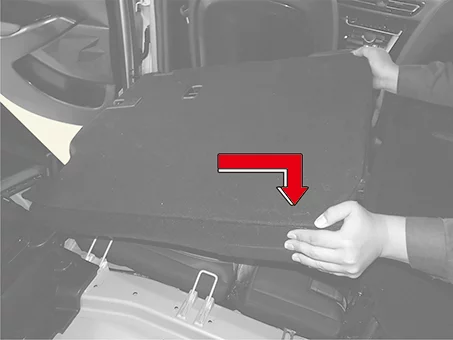
2)
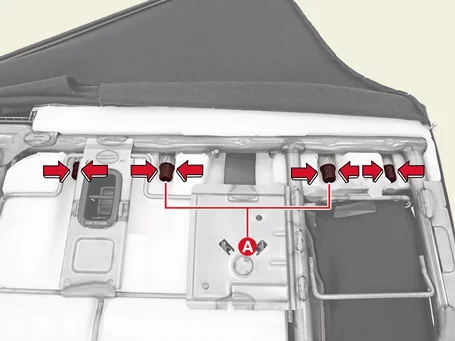
After moving the rear seat back side hinge pin outward, lift the rear seat back and remove it.

Body (Interior and Exterior) — Rear Seat / Rear Seat Assembly / Removal and Installation / Removal illustration

Installation
1.
Install in reverse order of removal.
Note    
How to mount the rear seat back assembly
1)
Insert the rear seat back side hinge pin into the side bracket hole.

Body (Interior and Exterior) — Rear Seat / Rear Seat Assembly / Removal and Installation / Installation illustration

2)
Pull the rear seat back inward and attach the center hinge pin to the center bracket.

Body (Interior and Exterior) — Rear Seat / Rear Seat Assembly / Removal and Installation / Installation illustration

Note    
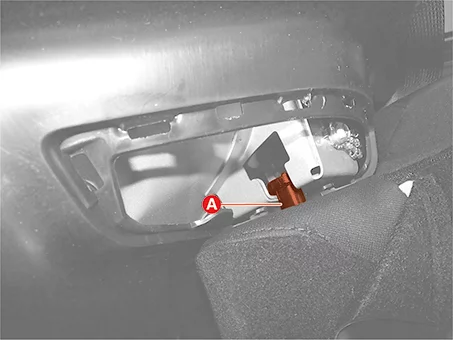
The side hinge pin (A) must fit completely into the side bracket.

Body (Interior and Exterior) — Rear Seat / Rear Seat Assembly / Removal and Installation / Installation illustration

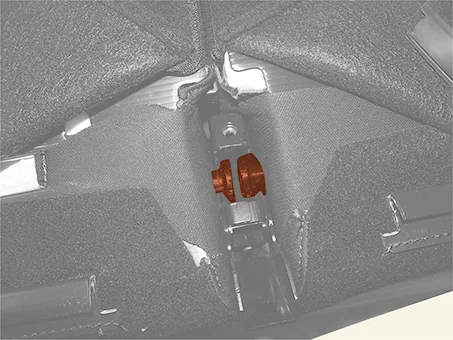
The center hinge pin must fit completely into the center bracket.

Body (Interior and Exterior) — Rear Seat / Rear Seat Assembly / Removal and Installation / Installation illustration

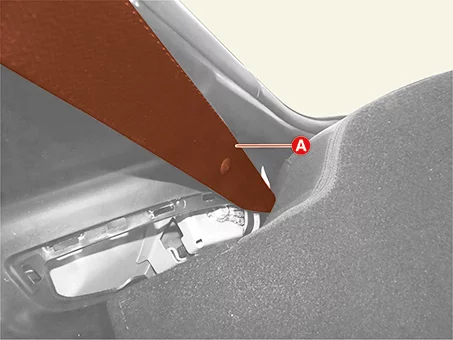
The rear seat belt (A) should be located in the driver's seat direction rather than the side hinge pins.

Body (Interior and Exterior) — Rear Seat / Rear Seat Assembly / Removal and Installation / Installation illustration

Rear Seat Cushion Cover Removal and Installation

Removal
1.
Remove the rear seat cushion assembly.
(Refer to Rear Seat - "Rear Seat Assembly")
2.
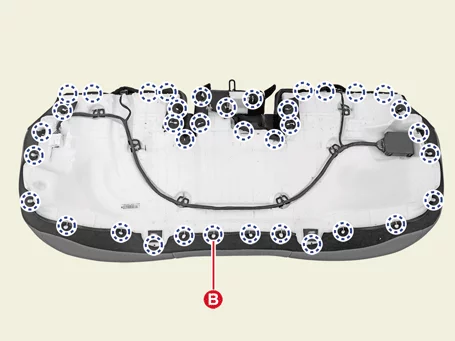
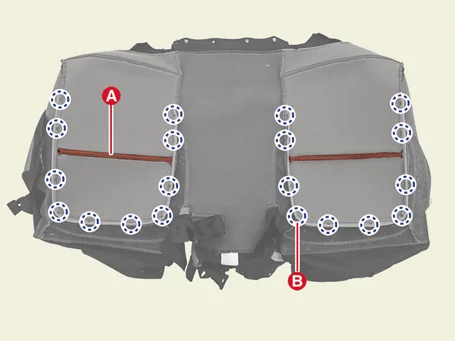
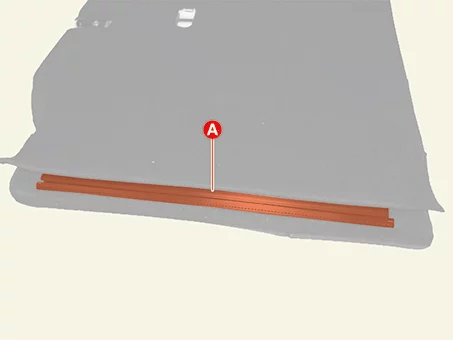
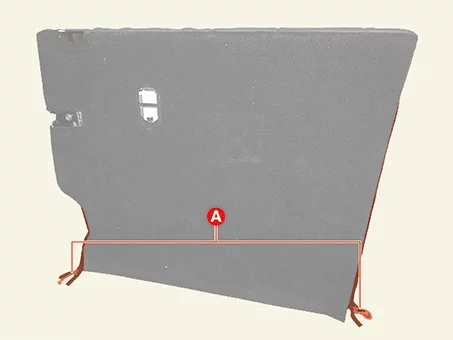
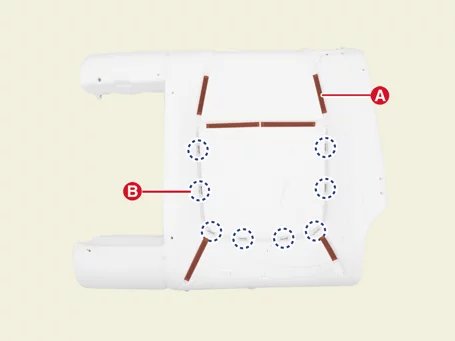
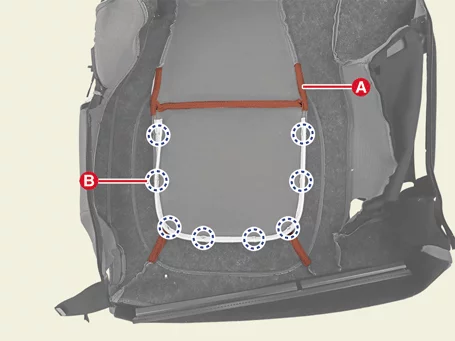
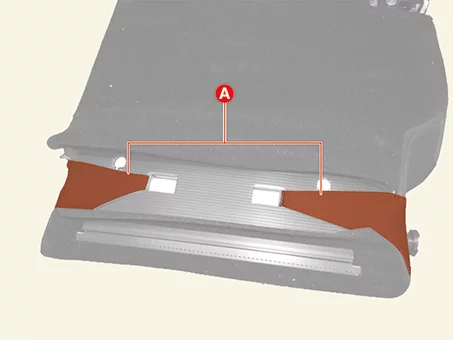
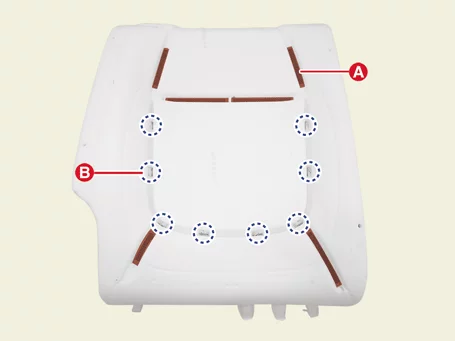
Remove the velcro tapes (A) and the hog ring clips (B).

Body (Interior and Exterior) — Rear Seat / Rear Seat Cushion Cover / Removal and Installation / Removal illustration

Body (Interior and Exterior) — Rear Seat / Rear Seat Cushion Cover / Removal and Installation / Removal illustration

3.
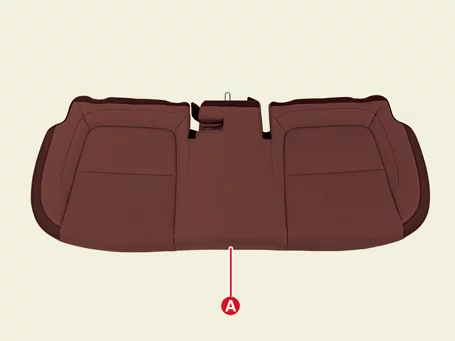
Remove the rear seat cushion cover (A).

Body (Interior and Exterior) — Rear Seat / Rear Seat Cushion Cover / Removal and Installation / Removal illustration

Installation
1.
Install in reverse order of removal.
Note    
Pull the cover evenly before assembling the hog ring clip to prevent fine wrinkles on the cover.

Rear Seat Back Cover Removal and Installation

Removal
Rear Seat Back Cover [Driver's side]
1.
Remove the rear seat back assembly [Driver's side].
(Refer to Rear Seat - "Rear Seat Assembly")
2.
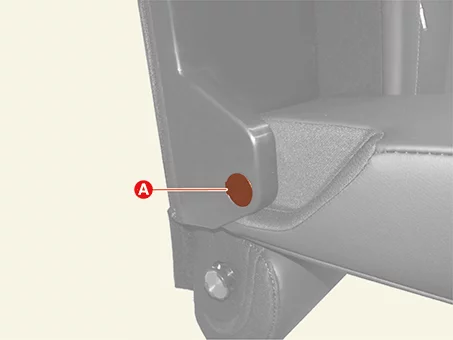
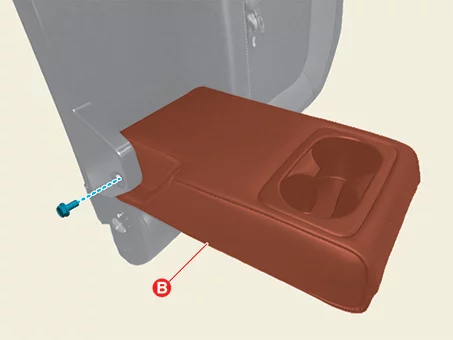
After removing the cap (A), Remove the rear back armrest (B) after removing the bolt.

Body (Interior and Exterior) — Rear Seat / Rear Seat Back Cover / Removal and Installation / Removal illustration

Body (Interior and Exterior) — Rear Seat / Rear Seat Back Cover / Removal and Installation / Removal illustration

3.
Remove the rear back armrest cover (A) after removing the screws.

Body (Interior and Exterior) — Rear Seat / Rear Seat Back Cover / Removal and Installation / Removal illustration

4.
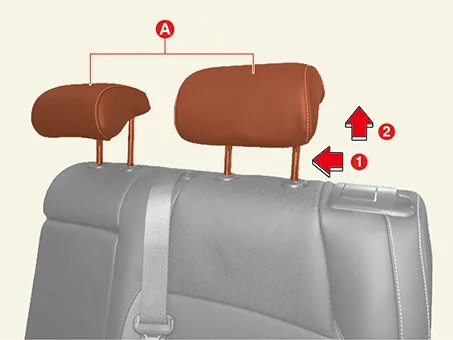
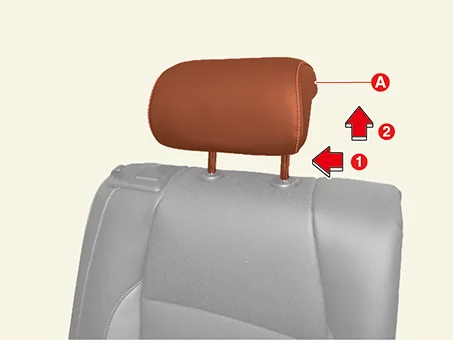
Remove the headrest (A) in the direction of the arrow.

Body (Interior and Exterior) — Rear Seat / Rear Seat Back Cover / Removal and Installation / Removal illustration

5.
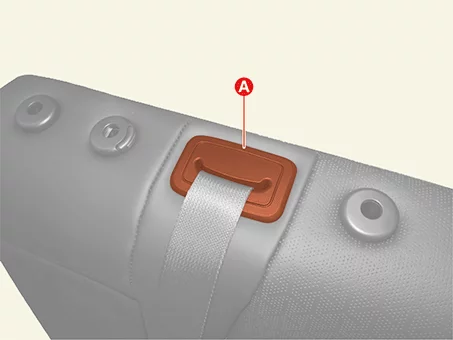
Remove the webbing guide (A).

Body (Interior and Exterior) — Rear Seat / Rear Seat Back Cover / Removal and Installation / Removal illustration

6.
After removing the cap (A), Remove the rear seat folding bezel (B) after removing the screw.

Body (Interior and Exterior) — Rear Seat / Rear Seat Back Cover / Removal and Installation / Removal illustration

Body (Interior and Exterior) — Rear Seat / Rear Seat Back Cover / Removal and Installation / Removal illustration

7.
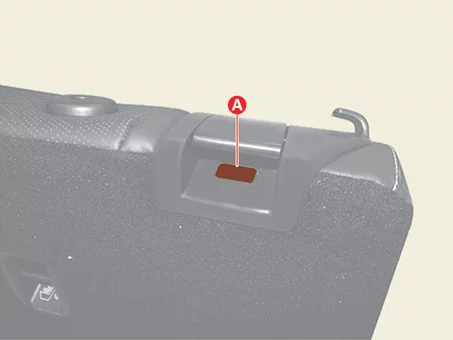
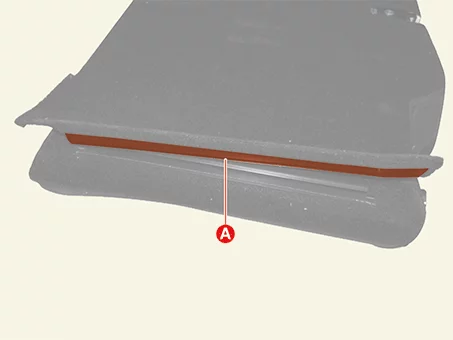
After removing the cap (A), Remove the rear seat back latch cover (B) after removing the screws.

Body (Interior and Exterior) — Rear Seat / Rear Seat Back Cover / Removal and Installation / Removal illustration

Body (Interior and Exterior) — Rear Seat / Rear Seat Back Cover / Removal and Installation / Removal illustration

8.
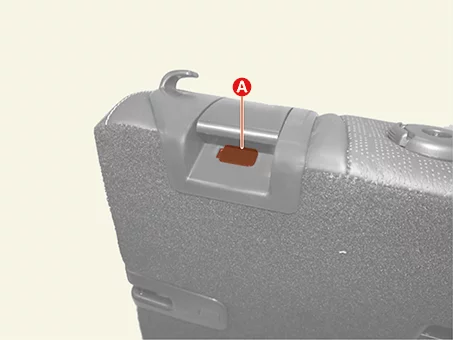
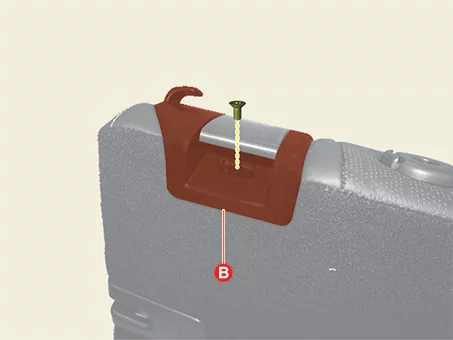
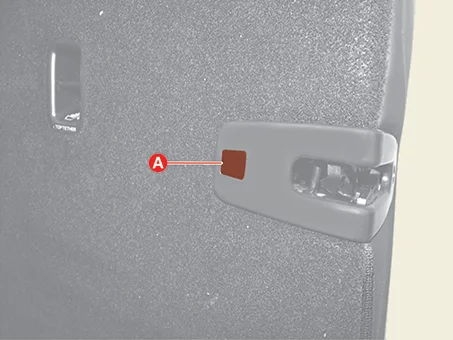
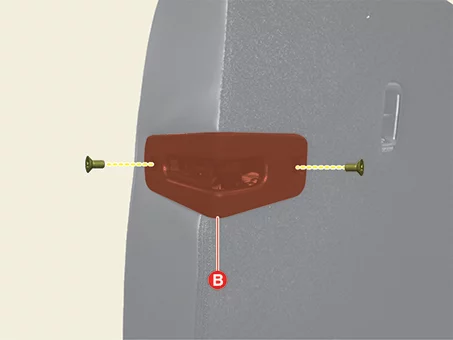
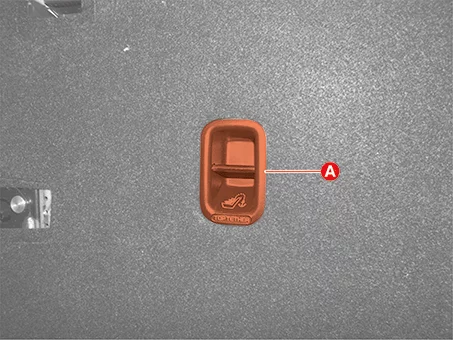
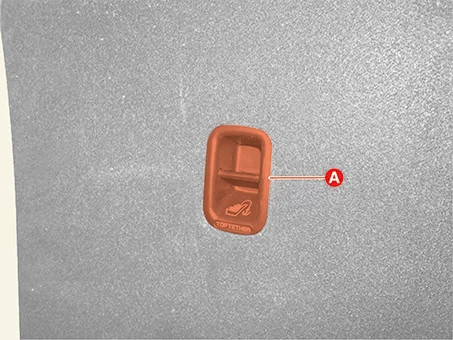
Remove the child anchor cover (A).

Body (Interior and Exterior) — Rear Seat / Rear Seat Back Cover / Removal and Installation / Removal illustration

9.
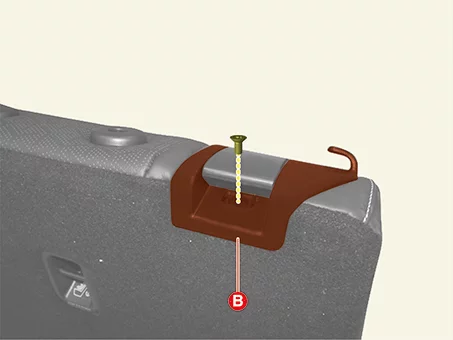
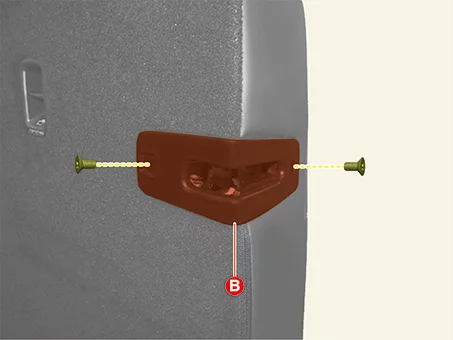
Remove the rear seat back protectors (A).

Body (Interior and Exterior) — Rear Seat / Rear Seat Back Cover / Removal and Installation / Removal illustration

Body (Interior and Exterior) — Rear Seat / Rear Seat Back Cover / Removal and Installation / Removal illustration

10.
Open the rear seat back zipper (A).

Body (Interior and Exterior) — Rear Seat / Rear Seat Back Cover / Removal and Installation / Removal illustration

11.
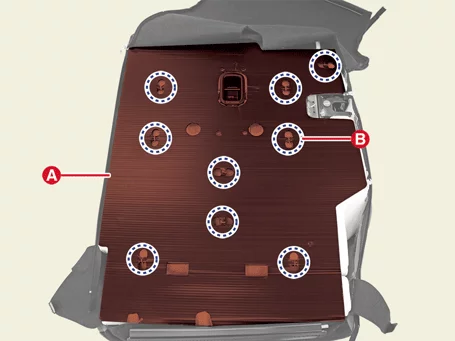
Remove the backboard (A) after removing the hog ring clips (B).

Body (Interior and Exterior) — Rear Seat / Rear Seat Back Cover / Removal and Installation / Removal illustration

12.
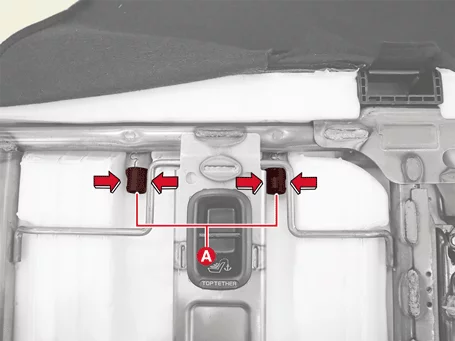
Press the locking pin and remove the headrest guide (A) in the direction of the arrow.

Body (Interior and Exterior) — Rear Seat / Rear Seat Back Cover / Removal and Installation / Removal illustration

Body (Interior and Exterior) — Rear Seat / Rear Seat Back Cover / Removal and Installation / Removal illustration

13.
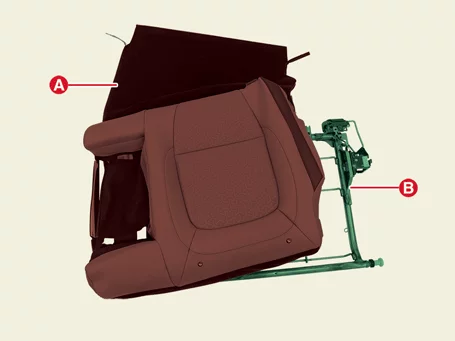
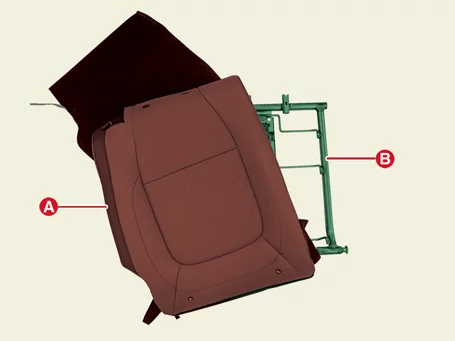
Remove the rear seat back assembly (A) from the rear seat back frame (B).

Body (Interior and Exterior) — Rear Seat / Rear Seat Back Cover / Removal and Installation / Removal illustration

14.
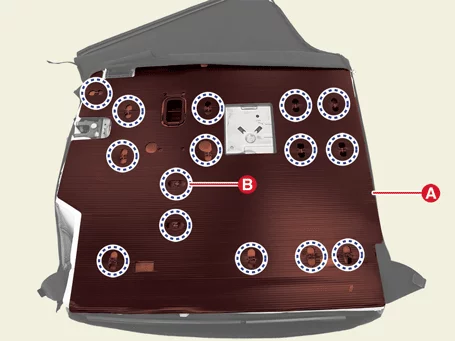
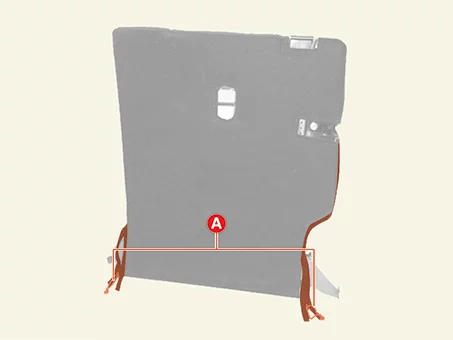
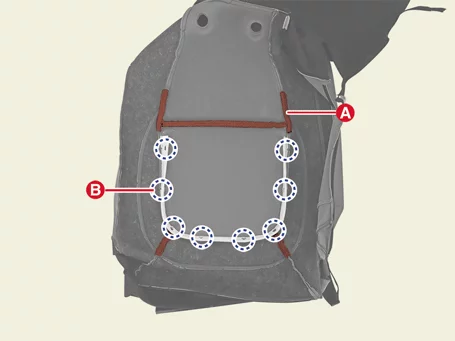
Remove the velcro tapes (A) and the hog ring clips (B).

Body (Interior and Exterior) — Rear Seat / Rear Seat Back Cover / Removal and Installation / Removal illustration

Body (Interior and Exterior) — Rear Seat / Rear Seat Back Cover / Removal and Installation / Removal illustration

15.
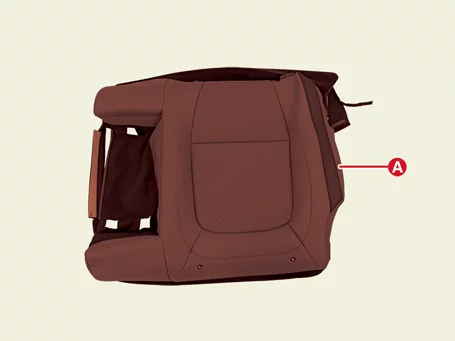
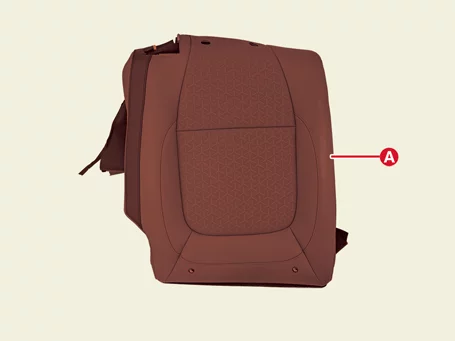
Remove the rear seat back cover (A) from the rear seat back pad.

Body (Interior and Exterior) — Rear Seat / Rear Seat Back Cover / Removal and Installation / Removal illustration

Rear seat back cover [Passenger's side]
1.
Remove the rear seat back assembly [Passenger's side].
(Refer to Rear Seat - "Rear Seat Assembly")
2.
Remove the headrest (A) in the direction of the arrow.

Body (Interior and Exterior) — Rear Seat / Rear Seat Back Cover / Removal and Installation / Removal illustration

3.
After removing the cap (A), Remove the rear seat folding bezel (B) after removing the screw.

Body (Interior and Exterior) — Rear Seat / Rear Seat Back Cover / Removal and Installation / Removal illustration

Body (Interior and Exterior) — Rear Seat / Rear Seat Back Cover / Removal and Installation / Removal illustration

4.
After removing the cap (A), Remove the rear seat back latch cover (B) after removing the screws.

Body (Interior and Exterior) — Rear Seat / Rear Seat Back Cover / Removal and Installation / Removal illustration

Body (Interior and Exterior) — Rear Seat / Rear Seat Back Cover / Removal and Installation / Removal illustration

5.
Remove the child anchor cover (A).

Body (Interior and Exterior) — Rear Seat / Rear Seat Back Cover / Removal and Installation / Removal illustration

6.
Remove the rear seat back protectors (A).

Body (Interior and Exterior) — Rear Seat / Rear Seat Back Cover / Removal and Installation / Removal illustration

Body (Interior and Exterior) — Rear Seat / Rear Seat Back Cover / Removal and Installation / Removal illustration

7.
Open the rear seat back zipper (A).

Body (Interior and Exterior) — Rear Seat / Rear Seat Back Cover / Removal and Installation / Removal illustration

8.
Remove the backboard (A) after removing the hog ring clips (B).

Body (Interior and Exterior) — Rear Seat / Rear Seat Back Cover / Removal and Installation / Removal illustration

9.
Press the locking pin and remove the headrest guide (A) in the direction of the arrow.

Body (Interior and Exterior) — Rear Seat / Rear Seat Back Cover / Removal and Installation / Removal illustration

Body (Interior and Exterior) — Rear Seat / Rear Seat Back Cover / Removal and Installation / Removal illustration

10.
Remove the rear seat back assembly (A) from the rear seat back frame (B).

Body (Interior and Exterior) — Rear Seat / Rear Seat Back Cover / Removal and Installation / Removal illustration

11.
Remove the velcro tapes (A) and the hog ring clips (B).

Body (Interior and Exterior) — Rear Seat / Rear Seat Back Cover / Removal and Installation / Removal illustration

Body (Interior and Exterior) — Rear Seat / Rear Seat Back Cover / Removal and Installation / Removal illustration

12.
Remove the rear seat back cover (A) from the rear seat back pad.

Body (Interior and Exterior) — Rear Seat / Rear Seat Back Cover / Removal and Installation / Removal illustration

Installation
1.
Install in reverse order of removal.

Rear Seat Latch Removal and Installation

Removal
Rear Seat Latch [Driver's side]
1.
Remove the rear seat back cover.
(Refer to Rear Seat - "Rear Seat Back Cover")
2.
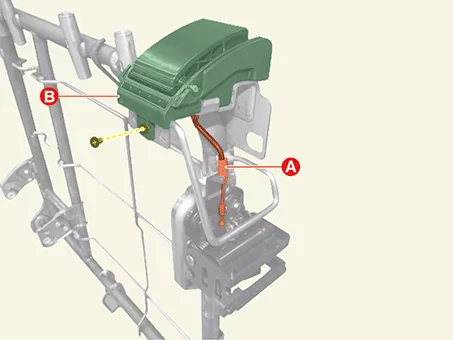
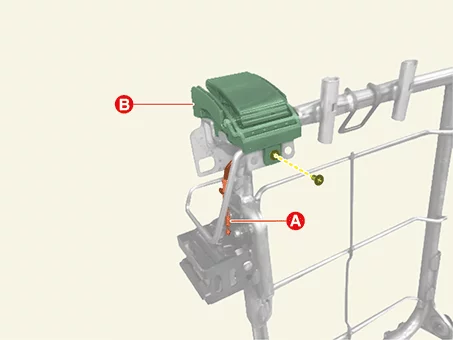
After separate the cable (A), Remove the rear seat folding lever (B) after removing screw.

Body (Interior and Exterior) — Rear Seat / Rear Seat Latch / Removal and Installation / Removal illustration

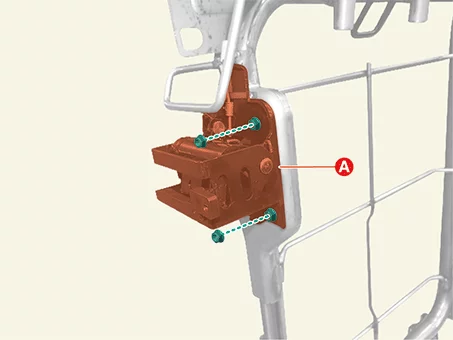
3.
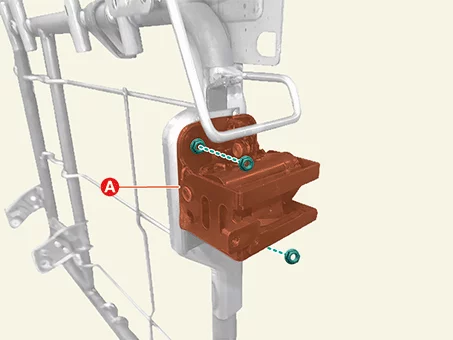
Remove the rear seat latch (A) after removing the nuts.

Tightening torque :
49 - 63.7 N·m (5.0 - 6.5 kgf·m, 36.2 - 47 lb·ft)

Body (Interior and Exterior) — Rear Seat / Rear Seat Latch / Removal and Installation / Removal illustration

Rear Seat Latch [Passenger Side]
1.
Remove the rear seat back cover.
(Refer to Rear Seat - "Rear Seat Back Cover")
2.
After separate the cable (A), Remove the rear seat folding lever (B) after removing screw.

Body (Interior and Exterior) — Rear Seat / Rear Seat Latch / Removal and Installation / Removal illustration

3.
Remove the rear seat latch (A) after removing the nuts.

Tightening torque :
49 - 63.7 N·m (5.0 - 6.5 kgf·m, 36.2 - 47 lb·ft)

Body (Interior and Exterior) — Rear Seat / Rear Seat Latch / Removal and Installation / Removal illustration

Installation
1.
Install in reverse order of removal.

Other information:

Kia Seltos SP2 (2021-2026) Service Manual: Smart key immobilizer system

The Kia Seltos smart key immobilizer system helps protect the vehicle from theft. If an incorrectly coded key or an unauthorized electronic device is used, the vehicle's power system may be disabled and the engine may not start. When the ENGINE START/STOP button is placed in the ON position, the immobilizer system indicator should illuminate briefly and then turn off.

Kia Seltos SP2 (2021-2026) Service Manual: General Safety Information and Caution

Precautions when repairing the SRS When repairing the SRS, pay attention to the following items.     If the items below are not observed, there is a possibility of serious injury due to unexpected airbag deployment, and the airbag may not operate.