Owner's library Kia Seltos Manuals Owner's manual pages, service notes, maintenance references and practical Kia Seltos help in one clean library.

Kia Seltos reference pages

Manuals, maintenance notes and quick owner help.

Find Kia Seltos operating instructions, warning light explanations, service information and owner guidance without digging through a full PDF.

Kia Seltos: Body (Interior and Exterior) / Rear Bumper

Contents:

Components and Components Location

Component

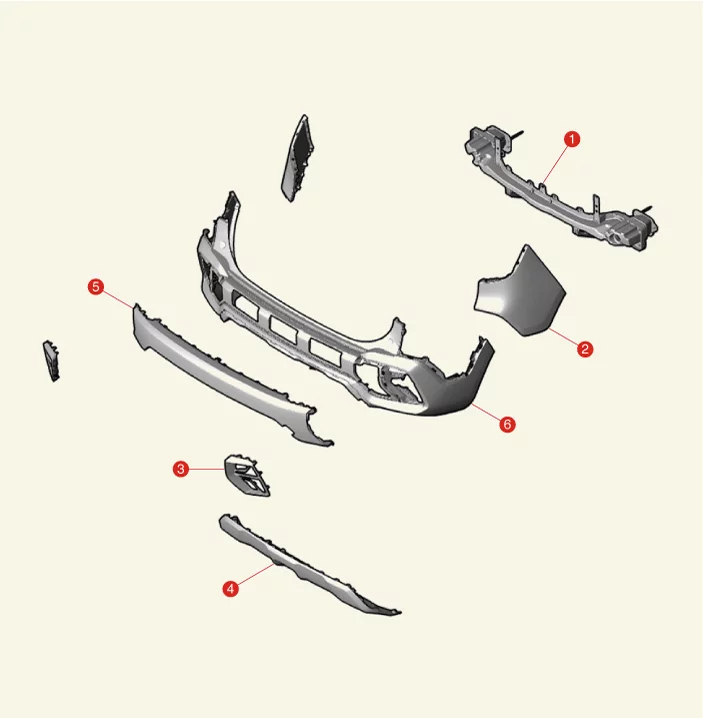
Body (Interior and Exterior) — Rear Bumper / Components and Components Location / Component illustration

1. Rear Bumper Beam Assembly
2. Rear Bumper Side Cover
3. Rear Bumper Fog Lamp Cover
4. Rear Bumper Skid Plate
5. Rear Bumper Center Molding
6. Rear Bumper Lower Cover

Rear Bumper Assembly Removal and Installation

Removal
1.
Remove the inside rear combination lamp.
(Refer to Body Electrical System - "Rear Combination Lamp")
2.
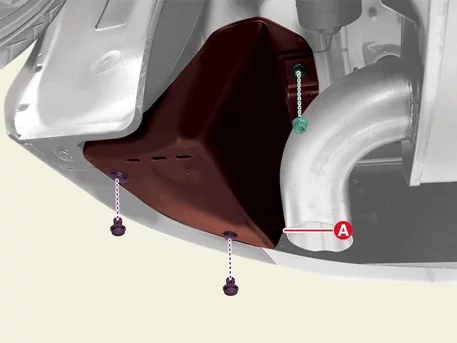
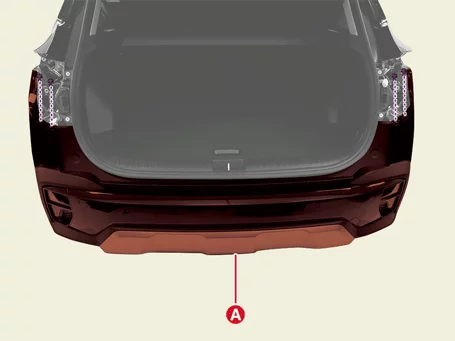
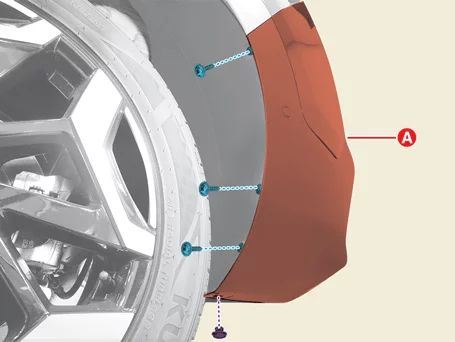
Remove the floor under cover (A) after removing clips and nut.

Body (Interior and Exterior) — Rear Bumper / Rear Bumper Assembly / Removal and Installation / Removal illustration

3.
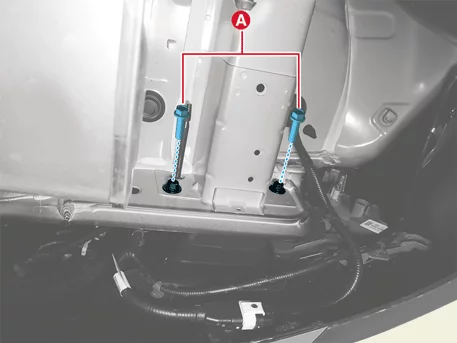
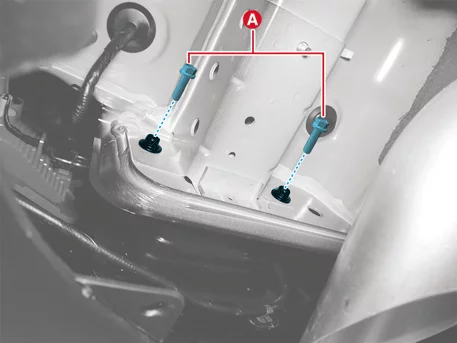
Remove the rear bumper assembly bolts (A).

Tightening torque :
15.7 - 23.5 N·m (1.6 - 2.4 kgf·m, 11.6 - 17.4 lb·ft)

Body (Interior and Exterior) — Rear Bumper / Rear Bumper Assembly / Removal and Installation / Removal illustration

Body (Interior and Exterior) — Rear Bumper / Rear Bumper Assembly / Removal and Installation / Removal illustration

4.
Remove the rear bumper (A) clips.

Body (Interior and Exterior) — Rear Bumper / Rear Bumper Assembly / Removal and Installation / Removal illustration

5.
Separate the left and right sides of rear bumper (A) after removing the screws and clip.

Body (Interior and Exterior) — Rear Bumper / Rear Bumper Assembly / Removal and Installation / Removal illustration

6.
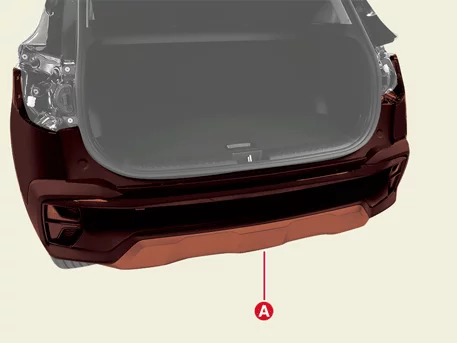
Remove the rear bumper assembly (A).

Body (Interior and Exterior) — Rear Bumper / Rear Bumper Assembly / Removal and Installation / Removal illustration

7.
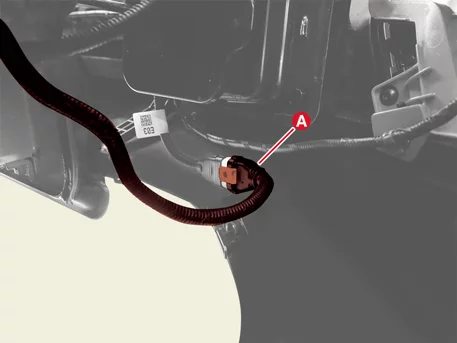
Remove the rear bumper connector (A).

Body (Interior and Exterior) — Rear Bumper / Rear Bumper Assembly / Removal and Installation / Removal illustration

Installation
1.
Install in reverse order of removal.
Note    
Rear Corner Radar Type
•
When installing the rear bumper, remove the foreign matter attached on the exterior/interior label of the rear bumper.
(If foreign matter attached in the exterior/interior label is not removed, rear corner radar may not work.)
•
Use only genuine parts to repair the rear bumper where the rear corner radar is located.
•
Do not use polyester putty containing metal component when painting the perimeter of the rear sight radar.
•
Rear bumper replacement or paint operation and repair around the rear corner radar may result in degradation radar system performance.
•
The system may not work properly if the rear corner radar is covered with foreign matters, such as snow, rain or dirt, etc.
•
The system may not work properly if the bumper around the rear corner radar is damaged or sensor is out of position caused by the impact.

Rear Bumper Assembly Disassembly and Reassembly

Disassembly
1.
Remove the rear bumper beam assembly.
(Refer to Rear Bumper - "Rear Bumper Beam Assembly")
2.
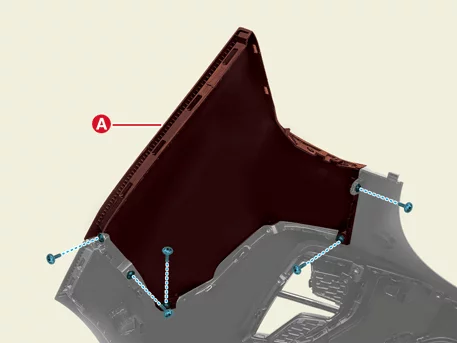
Remove the rear bumper side cover (A) after removing the screws.

Body (Interior and Exterior) — Rear Bumper / Rear Bumper Assembly / Disassembly and Reassembly / Disassembly illustration

3.
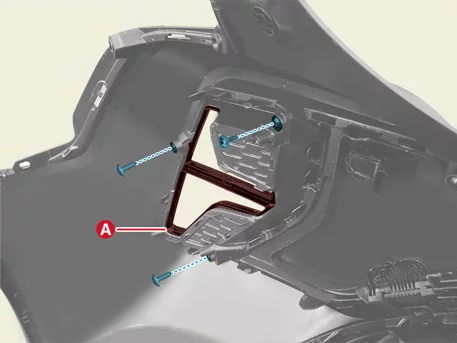
Remove the rear fog lamp cover (A) after removing the screws.

Body (Interior and Exterior) — Rear Bumper / Rear Bumper Assembly / Disassembly and Reassembly / Disassembly illustration

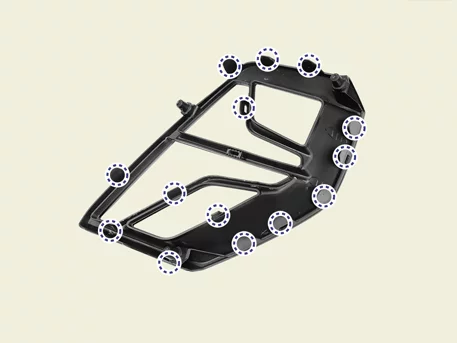
Body (Interior and Exterior) — Rear Bumper / Rear Bumper Assembly / Disassembly and Reassembly / Disassembly illustration

Information    
Clip position :

Body (Interior and Exterior) — Rear Bumper / Rear Bumper Assembly / Disassembly and Reassembly / Disassembly illustration

4.
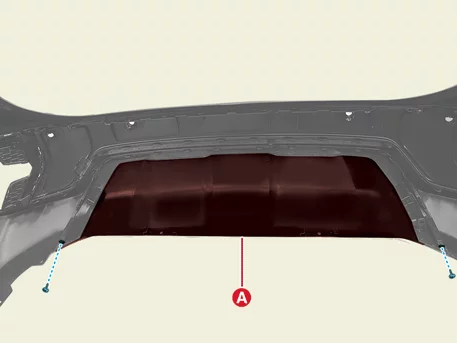
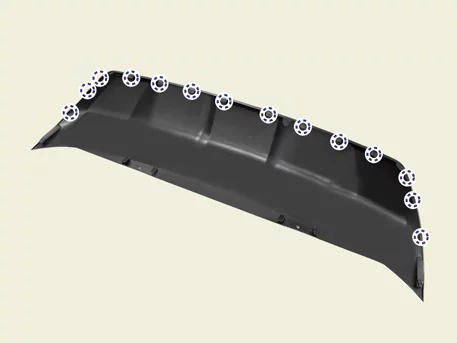
Remove the rear bumper skid plate (A) after removing the screws.

Body (Interior and Exterior) — Rear Bumper / Rear Bumper Assembly / Disassembly and Reassembly / Disassembly illustration

Body (Interior and Exterior) — Rear Bumper / Rear Bumper Assembly / Disassembly and Reassembly / Disassembly illustration

Information    
Clip position :

Body (Interior and Exterior) — Rear Bumper / Rear Bumper Assembly / Disassembly and Reassembly / Disassembly illustration

5.
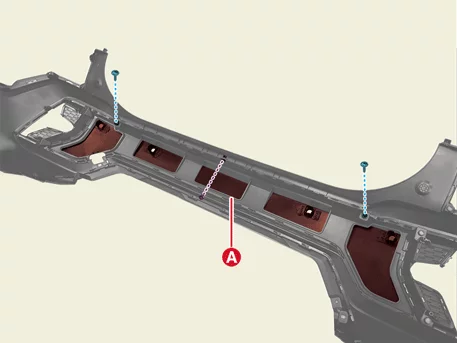
Remove the rear bumper center molding (A) after removing the screws and clips.

Body (Interior and Exterior) — Rear Bumper / Rear Bumper Assembly / Disassembly and Reassembly / Disassembly illustration

Body (Interior and Exterior) — Rear Bumper / Rear Bumper Assembly / Disassembly and Reassembly / Disassembly illustration

Information    
Clip position :

Body (Interior and Exterior) — Rear Bumper / Rear Bumper Assembly / Disassembly and Reassembly / Disassembly illustration

Reassembly
1.
Install in reverse order of removal.

Rear Bumper Beam Assembly Removal and Installation

Removal
1.
Remove the rear bumper assembly.
(Refer to Rear Bumper - "Rear Bumper Assembly")
2.
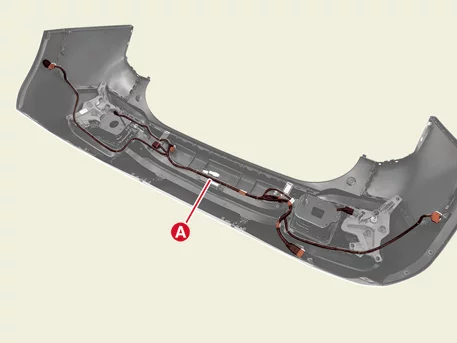
Remove the rear bumper wiring harness (A).

Body (Interior and Exterior) — Rear Bumper / Rear Bumper Beam Assembly / Removal and Installation / Removal illustration

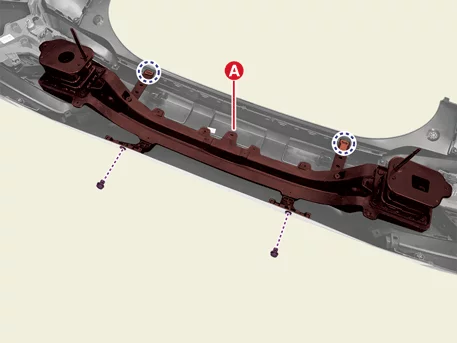
3.
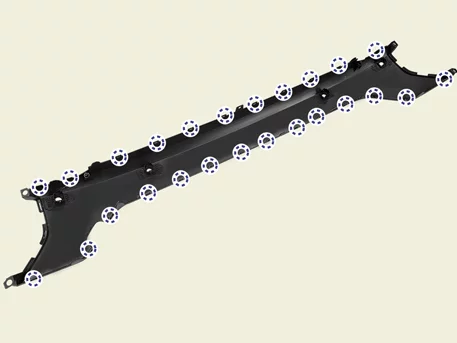
Remove the rear bumper beam assembly (A) after removing the clips.

Body (Interior and Exterior) — Rear Bumper / Rear Bumper Beam Assembly / Removal and Installation / Removal illustration

Information    
Clip position :

Body (Interior and Exterior) — Rear Bumper / Rear Bumper Beam Assembly / Removal and Installation / Removal illustration

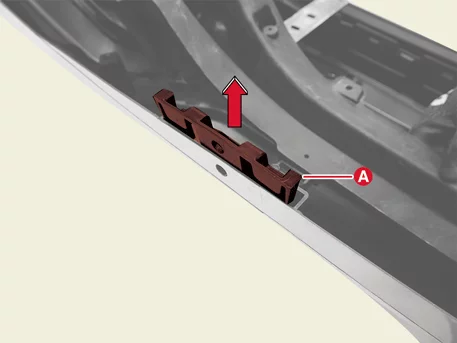
Information    
Remove the rear bumper beam (A) from the bracket in the direction of the arrow.

Body (Interior and Exterior) — Rear Bumper / Rear Bumper Beam Assembly / Removal and Installation / Removal illustration

Installation
1.
Install in reverse order of removal.

Other information:

Kia Seltos SP2 (2021-2026) Service Manual: Seats

Front seat Forward and backward Seatback angle Seat cushion tilt Seat cushion height Lumbar support* Headrest Rear seat Seat back folding/reclining adjustment Headrest WARNING Loose objects Loose objects in the driver's foot area may interfere with proper operation of the brake or accelerator pedal, which could lead to an accident.

Kia Seltos SP2 (2021-2026) Service Manual: Piston and Connecting Rod Inspection

Inspection The connecting rods. 1. Check the connecting rod side clearance. Using a feeler gauge, measure the end play while moving the connecting rod back and forth. • If out-of-tolerance, install a new connecting rod.