
Kia Seltos: Body Electrical System / Indicators And Gauges
Contents:
- Cluster Troubleshooting
- Cluster On Vehicle Inspection
- Cluster Terminal Function
- Cluster Removal and Installation
Cluster Troubleshooting
| Troubleshooting |
| TFT - LCD Screen Does Not Turn On |
| Check List |
Detailed Inspections |
Components |
||||||||||
|
|
Connectors, Wiring, Fuses, Instrument cluster |
| Airbag Warning Lamp Malfunction |
| Check List |
Detailed Inspections |
Components |
||||||||||
|
|
ACU Connectors, Wiring, Fuses, Instrument cluster |
| Integrated Driving Mode Malfunction |
| Check List |
Detailed Inspections |
Components |
||||||||||||
|
|
Switch connector, Wiring, Instrument cluster |
| No Alarm |
| Check List |
Detailed Inspections |
Components |
||||||||||
|
|
Speaker connectors, Wiring, Instrument cluster |
| Faulty Fuel Gauge Indication |
| Check List |
Detailed Inspections |
Components |
||||||||||
|
|
Fuel sender connector, Wiring, Instrument cluster |
Cluster On Vehicle Inspection
| On Vehicle Inspection |
| Visual Inspection |
| 1. |
Check point (Warning lamp)
|



























| 2. |
Check point (Gauge)
|
| Diagnosis with KDS |
| 1. |
The cluster can be more quickly diagnosed for problems with the KDS (Refer to "DTC guide").
|
Refer to the KDS screen for operating conditions and details.
|
Cluster Terminal Function
| Connector and Terminal Function |
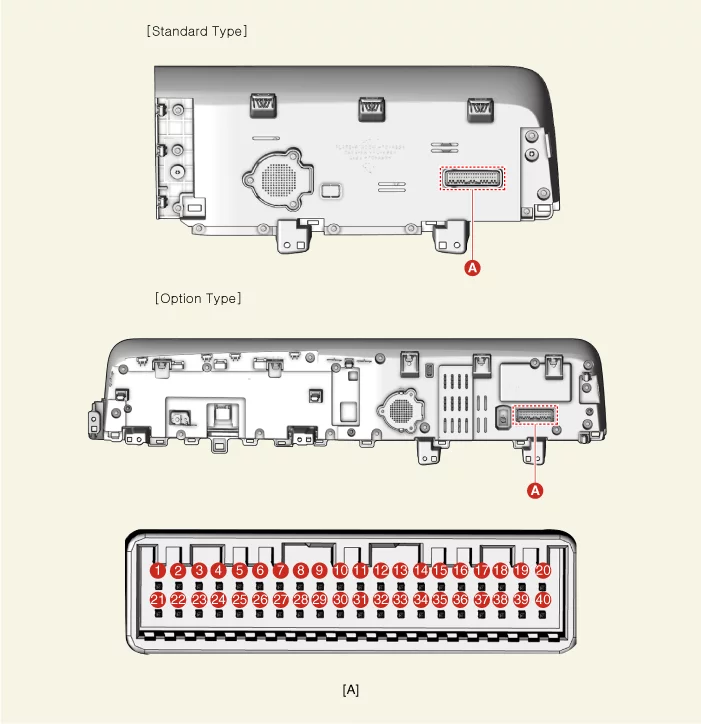
| Terminal |
Connector A |
||
|
Function |
Terminal |
Function |
|
|
1 |
Ground |
21 |
Trip switch ( - ) input |
|
2 |
Illumination ( - ) |
22 |
Trip switch 1 ( + ) input |
|
3 |
Rheostat switch (Down) Input |
23 |
Trip switch 2 ( + ) input |
|
4 |
Rheostat switch (UP) input |
24 |
Grip control switch ( + ) input |
|
5 |
Detent |
25 |
Grip control switch ( - ) input |
|
6 |
AT ('P' Position) |
26 |
- |
|
7 |
AT ('R' Position) |
27 |
- |
|
8 |
AT ('N' Position) |
28 |
- |
|
9 |
AT ('D' Position) |
29 |
M-CAN (Low) |
|
10 |
AT ('S' Position) |
30 |
M-CAN (High) |
|
11 |
- |
31 |
- |
|
12 |
Vehicle speed (output) |
32 |
C-CAN (High) |
|
13 |
Alternator (Input) |
33 |
C-CAN (Low) |
|
14 |
Fuel sender ( + ) input |
34 |
- |
|
15 |
- |
35 |
- |
|
16 |
Fuel sender ( - ) input |
36 |
- |
|
17 |
- |
37 |
Ground |
|
18 |
Airbag warning lamp |
38 |
- |
|
19 |
Oil press switch (Input) |
39 |
IG 1 |
|
20 |
- |
40 |
Battery (+) |
Cluster Removal and Installation
| Removal |
| 1. |
Disconnect the negative ( - ) battery terminal.
|
| 2. |
Remove the crash pad center garnish.
(Refer to Body - "Crash Pad Garnish")
|
| 3. |
Remove the front center speaker grille.
|
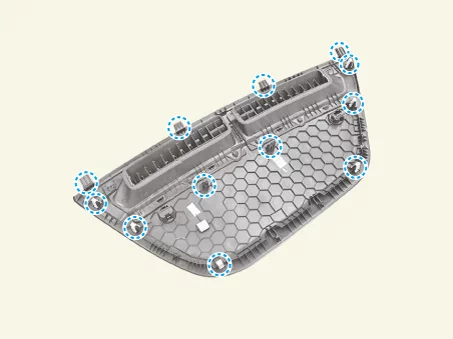

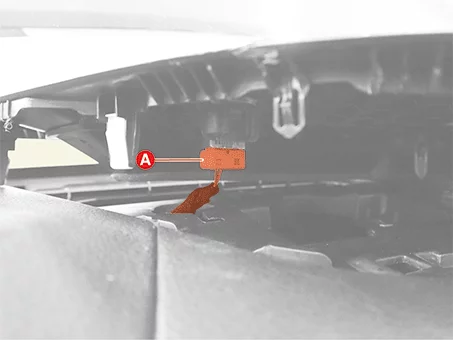
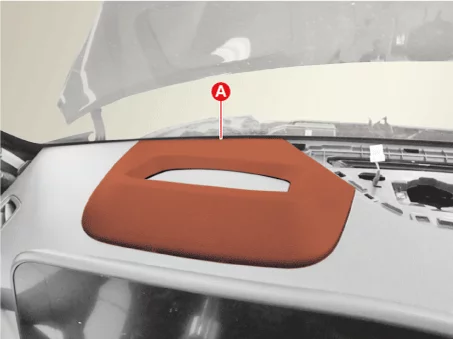
| 4. |
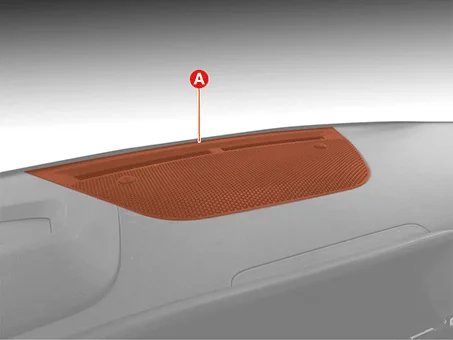
Remove the Head-Up Display (HUD) cover (A) by using the remover.
|
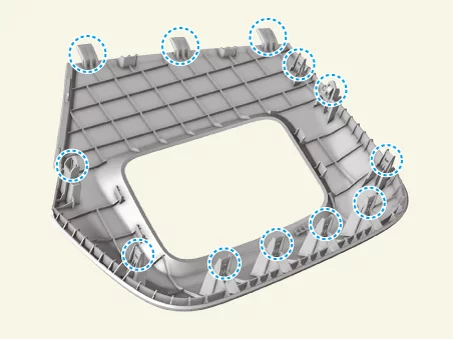
| 5. |
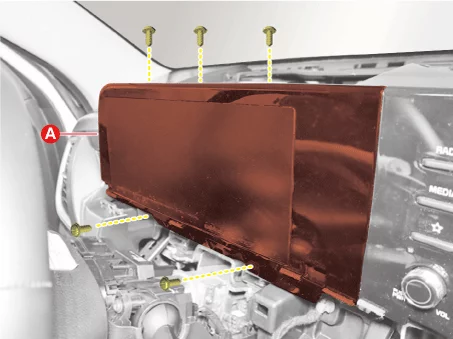
Remove the cluster (A) after removing the screws.
|
| 6. |
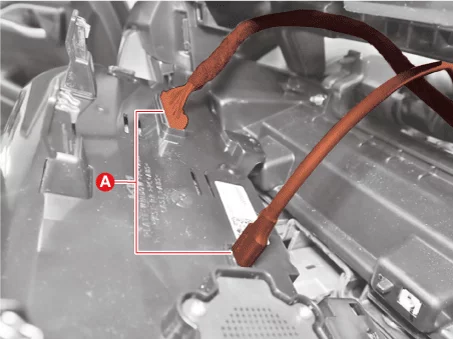
Disconnect the cluster connectors (A).
|
| 1. |
Disconnect the negative ( - ) battery terminal.
|
| 2. |
Remove the center air vent.
(Refer to Body - "Crash Pad Air Vent")
|
| 3. |
Remove the front center speaker grille.
|
| 4. |
Remove the Head-Up Display (HUD) unit cover (A).
|
| 5. |
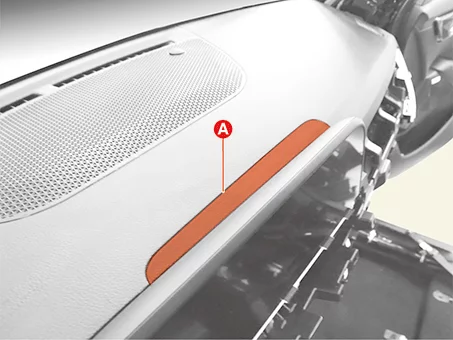
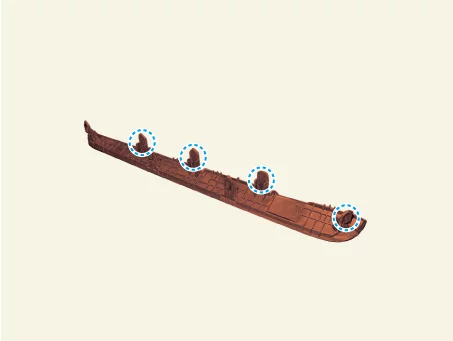
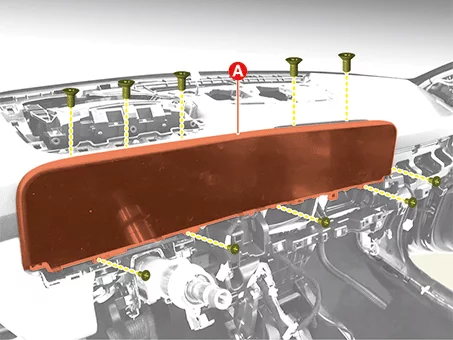
Remove the center fascia upper panel (A) by using the remover.
|
| 6. |
Remove the cluster (A) after removing the mounting screws.
|
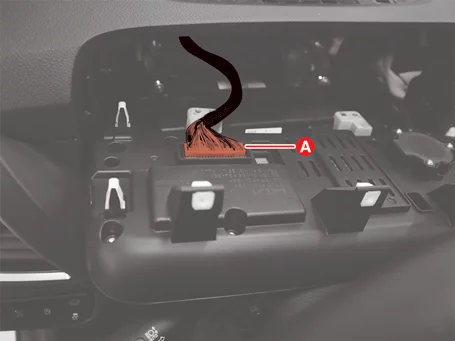
| 7. |
Disconnect the cluster connector (A), (B).
|
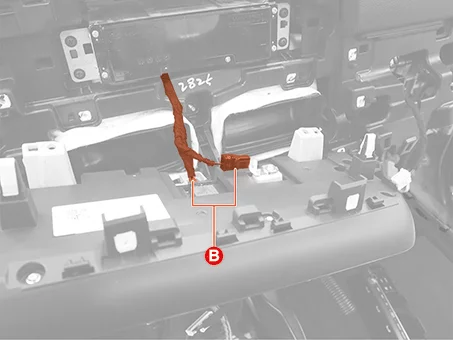
| Installation |
| 1. |
Install in reverse order of removal.
|
| 2. |
Perform the order below with the KDS when replacing the cluster.
(S/W Management → Cluster Module → CLU Variant Coding)
(S/W Management → Cluster Module → Setting mileage)
|


Other information:
Kia Seltos SP2 (2021-2026) Service Manual: Vehicle load limit
The vehicle load limit for the Kia Seltos is shown on the tire and loading information label located on the driver's door area. Tire and loading information label The label on the driver's door sill shows the original tire size, the recommended cold tire pressures, the maximum number of occupants, and the vehicle capacity weight for your Kia Seltos.