
Kia Seltos: Steering System / Motor Driven Power Steering (MDPS)
Contents:
- Components and Components Location
- Troubleshooting
- Adjustment
- MDPS Column & Housing On Vehicle Inspection
- MDPS Column & Housing Removal and Installation
- MDPS Column & Housing Disassembly and Reassembly
- Universal Joint Assembly On Vehicle Inspection
- Universal Joint Assembly Removal and Installation
- Steering Gear Box Removal and Installation
- Steering Gear Box Disassembly and Reassembly
- Tie Rod End Removal and Installation
Components and Components Location
| Components and Components Location |
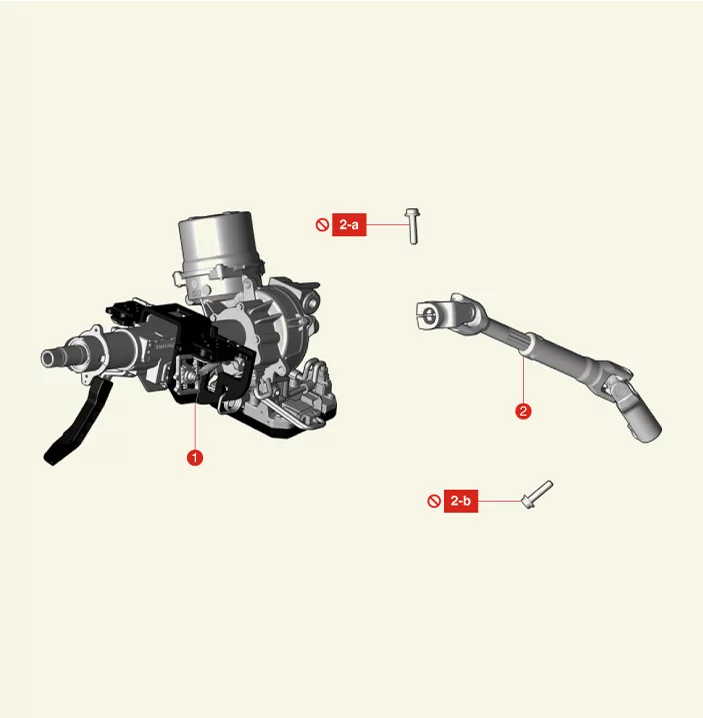
| 1. MDPS Column & Housing |
2. Universal Joint Assembly 2-a. 49.0 - 52.0 N·m (5.0 - 5.3 kgf·m, 36.2 - 38.3 lb·ft) 2-b. 49.0 - 58.8 N·m (5.0 - 6.0 kgf·m, 36.2 - 43.4 lb·ft) |
Troubleshooting
| Troubleshooting |
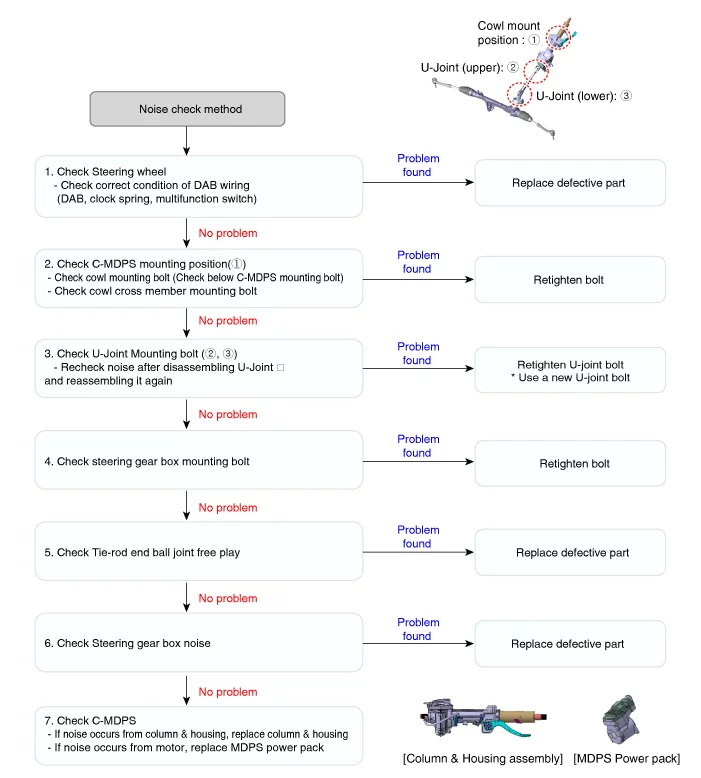
|
Symptoms |
Possible causes and Inspection |
Repair method |
||
| Abnormal noise |
1. An abnormal noise from MDPS column and housing |
– |
Column & housing partial part exchange |
|
| – Check for the same noise after removing surrounding parts |
– |
Replace motor when checking motor noise |
||
| Abnormal noise |
1. Check the handle and surrounding parts |
Check the noise from the parts |
||
| – Check for DAB wiring harness and DAB, clock spring, multi-function switch |
– |
Check the parts |
||
| 2. C - MDPS mounting check |
Check the cowl for mounting condition |
|||
| – |
Remove the cowl mounting bolt, then reassemble it |
|||
|
(C-MDPS lower end fixing through-bolt included |
||||
| 3. Check the universal joint mounting bolt |
If the bolt is worn, replace the universal joint mounting bolt |
|||
|
– |
After removing and installing the universal joint completely, check the noise again. |
|||
| 4. check the column moves when steering while the vehicle is stopped |
Secure clearance between parts |
|||
|
– |
Check the main wiring connected to MDPS / Spacing between parts around shroud/ Check friction |
– |
Check the wiring and column for moves and clearance between parts |
|
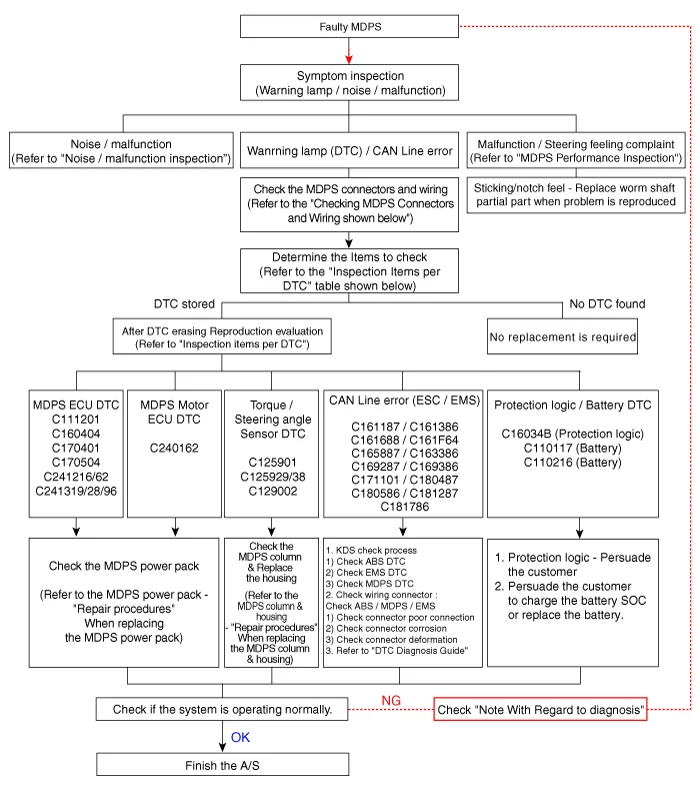
|
DTC |
Possible Cause |
Inspection |
Correction |
|
C111201 |
Abnormal torque sensor power supply |
Check the connector connection after erasing DTC |
If DTC reoccurs, replace MDPS. |
|
C11121C |
Abnormal motor position sensor power supply |
Check the connector connection after erasing DTC |
If DTC reoccurs, replace MDPS. |
| C125901 |
Abnormal Steering Angle Sensor (SAS) signal |
Erase DTC after performing 'Steering Angle Sensor(SAS) Calibration' Check the connector connection |
If DTC reoccurs, replace MDPS column and housing. |
| C126154 |
Abnormal SAS signal |
Erase DTC after performing 'Steering Angle Sensor(SAS) Calibration' Check the sensor connector connection |
Perform 'Steering Angle Sensor(SAS) Calibration' or If DTC reoccurs, replace MDPS column and housing. |
| C129002 |
Abnormal torque sensor signal |
Check after erasing DTC Check the sensor connector connection |
If DTC reoccurs, replace MDPS column and housing. |
|
C160404 |
ECU hardware error |
Check after erasing DTC |
If DTC reoccurs, replace MDPS. |
|
C171101 |
ECU abnormal termination |
Check after erasing DTC |
If DTC reoccurs, replace MDPS. |
|
C161386 |
Abnormal engine signal |
1. Check chassis CAN connection / status 2. Check connectors mounting status 3. Check engine ECU 4. Check the engine stop history while driving |
Erase DTC If DTC reoccurs, replace MDPS. |
|
C161487 |
VCU6 CAN message not received |
||
|
C161688 |
CAN communication circuit error |
||
|
C161187 |
EMS CAN message not received |
||
|
C162286 |
Abnormal vehicle speed signal |
||
|
C162887 |
Cluster CAN message not received |
Check cluster connector connection |
|
|
C163386 |
Abnormal cluster vehicle speed signal |
||
|
C169287 |
VSM CAN message not received |
Check ESC, chassis CAN |
|
|
C169386 |
Abnormal VSM signal |
||
|
C170004 |
NVM check error |
Check after erasing DTC |
|
|
C170255 |
Tuning map data error |
Check tuning map data |
|
|
C170504 |
ECU pre-charge circuit error |
Check after erasing DTC |
|
|
C180287 |
VCU1 CAN message not received |
Check CAN line |
|
|
C180487 |
LKA CAN message not received |
Check LKA, CAN line |
|
|
C180586 |
Abnormal LKA signal |
||
|
C180687 |
MCU CAN message not received |
Check CAN line |
|
|
C181287 |
Gateway CAN message not received |
Check gateway |
|
|
C181786 |
Abnormal P_STS signal |
||
|
C240162 |
Abnormal motor position sensor |
Check after erasing DTC |
If DTC reoccurs, replace MDPS. |
| C241216 |
Open or shorted motor circuit |
Check after erasing DTC |
Replace MDPS |
|
C241319 |
Motor current error |
Check after erasing DTC |
If DTC reoccurs, replace MDPS. |
| 1. |
Internal damage may occur if parts fall, impact, or excessive load occurs.
→ If it is dropped or impacted, replace it with a new one.
|
| 2. |
Tightening the steering wheel with excessive force can distort the center of the torque sensor.
→ Tighten with specified torque.
|
| 3. |
Be careful not to apply excessive force as the wiring may be damaged by deformation when
attaching/detaching the connector.
→ Do not use excessive connector insertion/removal.
|
| 4. |
Careful storage and replacement of partial parts under abnormal temperature and humidity conditions.
|
Adjustment
| Diagnosis with KDS |
Refer to the KDS screen for operating conditions and details
|

Refer to the KDS screen for operating conditions and details
|
Refer to the KDS screen for operating conditions and details
|
MDPS Column & Housing On Vehicle Inspection
| On Vehicle Inspection |
| 1. |
the MDPS system can be more quickly diagnosed for problems with the KDS (Refer to "DTC guide").
|
| 2. |
Check the steering column for damage or deformation.
|
| 3. |
Check the universal joint for damage or wear.
|
| 4. |
Check the tilt bracket for damage or crack.
|
MDPS Column & Housing Removal and Installation
| Removal |
| 1. |
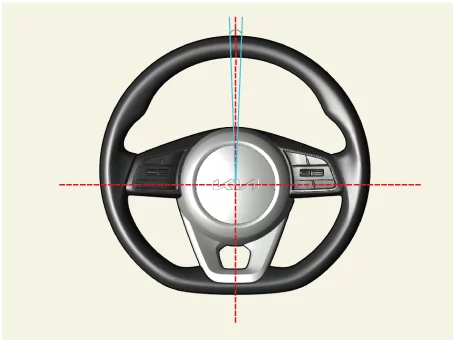
Align the steering wheel in a straight-ahead position using a digital level or other equivalent tools.
|
| 2. |
Disconnect the battery negative ( - ) terminal.
|
| 3. |
Remove the steering wheel
(Refer to Steering System - "Steering Wheel")
|
| 4. |
Remove the multifunction switch
(Refer to Body Electrical System - "Multifunction Switch")
|
| 5. |
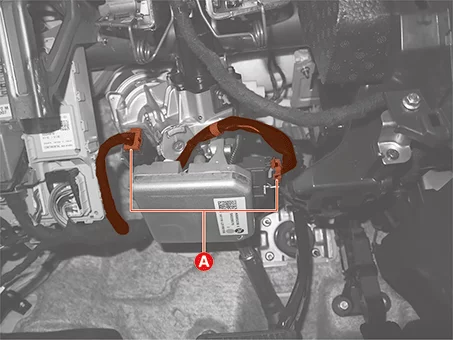
Disconnect the MDPS connectors (A).
|
| 6. |
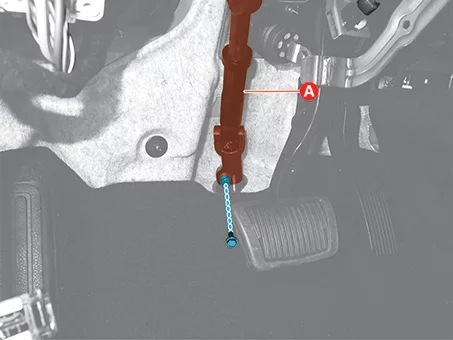
Remove the universal joint bolt (A), and separate the universal joint from the steering gear box.
|

| 7. |
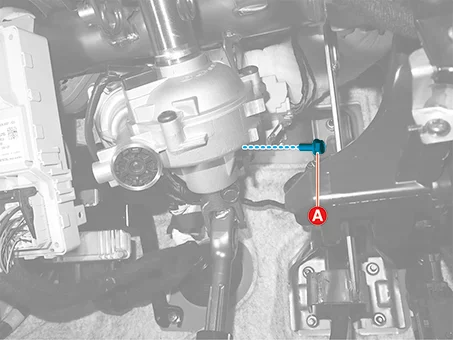
Remove the MDPS column & housing lower bolt (A).
|
| 8. |
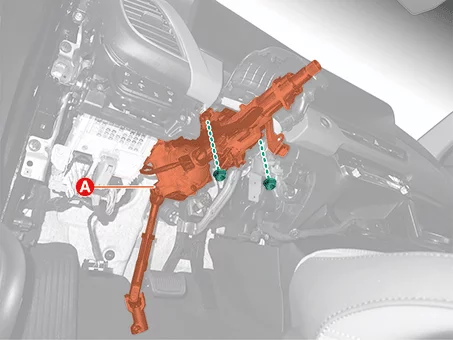
Remove the MDPS column & housing (A) after removing the upper nuts.
|
| Installation |
| 1. |
Install in reverse order of removal.
|
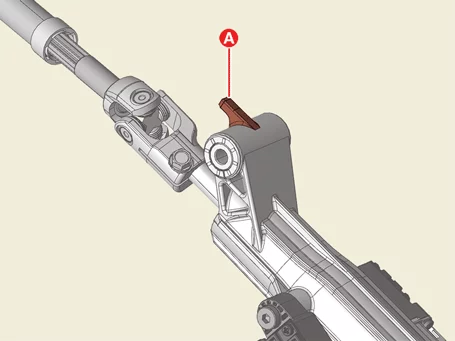
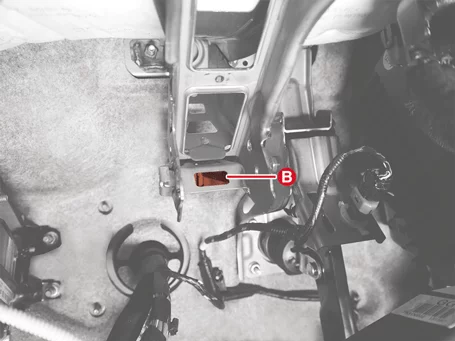
| 2. |
Perform the 'EPS type recognition', 'Steering Angle Sensor(SAS) Calibration' by using KDS.
(Refer to Motor Driven Power Steering (MDPS) - "Adjustment")
|
MDPS Column & Housing Disassembly and Reassembly
| Disassembly |
| 1. |
Remove the universal joint assembly (A) after removing the bolt.
|
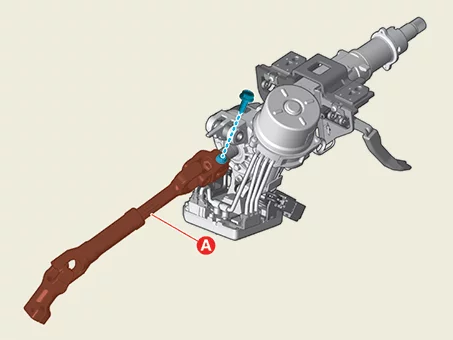
| Reassembly |
| 1. |
Reassemble in reverse order of disassembly.
|
| 2. |
Erase the DTC, and perform the "Steering Angle Sensor (SAS) calibration" by using the KDS.
(Refer to Motor Driven Power Steering (MDPS) - "Adjustment")
|
| 3. |
Check the steering feel and abnormal noise to ensure it is operating normally.
|
Universal Joint Assembly On Vehicle Inspection
| On Vehicle Inspection |
| 1. |
Check the universal joint bearing for damage or wear.
|
| 2. |
Check whether the universal joint bolt is tightened.
|
Universal Joint Assembly Removal and Installation
| Removal |
| 1. |
Align the steering wheel in a straight-ahead position using a digital level or other equivalent tools.
|
| 2. |
Disconnect the battery negative ( - ) terminal.
|
| 3. |
Fix the steering wheel by using a tool such as a steering wheel holder.
|
| 4. |
Remove the driver side crash pad lower panel.
(Refer to Body - "Crash Pad")
|
| 5. |
Remove the bolt, and then separate the universal joint (A) from the steering gear box.
|
| 6. |
Remove the bolt, and then remove the universal joint assembly (A).
|
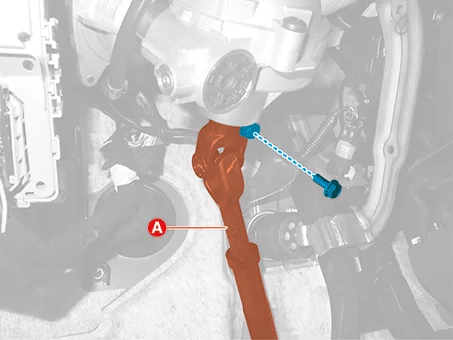
| Installation |
| 1. |
Install in reverse order of removal.
|
| 2. |
Perform the 'Steering Angle Sensor(SAS) Calibration' and 'Set the steering feel torque to zero'.
(Refer to Motor Driven Power Steering (MDPS) - "Adjustment")
|
Steering Gear Box Removal and Installation
| Special Service Tool |
|
Tool Name / Number |
Illustration |
Description |
|
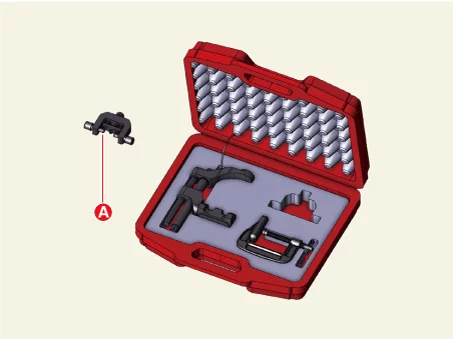
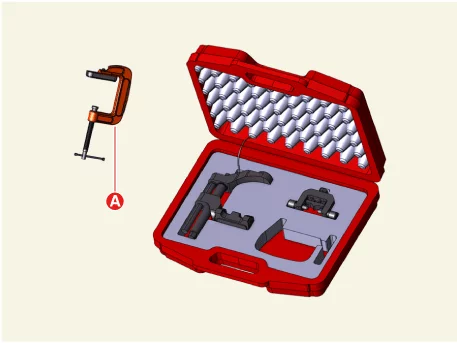
Ball joint puller 09568 - 1S100 |
|
Used for removal of tie rod end |
|
Ball joint puller 0K545 - A9100 |
|
Used for removal of front lower arm ball joint |
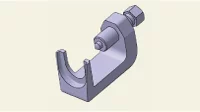
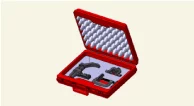
| Removal |
| 1. |
Align the steering wheel in a straight-ahead position using a digital level or other equivalent tools.
|
| 2. |
Fix the steering wheel by using a tool such as a steering wheel holder.
|
| 3. |
Remove the bolt, and then separate the universal joint (A) from the steering gear box.
|
| 4. |
Remove the front wheel and tires.
(Refer to Suspension System - "Wheel")
|
| 5. |
Separate the stabilizer bar link from the front strut assembly after removing the nut (A).
|
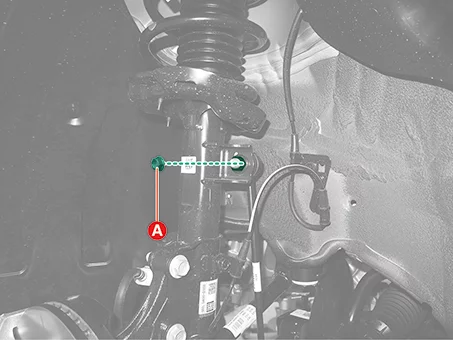
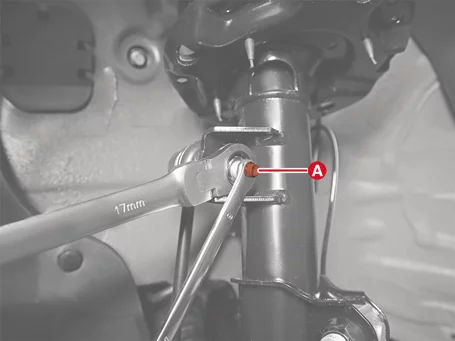
| 6. |
Separate the lower arm ball joint from the front axle.
|
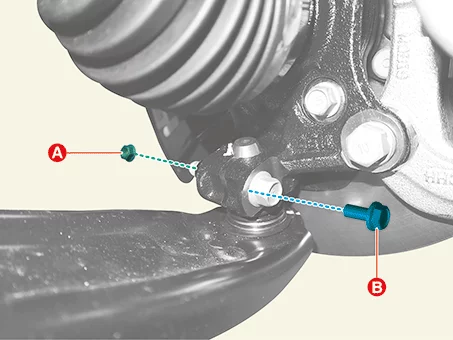
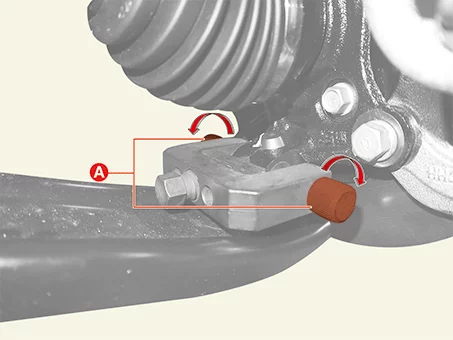
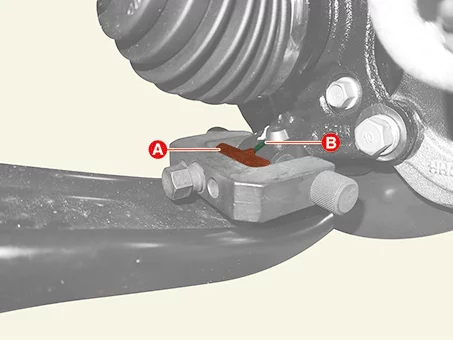
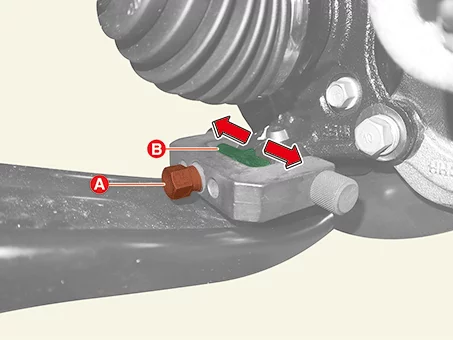
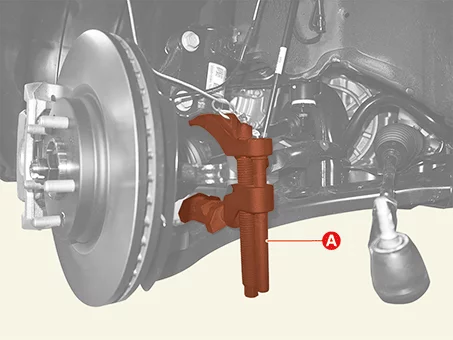
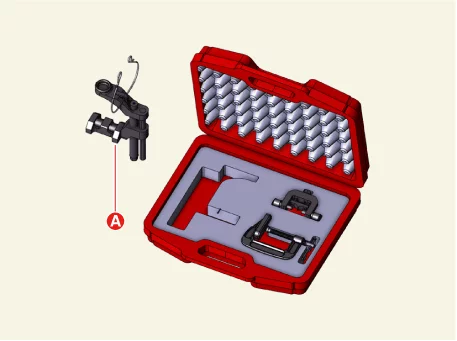
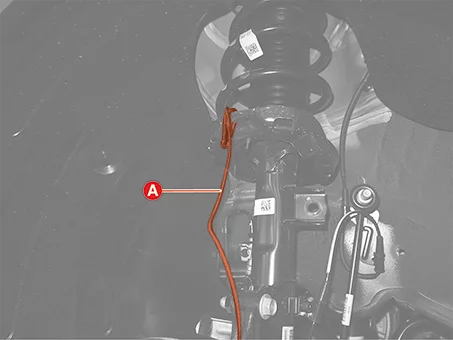
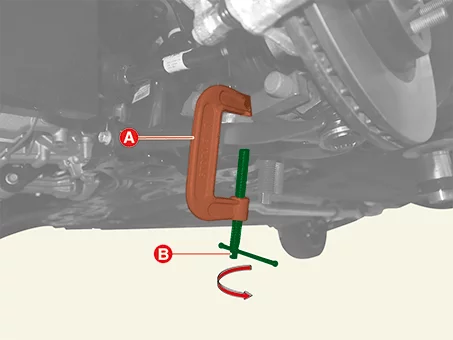
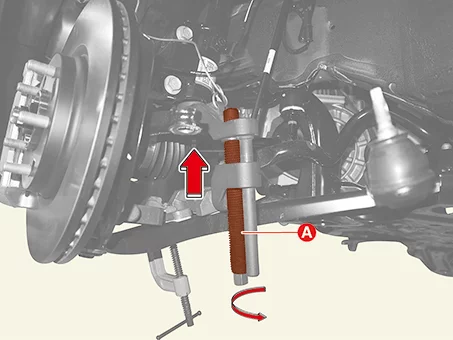
| 7. |
Separate the tie rod end ball joint from the front axle.
|
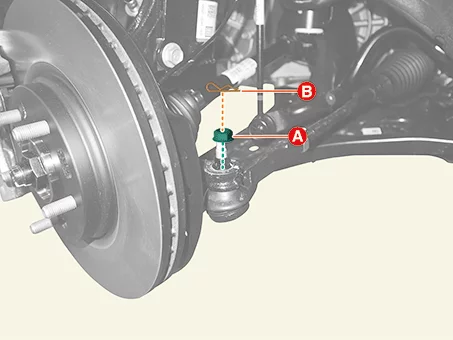
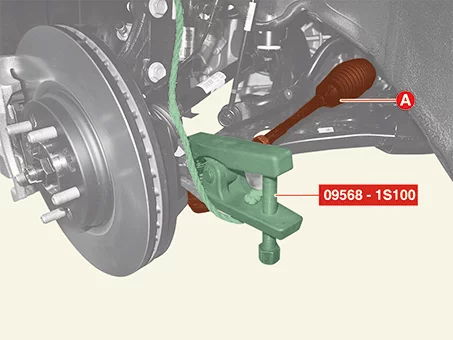
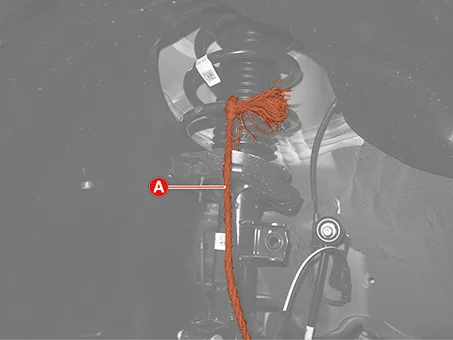
| 8. |
Remove the engine room rear under cover (A) after removing the nuts.
|
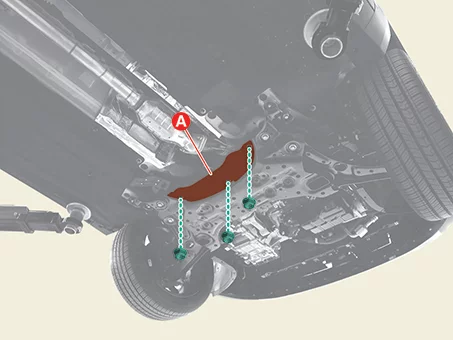
| 9. |
Remove the engine room under cover.
G 1.6 MPI GAMMA (Refer to Engine Mechanical System - "Engine Room Under
Cover")
G 1.6 T-GDI GAMMA II (Refer to Engine Mechanical System - "Engine Room
Under Cover")
G 2.0 MPI NU (Refer to Engine Mechanical System - "Engine Room Under
Cover")
|
| 10. |
Remove the bolt (A), and then separate the roll rod bracket from the roll rod support bracket.
|
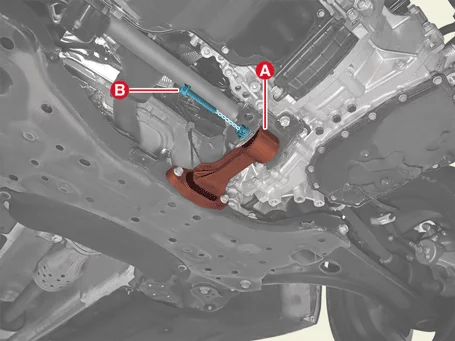
| 11. |
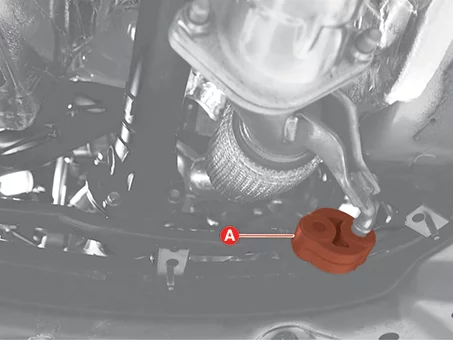
Remove the muffler rubber hanger (A) from the front sub frame.
|
| 12. |
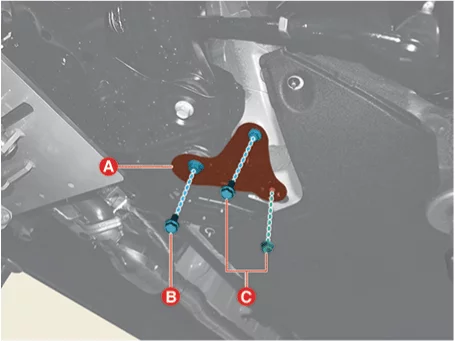
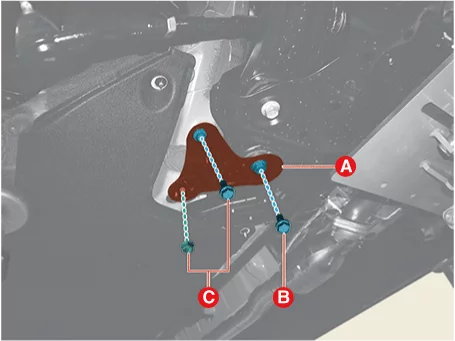
Remove the front sub frame stay (A).
[LH]
[RH]
|
| 13. |
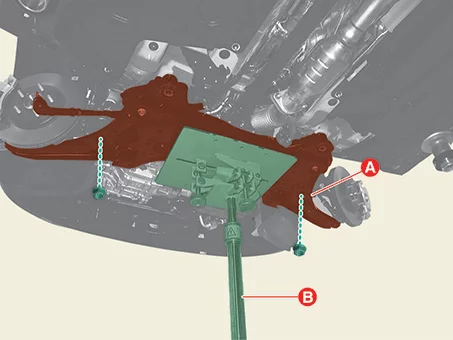
Support the front sub frame (A) with the jack (B) such as the transmission jack, and remove the front sub
frame after removing the nut.
|
| 14. |
Remove the steering gear box heat protector (A) after removing the bolts.
|
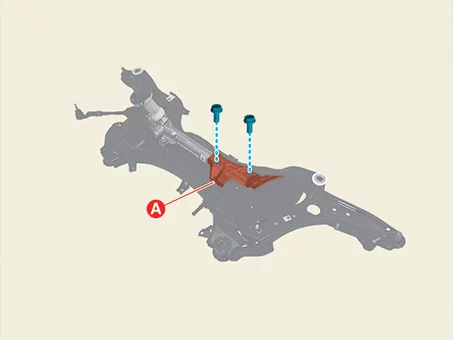
| 15. |
Remove the steering gear box (A) after removing the bolts.
|
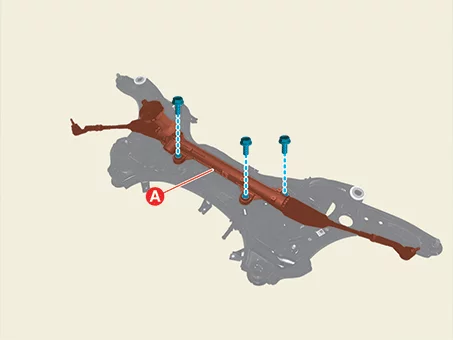
| Installation |
| 1. |
Install in reverse order of removal.
|
| 2. |
Check the alignment.
(Refer to Suspension System - Alignment")
|
| 3. |
Perform the 'Steering Angle Sensor(SAS) Calibration' by using KDS.
(Refer to Motor Driven Power Steering (MDPS) - "Adjustment")
|
Steering Gear Box Disassembly and Reassembly
| Disassembly |
|
| [Replaceable Parts] |
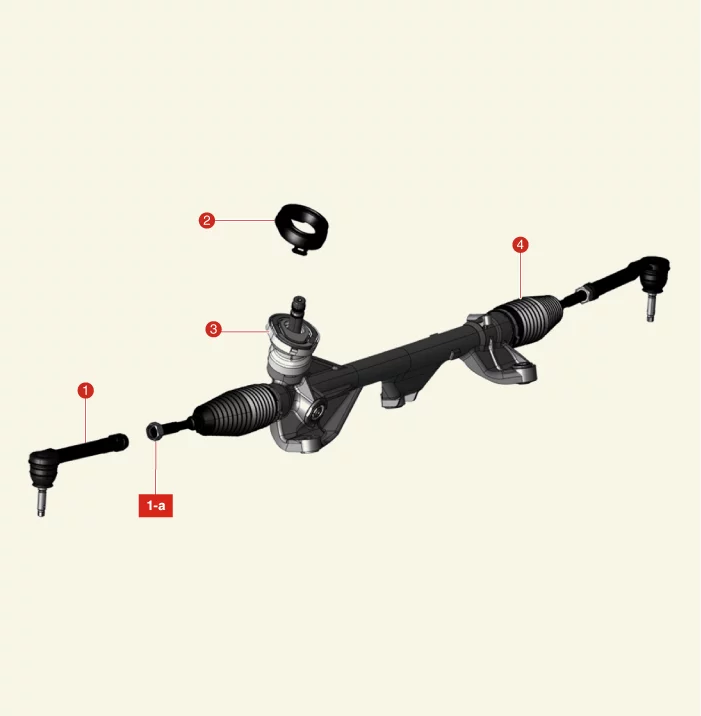
| 1. Tie Rod End 1-a. 49.0 - 53.9 N·m (5.0 - 5.5 kgf·m, 36.2 - 39.8 lb·ft) |
3. Dust Cap 4. Bellows |
| 2. Dust Cap Packing |
| 1. |
Loosen the tie rod end lock nut (A) until the tie rod end can rotate.
|
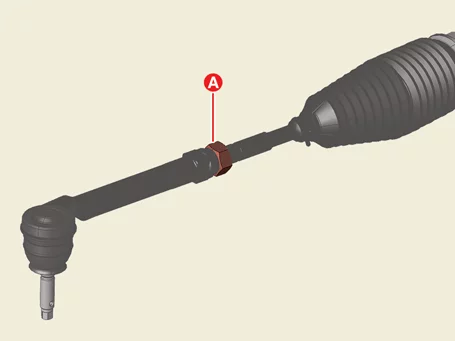
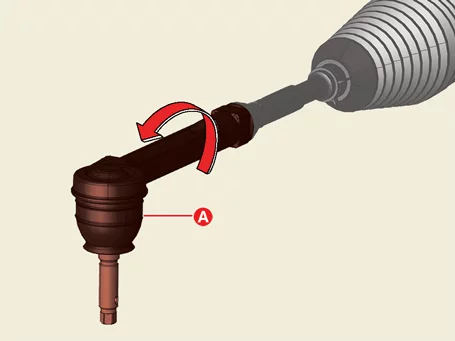
| 2. |
Rotate the tie rod end (A) counterclockwise to remove.
|
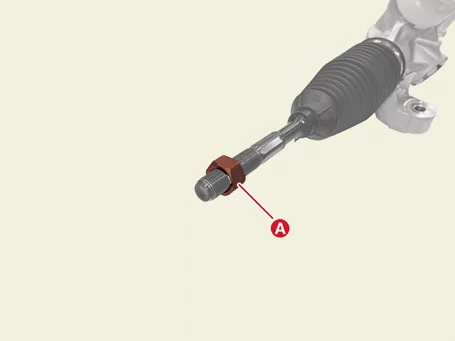
| 3. |
Remove the tie rod end lock nut (A).
|
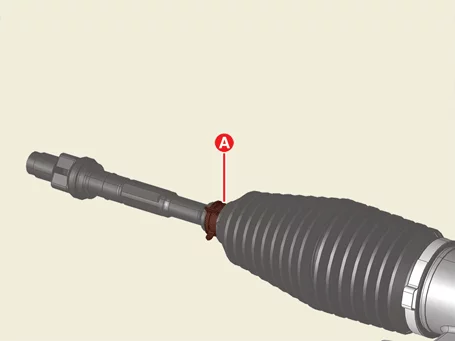
| 4. |
Remove the bellows clamp (A).
|
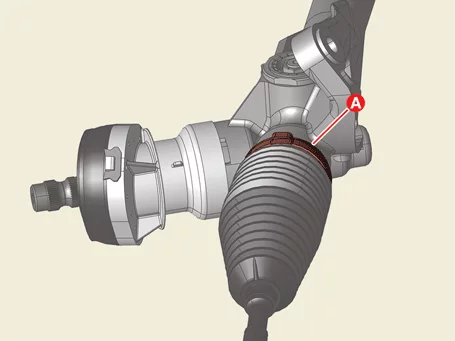
| 5. |
Remove the bellows band (A).
|
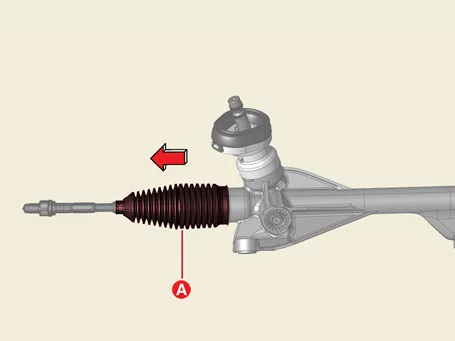
| 6. |
Remove the bellows (A) in the direction of the arrow.
|
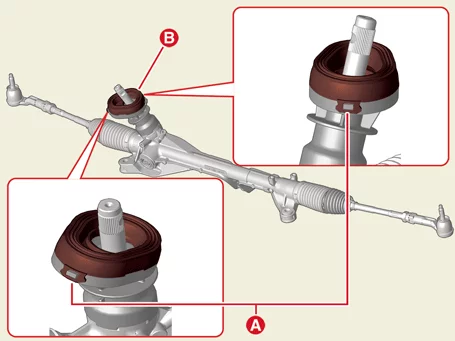
| 1. |
Release the mounting parts (A), and then remove the dust cap packing (B).
|
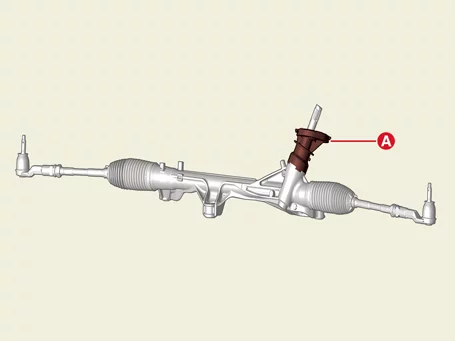
| 2. |
Remove the dust cap (A).
|
| Reassembly |
| 1. |
Replace with a new bellows.
|
| 2. |
Check the alignment.
(Refer to Suspension System - "Alignment")
|
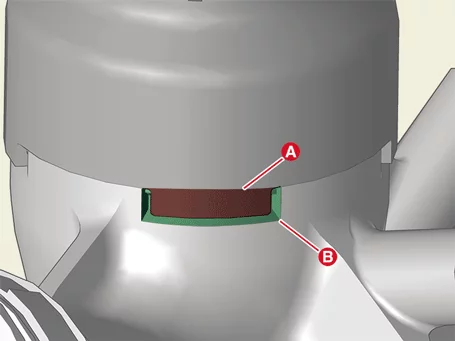
| 1. |
Replace with a new dust cap.
|
| 2. |
Check the alignment.
(Refer to Suspension System - "Alignment")
|
Tie Rod End Removal and Installation
| Special Service Tool |
|
Tool Name / Number |
Illustration |
Description |
|
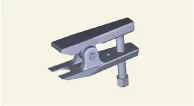
Ball joint puller 09568 - 1S100 |
|
Used for removal of tie rod end |
| Removal |
| 1. |
Remove the front wheel and tires.
(Refer to Suspension System - "Wheel")
|
| 2. |
Separate the tie rod end ball joint from the front axle.
|
| 3. |
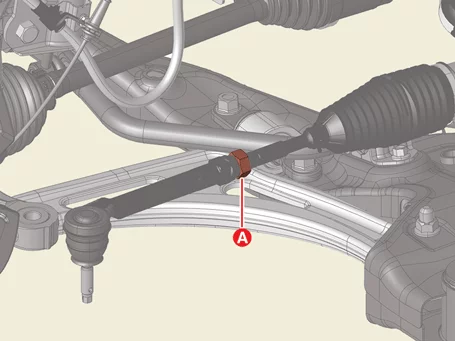
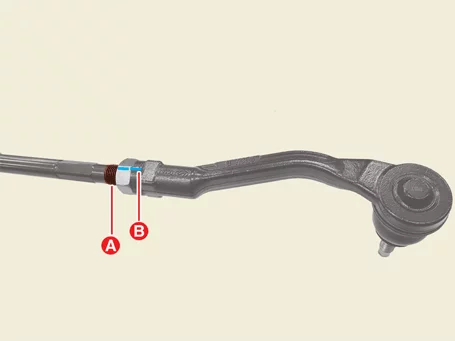
Loosen the tie rod end lock nut (A) until the tie rod end can rotate.
|
| 4. |
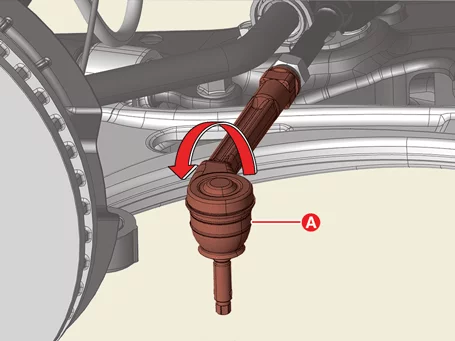
Rotate the tie rod end (A) counterclockwise to remove.
|
| Installation |
| 1. |
Install in reverse order of removal.
|
| 2. |
Replace the tie rod end with a new one.
|
| 3. |
Check the alignment.
(Refer to Suspension System - "Alignment")
|


Other information:
Kia Seltos SP2 (2021-2026) Service Manual: Lighting control
The Kia Seltos light switch includes positions for headlights, position lamps, AUTO lighting, and OFF or DRL OFF operation. To operate the lights, turn the knob at the end of the control lever to one of the following positions: OFF position / DRL off position Auto light position Position & Tail lamp Headlight positionKia Seltos SP2 (2021-2026) Service Manual: Description and Operation
Description Integrated Body Control Unit (IBU) Integrated body control unit has integrated several functions including body control module (BCM), smart key unit (SMK), and tire pressure monitoring system (TPMS). 1. Body Control Module Functions Burglar Alarm Tailgate Burglar Alarm Issues an alarm depending on the tailgate operation.