
Kia Seltos SP2 (2021-2026) Service Manual / Body Electrical System / Power Door Mirrors
Kia Seltos: Body Electrical System / Power Door Mirrors
Contents:
- Power Door Mirror Switch Terminal Function
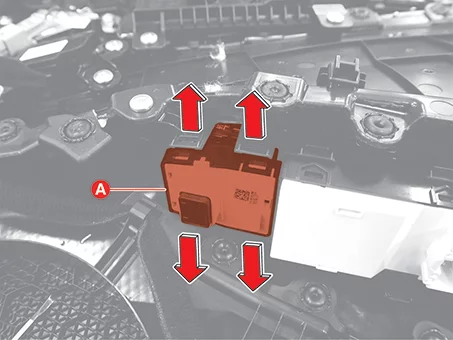
- Power Door Mirror Switch Removal and Installation
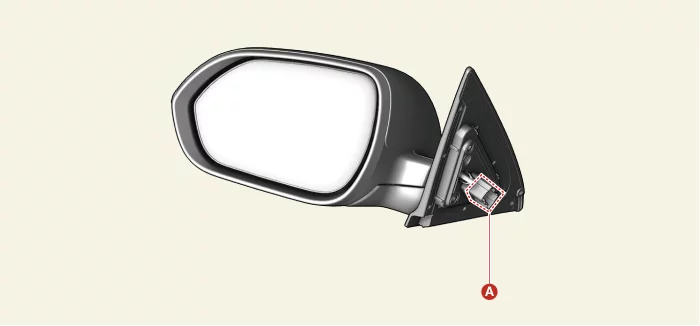
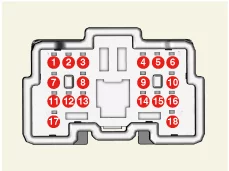
- Power Door Mirror Actuator Terminal Function
- Power Door Mirror Actuator Removal and Installation
- Power Door Mirror Actuator Inspection
Power Door Mirror Switch Terminal Function
| Connector and Terminal Function |
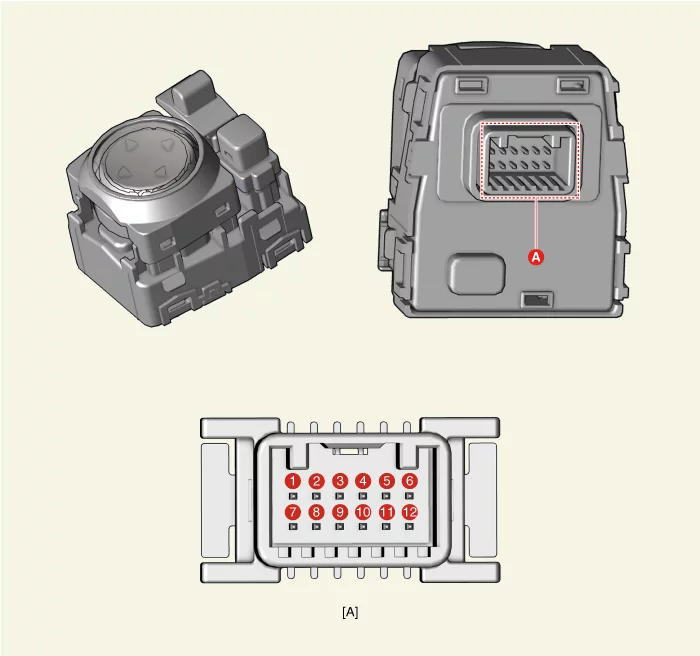
| Terminal |
Connector A |
|
Function |
|
|
1 |
ACC |
|
2 |
Driver/passenger seat power outside mirror (V) |
|
3 |
Passenger seat power outside mirror (HR) |
|
4 |
Driver seat power outside mirror (HL) |
|
5 |
- |
|
6 |
- |
|
7 |
Passenger seat power outside mirror (CR) |
|
8 |
Mirror folding (OPT) output |
|
9 |
Driver seat power outside mirror (CL) |
|
10 |
Mirror folding switch output (Fold) |
|
11 |
- |
|
12 |
Ground |
Power Door Mirror Switch Removal and Installation
| Removal |
| 1. |
Remove the front door trim [Driver's Side].
(Refer to Body - "Front Door Trim")
|
| 2. |
Remove the power door mirror switch (A) by pulling the hook in the direction of the arrow.
|
| Installation |
| 1. |
Install in reverse order of removal.
|
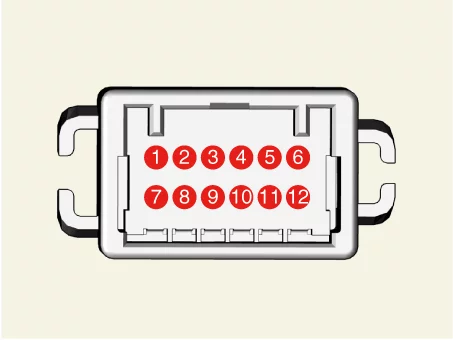
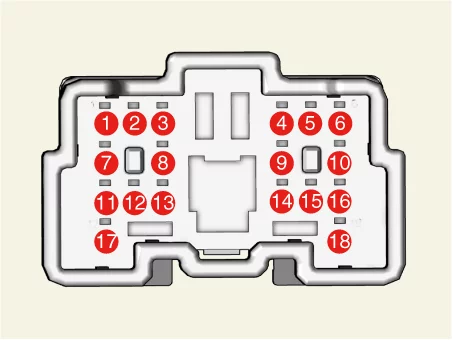
Power Door Mirror Actuator Terminal Function
| Connector and Terminal Function |
[Standard Type]
|
Connector A |
Terminal |
Function |
Terminal |
Function |
|
|
1 |
Power outside mirror switch (V) |
7 |
Power outside mirror unfolding relay |
|
2 |
Power outside mirror switch (CL) |
8 |
Turn signal lamp |
|
|
3 |
Power outside mirror switch (HL) |
9 |
- |
|
|
4 |
Mirror heater ( + ) |
10 |
BCW IND ( - ) |
|
|
5 |
Mirror heater ( - ) / Turn signal lamp ( - ) |
11 |
BCW IND ( + ) |
|
|
6 |
Outside mirror folding relay |
12 |
- |
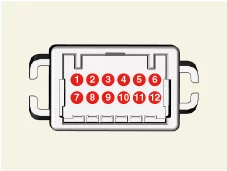
[Option Type]
|
Connector A |
Terminal |
Function |
Terminal |
Function |
|
|
1 |
Power outside mirror switch (V) |
11 |
BCW IND ( + ) |
|
2 |
Power outside mirror switch (CL) |
12 |
- |
|
|
3 |
Power outside mirror switch (HL) |
13 |
- |
|
|
4 |
Mirror heater ( + ) |
14 |
- |
|
|
5 |
Mirror heater ( - ) / Turn signal lamp ( - ) |
15 |
- |
|
|
6 |
Outside mirror folding relay |
16 |
- |
|
|
7 |
Outside mirror unfolding relay |
17 |
- |
|
|
8 |
Turn signal lamp ( + ) |
18 |
- |
|
|
9 |
- |
19 |
Camera |
|
|
10 |
BCW IND ( - ) |
|||
Power Door Mirror Actuator Removal and Installation
| Removal |
| 1. |
Disconnect the negative ( - ) battery terminal.
|
| 2. |
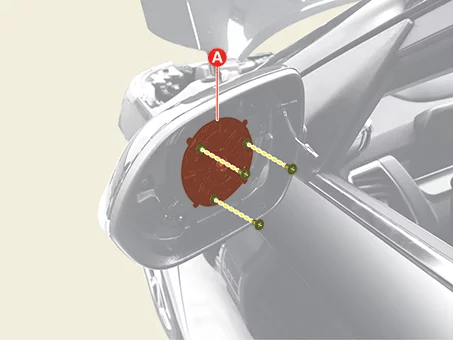
Remove the mirror.
(Refer to Body - "Outside Rear View Mirror")
|
| 3. |
Remove the mirror actuator (A) after removing the screws.
|
| 4. |
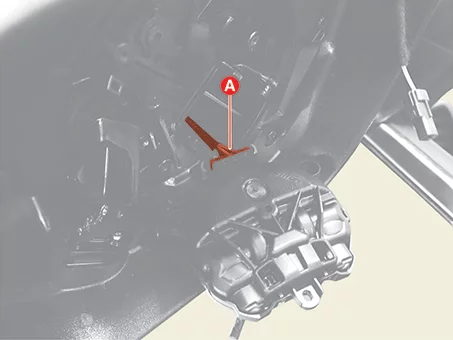
Disconnect the mirror actuator connector (A).
|
| Installation |
| 1. |
Install in reverse order of removal.
|
Power Door Mirror Actuator Inspection
| Inspection |
| 1. |
Disconnect the negative ( - ) battery terminal.
|
| 2. |
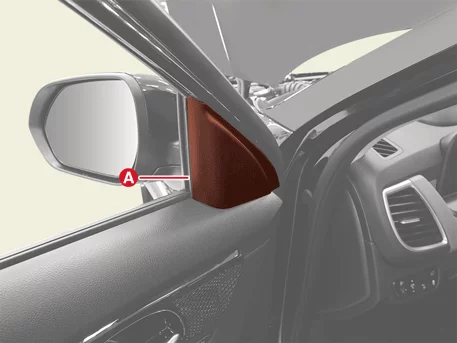
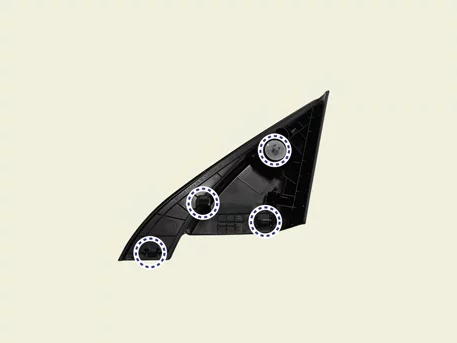
Remove the front door quadrant inner cover (A).
|
| 3. |
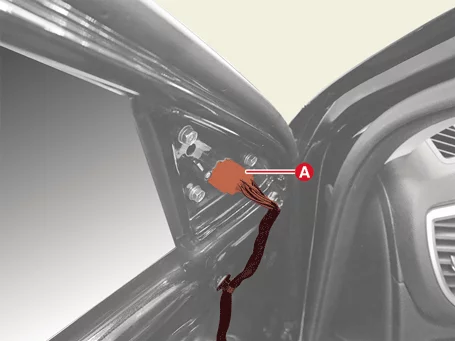
Disconnect the outside rear view mirror connector (A).
|
| 4. |
Apply battery voltage to each terminal as shown in the table and verify that the mirror operates
properly.
[Standard Type]
[Option Type]
[Mirror Actuator]
[Mirror Heater]
[Side Repeater Lamp]
[Folding Mirror]
[BCW Indicator]
|
||||||||||||||||||||||||||||||||||||||||||||||||||||||||||


Other information:
Kia Seltos SP2 (2021-2026) Service Manual: If you have a flat tire (with spare tire)
If your Kia Seltos has a flat tire, it may be replaced with the spare tire by using the supplied tools. Always park the vehicle safely before beginning any tire change procedure. WARNING Driving the Kia Seltos on a flat tire can permanently damage the tire. Re-inflating a tire that has been driven while severely underinflated or completely flat may cause a blowout and could lead to a serious crash.Kia Seltos SP2 (2021-2026) Service Manual: Special driving conditions
When driving conditions become worse because of poor weather, damaged roads, low visibility, or reduced traction, the Kia Seltos should be driven with extra care. Slow down, increase your following distance, and avoid sudden control inputs whenever the road surface is uncertain. Hazardous driving conditions When hazardous driving conditions are present, such as water, snow, ice, mud, sand, or similar road hazards, follow these safe driving suggestions: Drive cautiously and allow extra distance for braking.