
Kia Seltos SP2 (2021-2026) Service Manual / Engine Mechanical System / Timing System
Kia Seltos: Engine Mechanical System / Timing System
Contents:
- Components and Components Location
- Front Oil Seal Replacement
- Timing Chain Cover Removal
- Timing Chain Cover Installation
- Timing Chain Removal
- Timing Chain Installation
- Timing Chain Inspection
Components and Components Location
| Component |
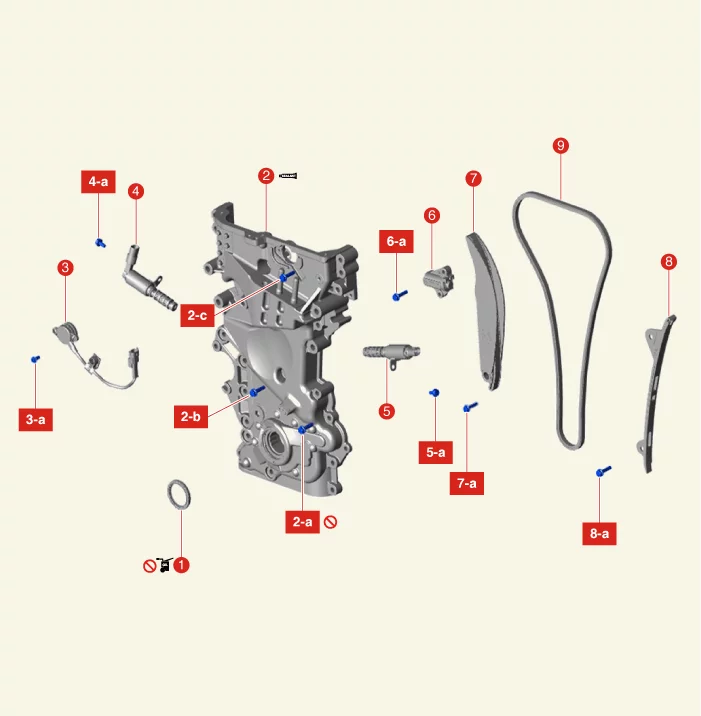
| 1. Front oil seal 2. Timing Chain Cover 2-a. 16.7 - 23.5 N·m (2.0 - 2.4 kgf·m, 14.5 - 17.3 lb·ft) 2-b. 9.8 - 11.8 N·m (1.0 - 1.2 kgf·m, 7.2 - 8.7 lb·ft) 2-c. M8 bolt 18.6 - 23.5 N·m (1.9 - 2.4 kgf·m, 13.7 - 17.4 lb·ft) 2-c. M10 bolt 39.2 - 49.0 N·m (4.0 - 5.0 kgf·m, 28.9 - 36.2 lb·ft) 3. Intake Middle Lock Control Solenoid 3-a. 8.8 - 9.8 N·m (0.9 - 1.0 kgf·m, 6.5 - 7.2 lb·ft) |
4. CVVT CVVT Oil Control Valve
(OCV) - Exhaust 4-a. 9.8 - 11.8 N·m (1.0 - 1.2 kgf·m, 7.2 - 8.7 lb·ft) 5. CVVT CVVT Oil Control Valve (OCV) - Intake 5-a. 9.8 - 11.8 N·m (1.0 - 1.2 kgf·m, 7.2 - 8.7 lb·ft) 6. Timing chain tensioner 6-a. 9.8 - 11.8 N·m (1.0 - 1.2 kgf·m, 7.2 - 8.7 lb·ft) 7. Timing chain tensioner arm 7-a. 18.6 - 22.6 N·m (1.9 - 2.3 kgf·m, 13.7 - 16.6 lb·ft) 8. Timing Chain Guide 8-a. 18.6 - 22.6 N·m (1.9 - 2.3 kgf·m, 13.7 - 16.6 lb·ft) 9. Timing Chain |
Front Oil Seal Replacement
| Special Service Tool |
|
Tool Name / Number |
Illustration |
Description |
|
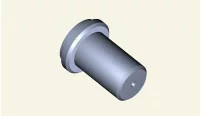
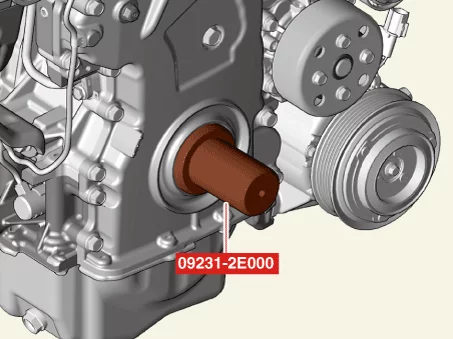
front oil seal installer 09231 - 2E000 |
|
Used for installing crankshaft front oil seal |
| Replacement |
| 1. |
Remove the crankshaft damper pulley.
(Refer to Drive Belt System - "Crankshaft Damper Pulley")
|
| 2. |
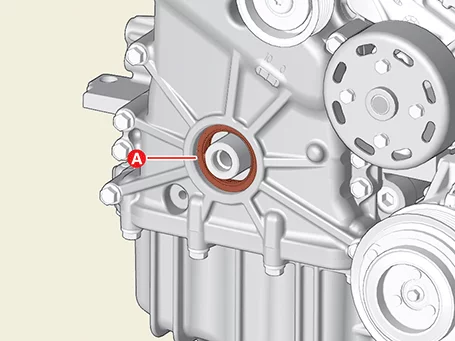
Remove the front oil seal (A).
|
| 3. |
Apply engine oil to the edge of the new oil seal.
|

| 4. |
Use SST (09231-2E000) and a rubber mallet to lightly tap and install the new front oil seal.
|
Timing Chain Cover Removal
| Removal |
|
|

| 1. |
Disconnect the battery negative ( - ) terminal.
|
| 2. |
Remove the engine cover.
(Refer to Engine and Transaxle Assembly - "Engine Cover")
|
| 3. |
Remove the intake middle lock control solenoid.
(Refer to Engine Control / Fuel System - "Intake Middle Lock Control
Solenoid")
|
| 4. |
Remove the RH front wheel and tire.
(Refer to Suspension System - "Wheel")
|
| 5. |
Remove the engine room under cover.
(Refer to Engine and Transaxle Assembly - "Engine Room Under
Cover")
|
| 6. |
Remove the cylinder head cover.
(Refer to Cylinder Head Assembly - "Cylinder Head Cover")
|
| 7. |
Remove the air conditioning compressor.
(Refer to Heating, Ventilation and Air Conditioning -
"Compressor")
|
| 8. |
Remove the oil pan.
(Refer to Lubrication - "Oil Pan")
|
| 9. |
Remove the engine mounting support bracket.
(Refer to Engine And Transaxle Assembly - "Engine Mounting")
|
| 10. |
Remove the crankshaft damper pulley.
(Refer to Drive Belt System - "Crankshaft Damper Pulley")
|
| 11. |
Remove the idler.
(Refer to Drive Belt System - "Idler")
|
| 12. |
Remove the alternator.
(Refer to Engine Electrical System - "Alternator")
|
| 13. |
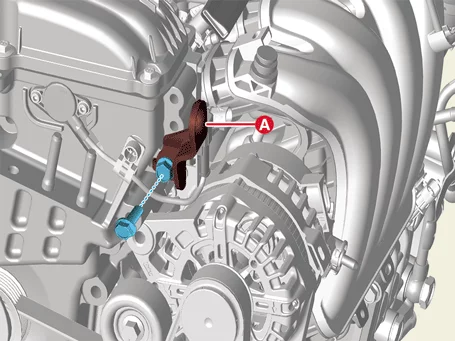
Remove the front engine hanger (A), after removing the bolt.
|
| 14. |
Remove the drive belt tensioner.
(Refer to Drive Belt System - "Drive Belt Tensioner")
|
| 15. |
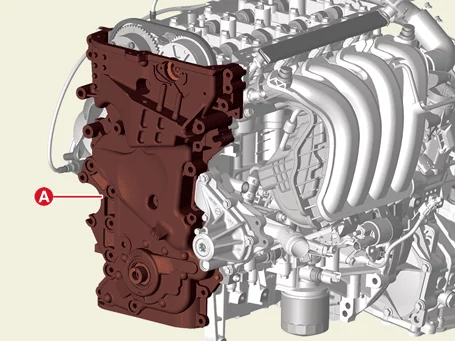
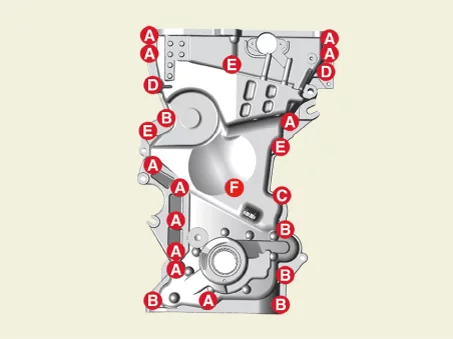
Remove the timing chain cover (A) after removing the bolts.
|
Timing Chain Cover Installation
| Installation |
| 1. |
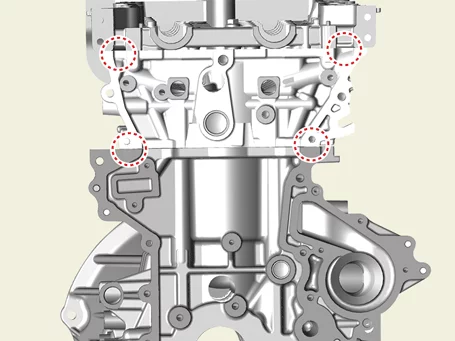
Install the timing chain cover.
|
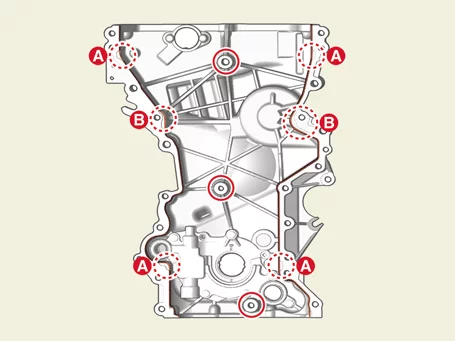
| 2. |
front oil seal exchange if necessary.
(Refer to Timing System – "Front Oil Seal")
|
| 3. |
Install in reverse order of removal.
|
Timing Chain Removal
| Removal |
Do not reuse the timing chain tensioner.
|
| 1. |
Remove the cylinder head cover.
(Refer to Cylinder Head Assembly - "Cylinder Head Cover")
|
| 2. |
Set No.1 cylinder to TDC (Top dead center) on compression stroke.
|
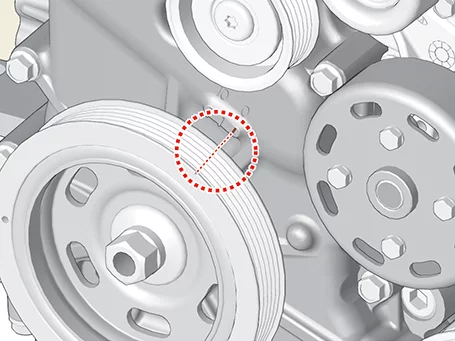
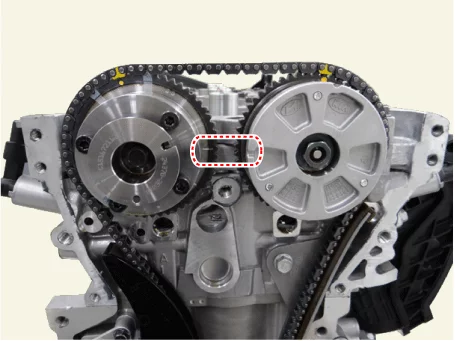
| 3. |
Remove the timing chain cover.
(Refer to Timing System - "Timing Chain Cover")
|
| 4. |
Compress the piston and then insert a stopper pin (A) into the hole to fix the piston and then remove the
tensioner (B).
|
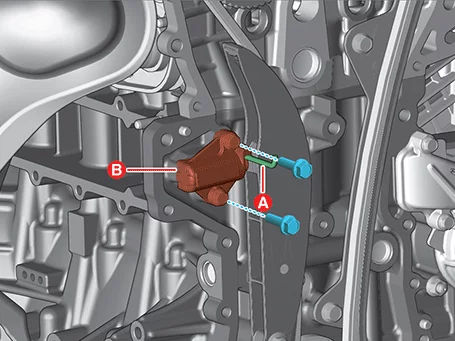
| 5. |
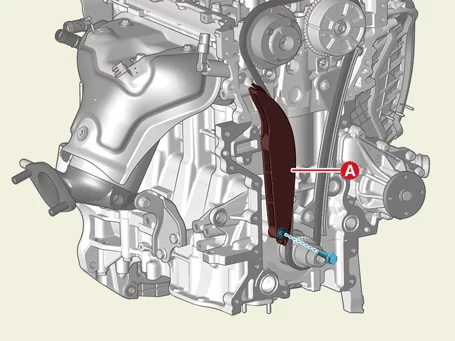
Remove the timing chain tensioner arm (A) after removing the bolt.
|
| 6. |
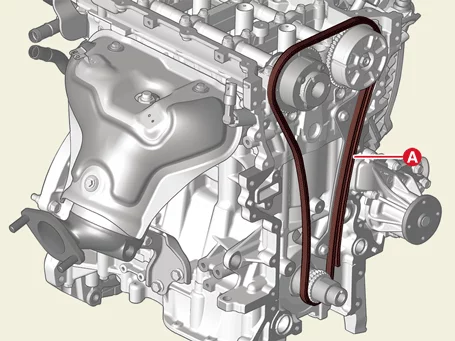
Remove the timing chain (A).
|
| 7. |
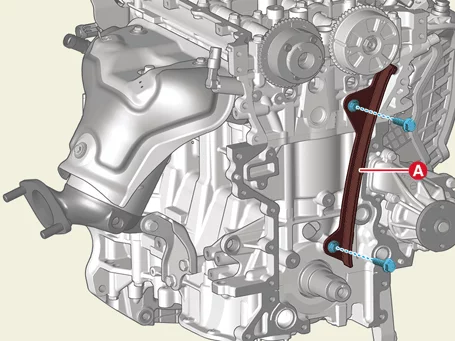
Remove the timing chain guide (A) after removing the bolts.
|
Timing Chain Installation
| Installation |
Do not reuse the timing chain tensioner.
|
| 1. |
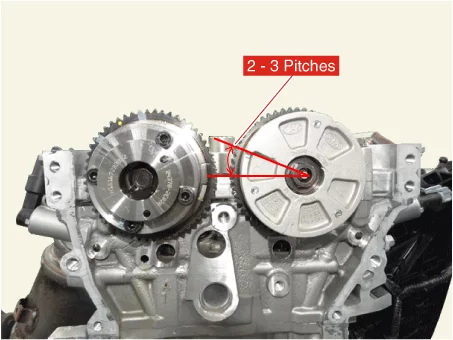
The TDC marks of the intake and exhaust CVVT sprockets are slightly turned from the TDC position as shown
when the timing chain is removed.
|
| 2. |
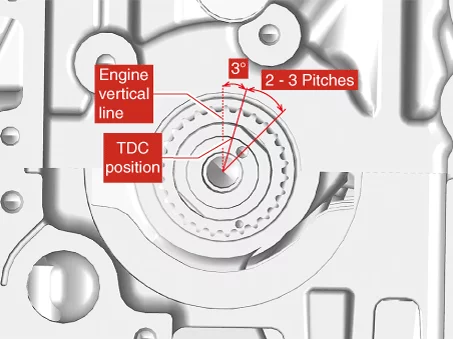
Turn the crankshaft clockwise (about 2-3 pitches) from the TDC position (the dowel pin (A) of crankshaft
is about 3° with the engine vertical line) as rotation of the intake CVVT sprocket from the TDC position.
|
| 3. |
Install the timing chain guide, and then tighten the bolt.
|
| 4. |
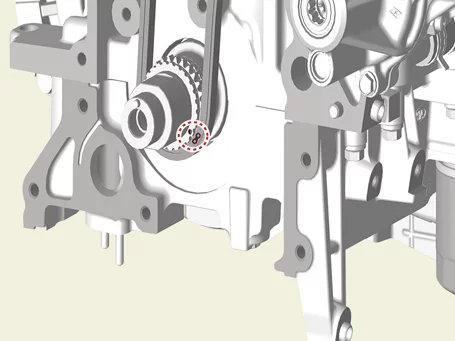
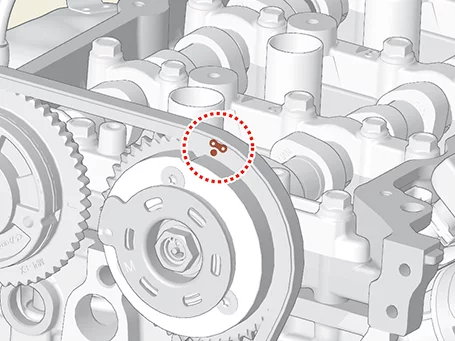
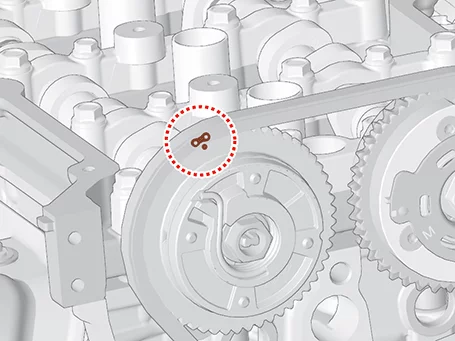
Install the timing chain.
Crankshaft sprocket → timing chain guide → Intake CVVT sprocket → exhaust CVVT sprocket
|
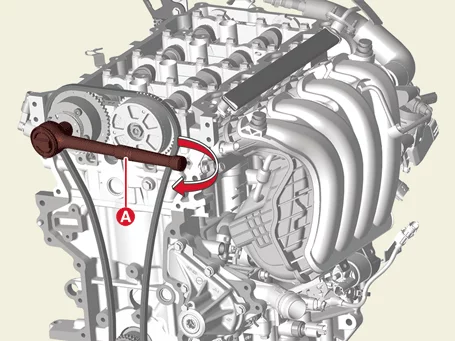
| 5. |
Install the timing chain tensioner arm, and then tighten the bolt.
|
| 6. |
Install the timing chain tensioner (B), tighten the bolts, and remove the fixing pin (A).
|
| 7. |
Turn the crankshaft clockwise 2 turns and check that the TDC marks on the front of the intake and exhaust
CVVT sprockets are facing each other.
|
| 8. |
Assemble the other parts in the reverse order of disassembly.
|
Timing Chain Inspection
| Inspection |
Sprockets, Chain Tensioner, Chain Tensioner Arm, Chain Guide
| 1. |
Check the CVVT sprocket, crankshaft sprocket teeth for abnormal wear, cracks or damage. Replace if
necessary.
|
| 2. |
Check a contact surface of the chain tensioner arm and guide for abnormal wear, cracks or damage,Replace
if necessary.
|
| 3. |
Check that the chain tensioner piston slides smoothly and inspect whether the ratchet operates normally.
Replace if necessary.
|


Other information:
Kia Seltos SP2 (2021-2026) Service Manual: Personalized Profile and Vehicle Settings
When a registered digital key is linked to a user profile, the Kia Seltos can automatically apply selected vehicle settings when that digital key is used. This may include door lock and unlock behavior with Digital Key 2 Touch and other personalized settings available through the infotainment system. User profile linking and personalization are available for up to two drivers, allowing the Kia Seltos to provide a more convenient and customized driving experience for regular users.