Owner's library Kia Seltos Manuals Owner's manual pages, service notes, maintenance references and practical Kia Seltos help in one clean library.

Kia Seltos reference pages

Manuals, maintenance notes and quick owner help.

Find Kia Seltos operating instructions, warning light explanations, service information and owner guidance without digging through a full PDF.

Kia Seltos: All Wheel Drive (AWD) System / Rear Differential Carrier Assembly

Contents:

Rear Differential Carrier Components and Components Location

Component

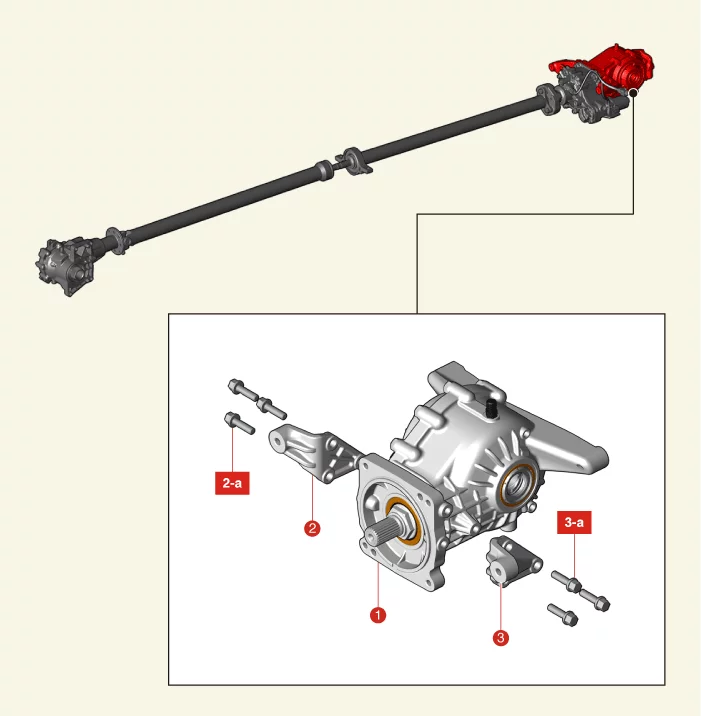
All Wheel Drive (AWD) System — Rear Differential Carrier Assembly / Rear Differential Carrier / Components and Components Location / Component illustration

1. Rear Differential Carrier Assembly
2. Rear Differential Carrier Mounting Bracket [RH]
2-a. 56.9 - 64.7 N·m (5.8 - 6.6 kgf·m, 42.0 - 47.7 lb·ft)
3. Rear differential carrier mounting bracket [LH]
3-a. 56.9 - 64.7 N·m (5.8 - 6.6 kgf·m, 42.0 - 47.7 lb·ft)

Component Location

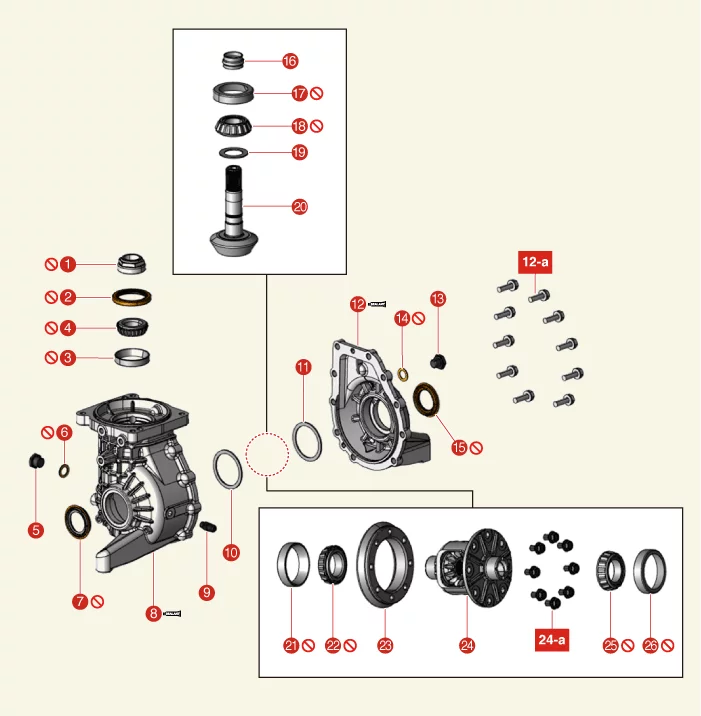
All Wheel Drive (AWD) System — Rear Differential Carrier Assembly / Rear Differential Carrier / Components and Components Location / Component Location illustration

1. Pinion Lock Nut
2. Oil Seal (Pinion Side)
3. Pinion Outer Bearing Spacer
4. Pinion Outer Bearing
5. Drain Plug
6. Packing
7. Oil Seal (Case Side)
8. Differential Carrier Case
9. Air Bleeder
10. Differential Bearing Shim (Case Side)
11. Differential Bearing Shim (Cover Side)

12. Differential Carrier Case Side Cover
12-a. 39.2 - 49 N·m (4.0 - 5.0 kgf·m, 28.9 - 36.2 lb·ft)
13. Filler Plug
14. Filler Gasket
15. Oil Seal (Cover Side)
16. Pinion Bearing Spacer
17. Pinion Inner Bearing Spacer
18. Pinion Inner Bearing
19. Pinion Inner Bearing Adjusting Shim
20. Pinion Drive Gear
21. Differential Gear Bearing Spacer (Case Side)
22. Differential Gear Bearing
23. Ring Gear
24. Gear Carrier
24-a. 78.5 - 88.3 N·m (8.0 - 9.0 kgf·m, 57.9 - 65.1 lb·ft)
25. Differential Gear Bearing (Cover Side)
26. Differential Gear Bearing Spacer (Cover Side)


Rear Differential Carrier Removal

Removal
1.
Disconnect the battery negative (-) terminal.
2.
Remove the rear driveshaft.
(Refer to Rear Driveshaft Assembly - "Rear Driveshaft")
3.
Remove the coupling assembly.
(Refer to Coupling Assembly - "Direct Electro Hydraulic Actuator Coupling" )
4.
Drain rear differential carrier oil.
(Rear Differential Carrier Oil - "Replacement")
5.
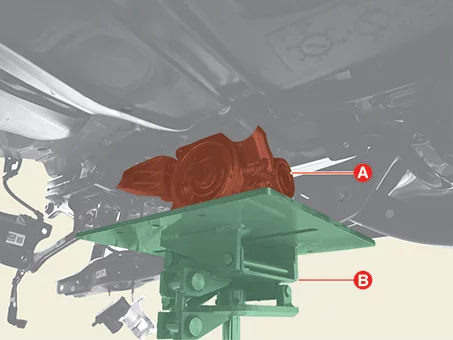
Support the rear differential carrier assembly (A) with a jack such as transmission jack (B).

All Wheel Drive (AWD) System — Rear Differential Carrier Assembly / Rear Differential Carrier / Removal illustration

6.
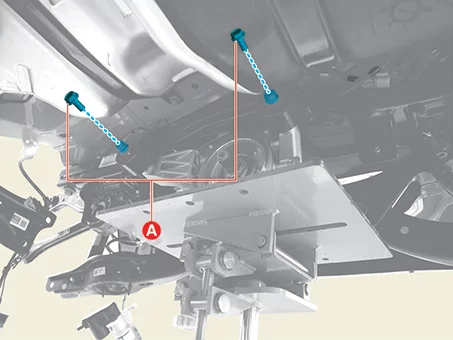
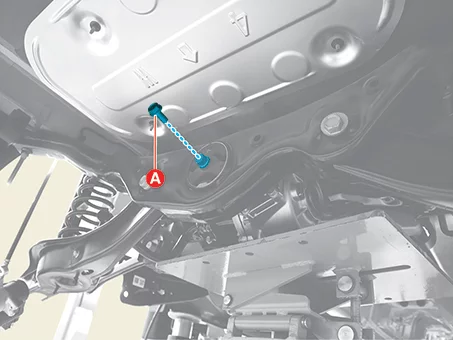
Remove the rear differential carrier assembly after removing the bolts (A).

Tightening torque :
68.6 - 88.3 N·m (7.0 - 9.0 kgf·m, 50.6 - 65.1 lb·ft)

[Front]

All Wheel Drive (AWD) System — Rear Differential Carrier Assembly / Rear Differential Carrier / Removal illustration

[Rear]

All Wheel Drive (AWD) System — Rear Differential Carrier Assembly / Rear Differential Carrier / Removal illustration

7.
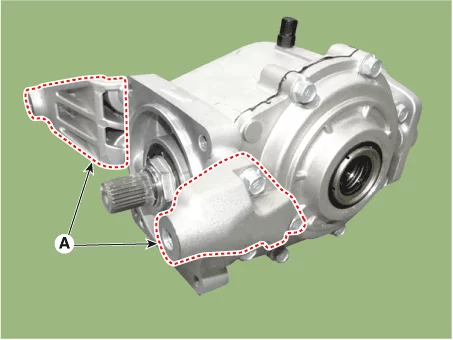
Remove the bolts, and then remove the rear differential carrier brackets (A).

Tightening torque :
56.9 - 64.7 N·m (5.8 - 6.6 kgf·m, 42.0 - 47.7 lb·ft)

All Wheel Drive (AWD) System — Rear Differential Carrier Assembly / Rear Differential Carrier / Removal illustration

Rear Differential Carrier Disassembly

Disassembly
[Differential Case Assembly]
1.
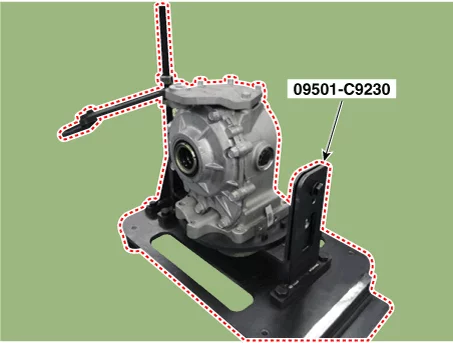
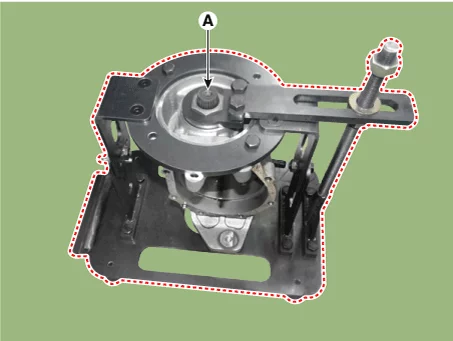
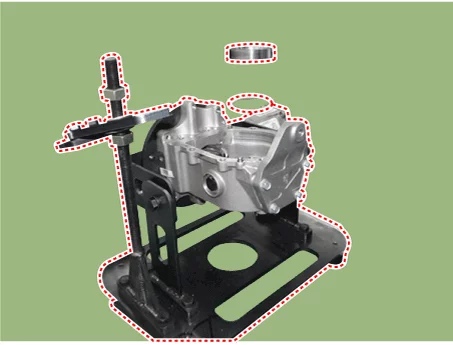
Using the SST (09501-C9230), hold the differential assembly safely.

All Wheel Drive (AWD) System — Rear Differential Carrier Assembly / Rear Differential Carrier / Disassembly illustration

2.
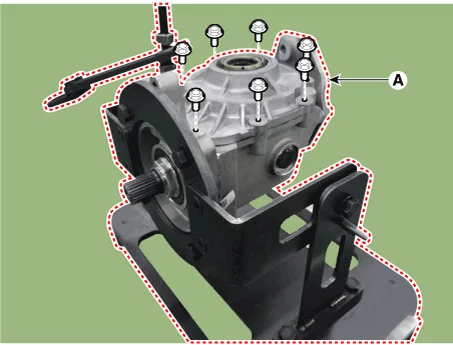
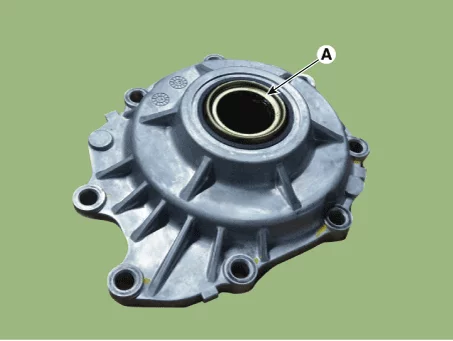
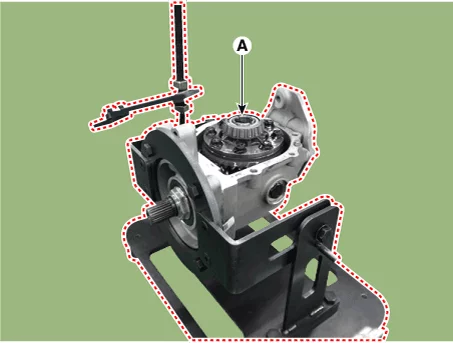
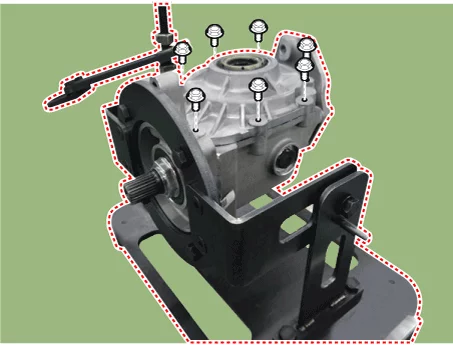
Loosen the cover bolts and then remove the cover (A).

All Wheel Drive (AWD) System — Rear Differential Carrier Assembly / Rear Differential Carrier / Disassembly illustration

3.
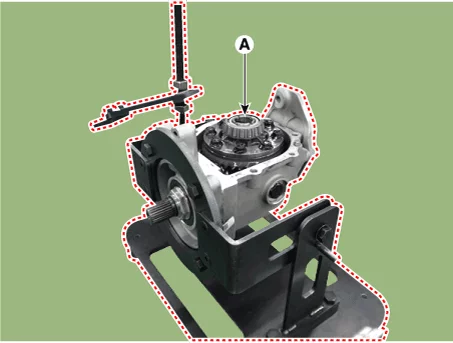
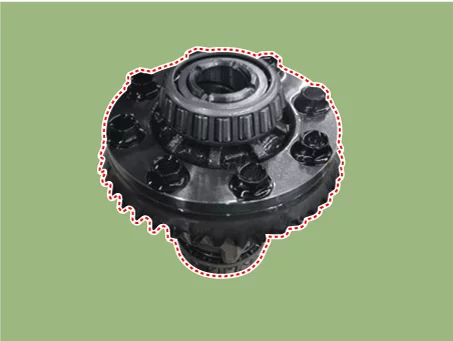
Remove the gear carrier assembly (A).

All Wheel Drive (AWD) System — Rear Differential Carrier Assembly / Rear Differential Carrier / Disassembly illustration

All Wheel Drive (AWD) System — Rear Differential Carrier Assembly / Rear Differential Carrier / Disassembly illustration

4.
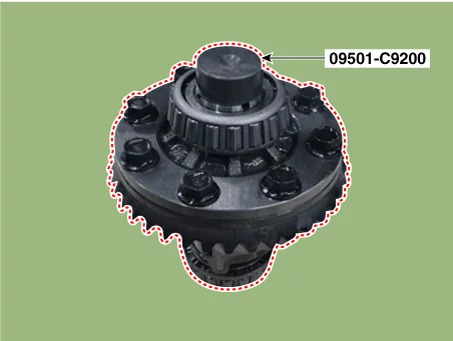
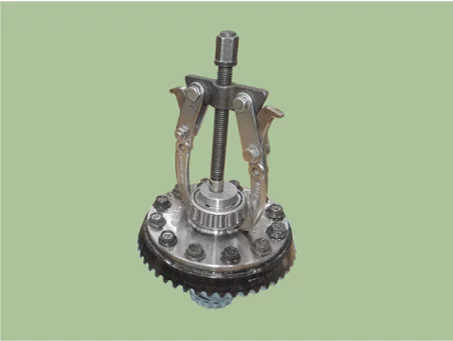
Using the SST (09501-C9200), remove the front / rear bearing.

All Wheel Drive (AWD) System — Rear Differential Carrier Assembly / Rear Differential Carrier / Disassembly illustration

All Wheel Drive (AWD) System — Rear Differential Carrier Assembly / Rear Differential Carrier / Disassembly illustration

Caution    
•
Do not use the bearing again.
5.
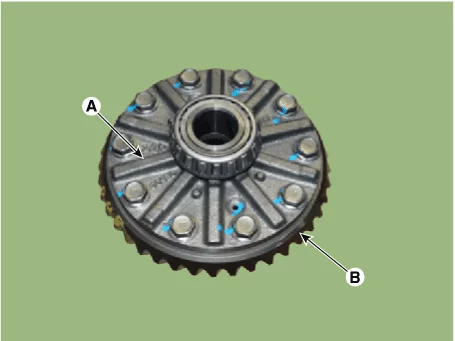
Loosen the seal bolts and then remove the gear carrier (A) and ring gear (B).

All Wheel Drive (AWD) System — Rear Differential Carrier Assembly / Rear Differential Carrier / Disassembly illustration

[Pinion Drive Gear Assembly]
1.
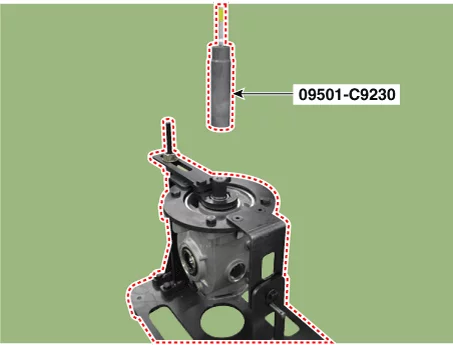
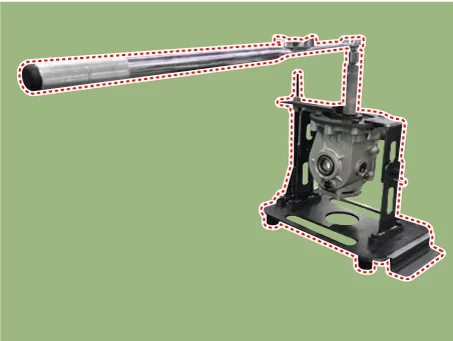
Using the SST (09501-C9230), remove the pinion gear lock nut (A).

All Wheel Drive (AWD) System — Rear Differential Carrier Assembly / Rear Differential Carrier / Disassembly illustration

All Wheel Drive (AWD) System — Rear Differential Carrier Assembly / Rear Differential Carrier / Disassembly illustration

All Wheel Drive (AWD) System — Rear Differential Carrier Assembly / Rear Differential Carrier / Disassembly illustration

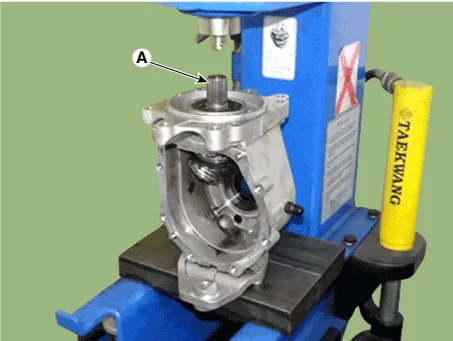
2.
Using the press, remove the pinion drive gear (A).

All Wheel Drive (AWD) System — Rear Differential Carrier Assembly / Rear Differential Carrier / Disassembly illustration

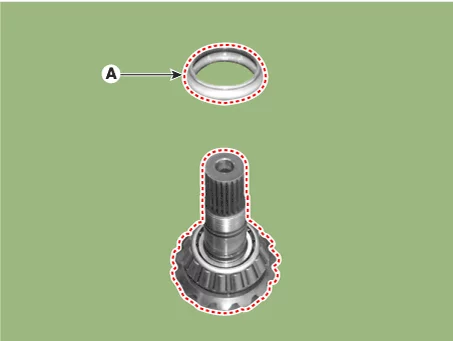
3.
Remove the spacer (A) from the pinion drive gear assembly.

All Wheel Drive (AWD) System — Rear Differential Carrier Assembly / Rear Differential Carrier / Disassembly illustration

4.
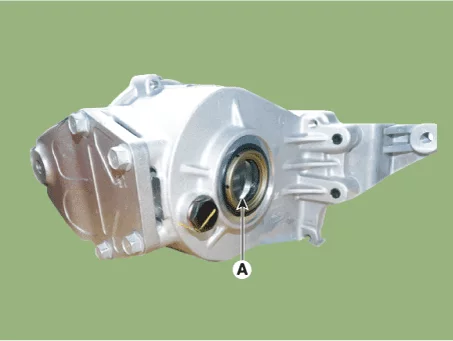
Remove the oil seal (A).

All Wheel Drive (AWD) System — Rear Differential Carrier Assembly / Rear Differential Carrier / Disassembly illustration

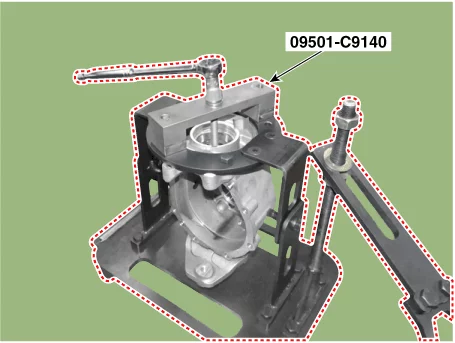
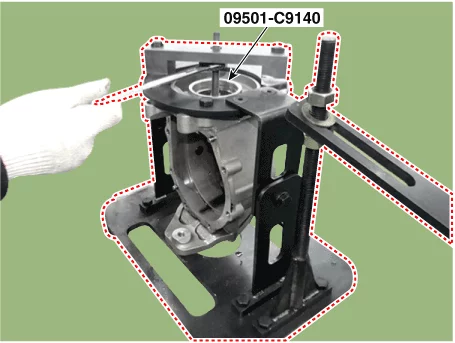
5.
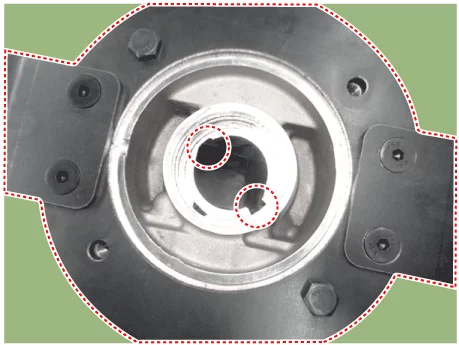
Using the SST (09501-C9140), remove the upper / lower race.

All Wheel Drive (AWD) System — Rear Differential Carrier Assembly / Rear Differential Carrier / Disassembly illustration

All Wheel Drive (AWD) System — Rear Differential Carrier Assembly / Rear Differential Carrier / Disassembly illustration

Note    
•
Using the SST (09501-C9140), install in the hole.

All Wheel Drive (AWD) System — Rear Differential Carrier Assembly / Rear Differential Carrier / Disassembly illustration

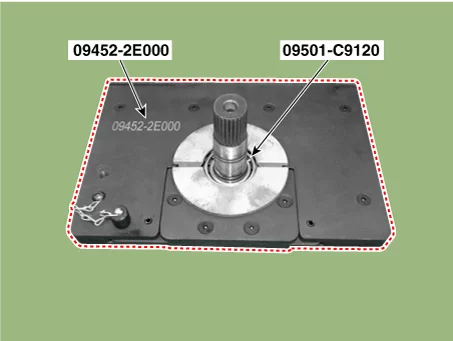
6.
Using the press and SST (09501-C9120, 09452-2E000), remove the pinion bearing from the pinion drive gear.

All Wheel Drive (AWD) System — Rear Differential Carrier Assembly / Rear Differential Carrier / Disassembly illustration

Caution    
•
Do not use the bearing again.
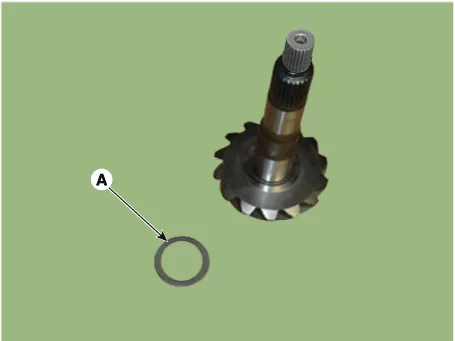
7.
Remove the bearing adjust (A) from the pinion drive gear.

All Wheel Drive (AWD) System — Rear Differential Carrier Assembly / Rear Differential Carrier / Disassembly illustration

8.
Using the (-) driver, remove the front / rear bearing race and spacer.

All Wheel Drive (AWD) System — Rear Differential Carrier Assembly / Rear Differential Carrier / Disassembly illustration

All Wheel Drive (AWD) System — Rear Differential Carrier Assembly / Rear Differential Carrier / Disassembly illustration

Note    
•
Put the (-) driver in the hole part, remove the front / rear bearing race and spacer.

All Wheel Drive (AWD) System — Rear Differential Carrier Assembly / Rear Differential Carrier / Disassembly illustration

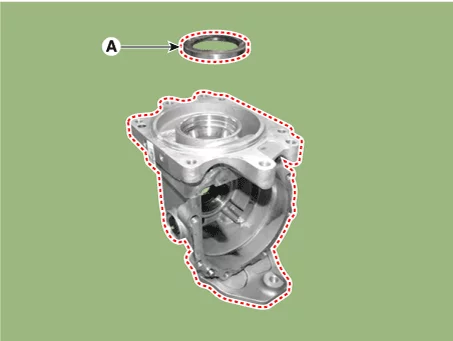
9.
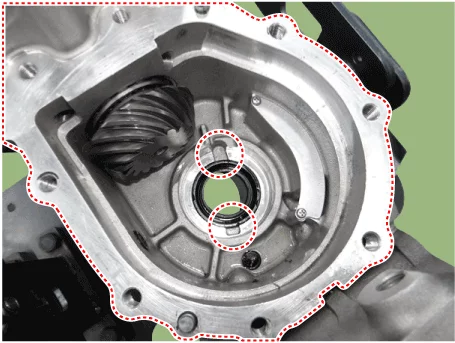
Remove the differential carrier side oil seal (A).

All Wheel Drive (AWD) System — Rear Differential Carrier Assembly / Rear Differential Carrier / Disassembly illustration

All Wheel Drive (AWD) System — Rear Differential Carrier Assembly / Rear Differential Carrier / Disassembly illustration

Rear Differential Carrier Inspection

Inspection
1.
After cleaning the disassembled parts, visually check the degree of damage or wear on each part. In case of wear or damage to disassembled components, follow the following methods :
Parts
Inspection
Gear set (Pinion drive gear and Drive gear)
Replace with a new gear set if damaged (crack/dent etc.) on the gear teeth, surface.
Bearing
Replace bearing rollers or races with new bearings if damaged (scratches, dents, noise).
Oil seal
Replace the oil seal each time it is removed.
Differential Carrier Case
The carrier must be replaced with a new one if the inside of the carrier bearing is damaged (crack/pits/dents) or a crack is found inside/ouside.
Companion flange
The pinion oil seal must be replaced with a new one if the contact surface is damaged (crack/pits/dents).

2.
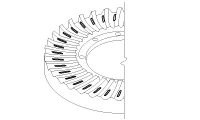
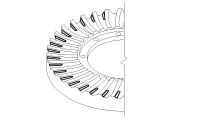
Check the tooth contact pattern.
Contact
Contact Location
Solution
Standard contact

All Wheel Drive (AWD) System — Rear Differential Carrier Assembly / Rear Differential Carrier / Inspection illustration


1. Heel contact

All Wheel Drive (AWD) System — Rear Differential Carrier Assembly / Rear Differential Carrier / Inspection illustration

Increase the thickness of the pinion height adjusting shim, and position the drive pinion closer to the center of the drive gear. Also, for backlash adjustment, reposition the drive gear further from the drive pinion.

All Wheel Drive (AWD) System — Rear Differential Carrier Assembly / Rear Differential Carrier / Inspection illustration

2. Face contact

All Wheel Drive (AWD) System — Rear Differential Carrier Assembly / Rear Differential Carrier / Inspection illustration

3. Toe contact

All Wheel Drive (AWD) System — Rear Differential Carrier Assembly / Rear Differential Carrier / Inspection illustration

Decrease the thickness of the pinion height adjusting shim, and position the drive pinion further from the center of the drive gear. Also, for backlash adjustment, reposition the drive gear closer to the drive pinion.

All Wheel Drive (AWD) System — Rear Differential Carrier Assembly / Rear Differential Carrier / Inspection illustration

4. Crank contact

All Wheel Drive (AWD) System — Rear Differential Carrier Assembly / Rear Differential Carrier / Inspection illustration


Note    
•
Tooth contact pattern is a method for judging the result of the adjustment of drive pinion height and final drive gear backlash. The adjustment of drive pinion height and final drive gear backlash should be repeated until the tooth contact patterns are similar to the standard tooth contact pattern.
•
If obtaining a correct pattern is impossible, the drive gear and drive pinion have exceeded their limits. Both gears should be replaced as a set.

Rear Differential Carrier Reassembly

Reassembly
Caution    
•
The already adopted seam for controlling the inner bearing on the front differential assembly is used. (Use the same thickness controlling seam in case of destruction)
•
The rear differential assembly shall be replaced with new one when the differential carrier or differential case assembly is failed.
•
The noise or vibration can be made due to the no matching of current inner bearing and gear control seam when the carrier or differential case assembly is exchanged as a unit.
1.
Install the Inner bearing adjustment shim (A) to the pinion drive gear.

All Wheel Drive (AWD) System — Rear Differential Carrier Assembly / Rear Differential Carrier / Reassembly illustration

2.
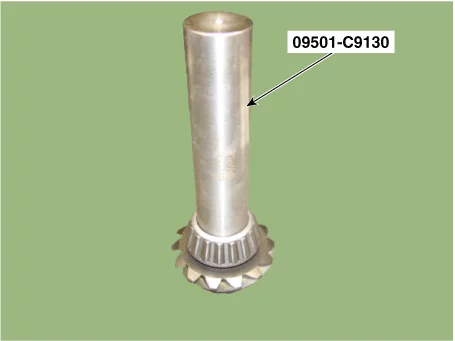
Using the press and SST (09501-C9130), install the pinion bearing.

All Wheel Drive (AWD) System — Rear Differential Carrier Assembly / Rear Differential Carrier / Reassembly illustration

3.
Install the spacer (A) from the pinion drive gear assembly.

All Wheel Drive (AWD) System — Rear Differential Carrier Assembly / Rear Differential Carrier / Reassembly illustration

Caution    
•
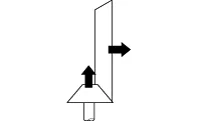
Be careful not to deflect the spacer (A) when mounting it.
Normal mounting
Abnormal mounting

All Wheel Drive (AWD) System — Rear Differential Carrier Assembly / Rear Differential Carrier / Reassembly illustration

All Wheel Drive (AWD) System — Rear Differential Carrier Assembly / Rear Differential Carrier / Reassembly illustration


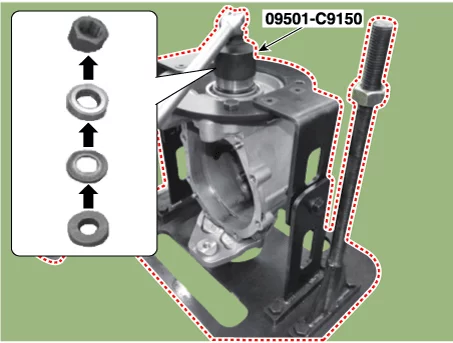
4.
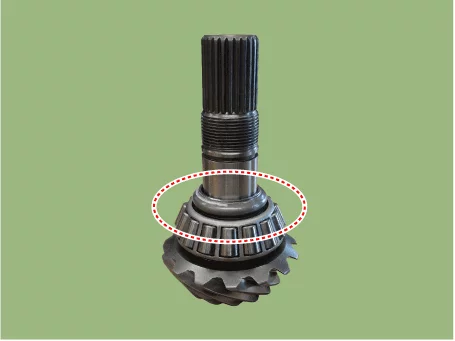
Using the SST (09501-C9150), install the upper outer race and bearing (A).

All Wheel Drive (AWD) System — Rear Differential Carrier Assembly / Rear Differential Carrier / Reassembly illustration

All Wheel Drive (AWD) System — Rear Differential Carrier Assembly / Rear Differential Carrier / Reassembly illustration

All Wheel Drive (AWD) System — Rear Differential Carrier Assembly / Rear Differential Carrier / Reassembly illustration

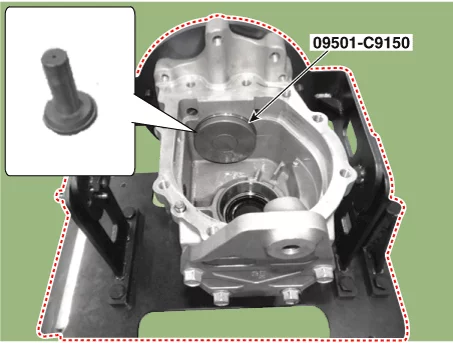
5.
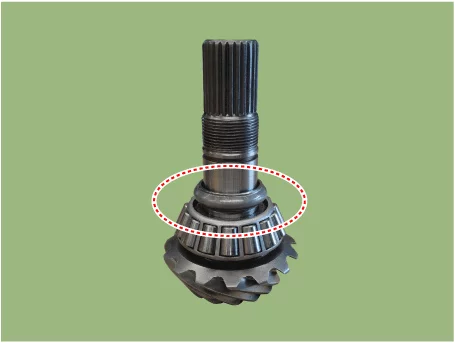
Using the SST (09501-C9150), install the lower outer race and bearing (A).

All Wheel Drive (AWD) System — Rear Differential Carrier Assembly / Rear Differential Carrier / Reassembly illustration

All Wheel Drive (AWD) System — Rear Differential Carrier Assembly / Rear Differential Carrier / Reassembly illustration

All Wheel Drive (AWD) System — Rear Differential Carrier Assembly / Rear Differential Carrier / Reassembly illustration

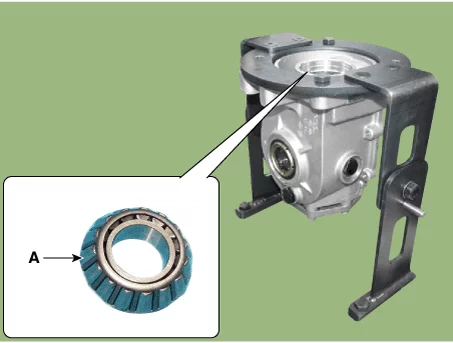
6.
Install the upper bearing (A).

All Wheel Drive (AWD) System — Rear Differential Carrier Assembly / Rear Differential Carrier / Reassembly illustration

7.
Using the press, install the pinion drive gear assembly (A).

All Wheel Drive (AWD) System — Rear Differential Carrier Assembly / Rear Differential Carrier / Reassembly illustration

8.
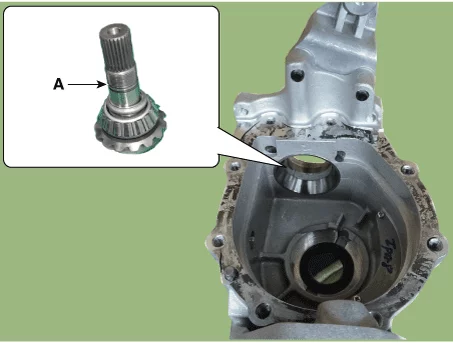
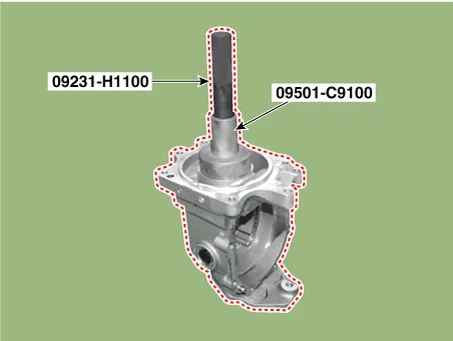
Using the SST (09501-C9100, 09231-H1100), install the pinion oil seal.

All Wheel Drive (AWD) System — Rear Differential Carrier Assembly / Rear Differential Carrier / Reassembly illustration

9.
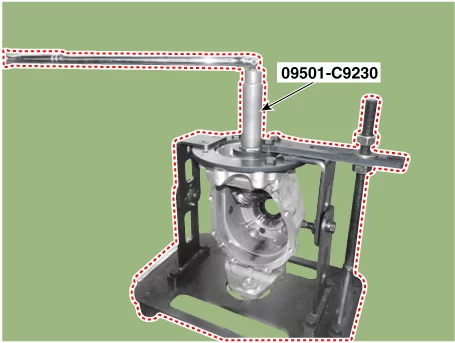
Using the SST (09501-C9230), install the pinion lock nut (A).

All Wheel Drive (AWD) System — Rear Differential Carrier Assembly / Rear Differential Carrier / Reassembly illustration

All Wheel Drive (AWD) System — Rear Differential Carrier Assembly / Rear Differential Carrier / Reassembly illustration

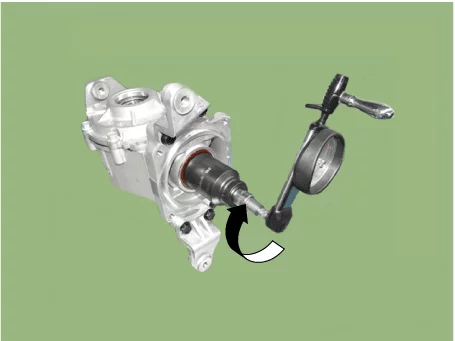
10.
Measures the pinion freeroad.

Pinion preload : (9.2 - 18.3 kgf.m)

All Wheel Drive (AWD) System — Rear Differential Carrier Assembly / Rear Differential Carrier / Reassembly illustration

Information    
•
Maintain the constant speed rotation (60rpm).

All Wheel Drive (AWD) System — Rear Differential Carrier Assembly / Rear Differential Carrier / Reassembly illustration

Note    
•
If the measured value is exceeded the standard value, should be exchanged the spacer (A) with a new one. And then should be Rework.

All Wheel Drive (AWD) System — Rear Differential Carrier Assembly / Rear Differential Carrier / Reassembly illustration

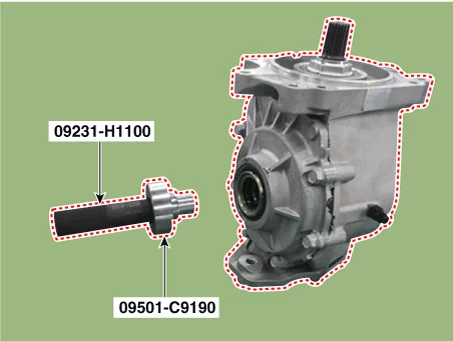
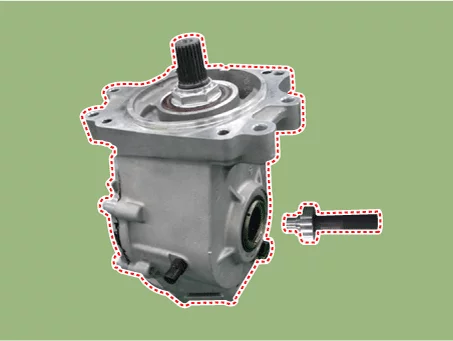
11.
Using the SST (09231-H1100, 09501-C9190), install the side oil seal.

All Wheel Drive (AWD) System — Rear Differential Carrier Assembly / Rear Differential Carrier / Reassembly illustration

All Wheel Drive (AWD) System — Rear Differential Carrier Assembly / Rear Differential Carrier / Reassembly illustration

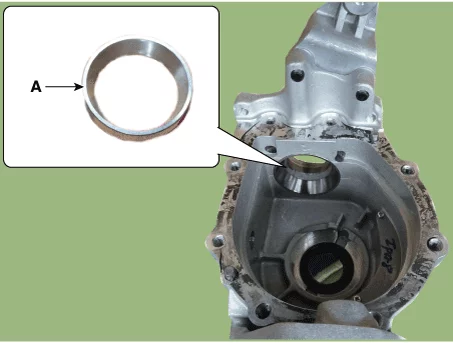
12.
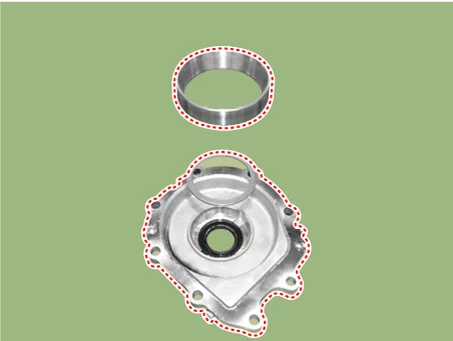
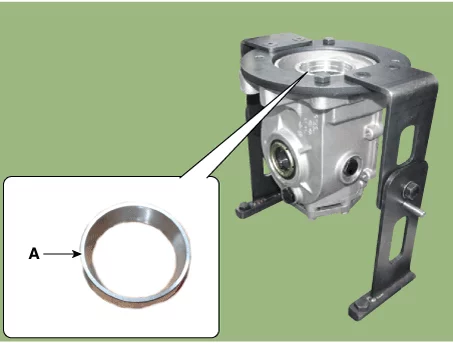
Install the side bearing race.

All Wheel Drive (AWD) System — Rear Differential Carrier Assembly / Rear Differential Carrier / Reassembly illustration

[Differential Case Assembly]
1.
Install the differential case (A) and ring gear (B).

All Wheel Drive (AWD) System — Rear Differential Carrier Assembly / Rear Differential Carrier / Reassembly illustration

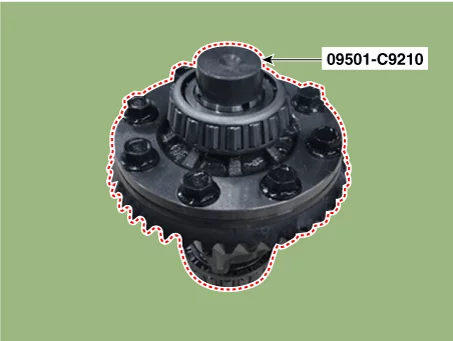
2.
Using the SST (09501-C9210) and press, install the front / rear bearing.

All Wheel Drive (AWD) System — Rear Differential Carrier Assembly / Rear Differential Carrier / Reassembly illustration

3.
Install the differential case (A).

All Wheel Drive (AWD) System — Rear Differential Carrier Assembly / Rear Differential Carrier / Reassembly illustration

4.
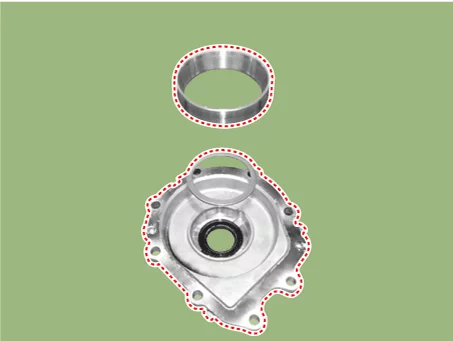
Install the side cover.

Sealant : L5702

All Wheel Drive (AWD) System — Rear Differential Carrier Assembly / Rear Differential Carrier / Reassembly illustration

Caution    
•
Remove the remaining sealant before coating.
•
Apply along the rear cover surface to the 2~3 mm of thickness evenly.
5.
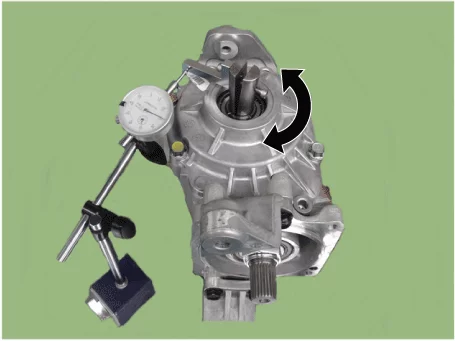
Measures the differential rear backlash.

Differential gear backlash : 0.01 - 0.06 mm

All Wheel Drive (AWD) System — Rear Differential Carrier Assembly / Rear Differential Carrier / Reassembly illustration

6.
Measures the total preload.

Standard : Pinion freeroad +0.24 - 0.83 N.m (+2.5 - 8.5 kgf.cm, 0.18 - 0.62 lb-ft)

Information    
•
Maintain the constant speed rotation (60rpm).

All Wheel Drive (AWD) System — Rear Differential Carrier Assembly / Rear Differential Carrier / Reassembly illustration

Rear Differential Carrier Installation

Installation
1.
Install the differential carrier bracket (A).

Tightening torque :
56.9 - 64.7 N·m (5.8 - 6.6 kgf·m, 42.0 - 47.7 lb·ft)

All Wheel Drive (AWD) System — Rear Differential Carrier Assembly / Rear Differential Carrier / Installation illustration

2.
Support the rear differential carrier assembly (A) with a jack such as transmission jack (B).

All Wheel Drive (AWD) System — Rear Differential Carrier Assembly / Rear Differential Carrier / Installation illustration

3.
Install the rear differential carrier assembly after installing the bolts (A).

Tightening torque :
68.6 - 88.3 N·m (7.0 - 9.0 kgf·m, 50.6 - 65.1 lb·ft)

[Front]

All Wheel Drive (AWD) System — Rear Differential Carrier Assembly / Rear Differential Carrier / Installation illustration

[Rear]

All Wheel Drive (AWD) System — Rear Differential Carrier Assembly / Rear Differential Carrier / Installation illustration

4.
Add new gear oil through filler plug hole (A).

Oil Type :
Hypoid gear oil MS517-15 GTC 75W/85 (GL-5)
(SK HCT-5 Gear Oil 75W/85 or equivalent)
Oil Capacity (L) :
About 0.58 ± 0.05 ℓ (0.15 U.S.gal., 0.52 U.S.qt., 0.51 Imp.qt.)

All Wheel Drive (AWD) System — Rear Differential Carrier Assembly / Rear Differential Carrier / Installation illustration

5.
Install the filler plug (A) and filler gasket (B).

Tightening torque :
39.2 - 58.8 N·m (4.0 - 6.0 kgf·m, 28.9 - 43.4 lb·ft)

All Wheel Drive (AWD) System — Rear Differential Carrier Assembly / Rear Differential Carrier / Installation illustration

Note    
Do not reuse the filler plug gasket (B).
6.
Install the coupling assembly.
(Refer to Coupling Assembly - "Direct Electro Hydraulic Actuator Coupling" )
7.
Install the rear driveshaft.
(Refer to Rear Driveshaft Assembly - "Rear Driveshaft")
8.
Connect the battery negative ( - ) terminal.
9.
Start the vehicle and check for oil leaks from the differential carrier assembly.
Note    
If oil leaks, disassemble and reassemble the differential carrier assembly and re-inspect.
10.
Check the alignment.
(Refer to Suspension System - "Alignment")

Rear Differential Carrier Gear Oil Lubricant

Lubricant
Rear differential carrier (AWD)
Item
Lubricant
Capacity
Rear differential carrier oil
Hypoid gear oil SK HCT-5 gear oil 75W/85 or equivalent
About 0.58 ± 0.05 ℓ
(0.15 U.S.gal., 0.52 U.S.qt., 0.51 Imp.qt.)

Rear Differential Carrier Gear Oil Inspection

Inspection
1.
Check for traces of oil leakage around the filler plug.
2.
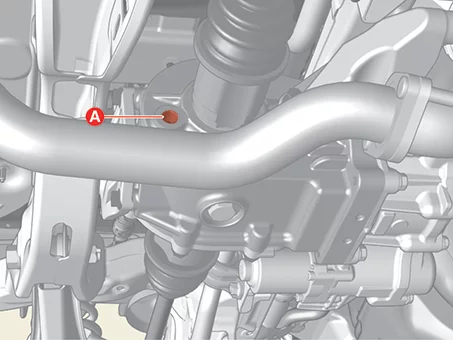
Remove the filler plug and check that gear oil is visible through the filler plug hole (A).

All Wheel Drive (AWD) System — Rear Differential Carrier Assembly / Rear Differential Carrier Gear Oil / Inspection illustration

Note    
If gear oil is not visible, fill gear oil.

Rear Differential Carrier Gear Oil Replacement

Replacement
1.
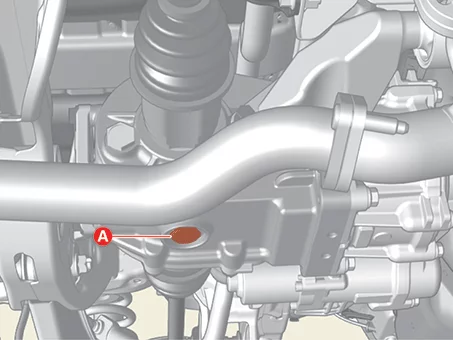
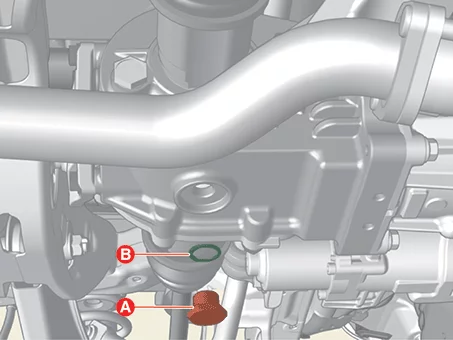
Remove the drain plug (A) and drain gear oil, and then reinstall the drain plug (A).

Tightening torque :
49.0 - 68.6 N·m (5.0 - 7.0 kgf·m, 36.2 - 50.6 lb·ft)

All Wheel Drive (AWD) System — Rear Differential Carrier Assembly / Rear Differential Carrier Gear Oil / Replacement illustration

Note    
Do not reuse the drain plug packing (B).

All Wheel Drive (AWD) System — Rear Differential Carrier Assembly / Rear Differential Carrier Gear Oil / Replacement illustration

2.
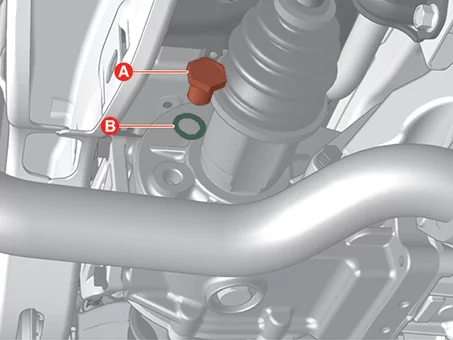
Remove the filler plug (A) and gasket (B).

All Wheel Drive (AWD) System — Rear Differential Carrier Assembly / Rear Differential Carrier Gear Oil / Replacement illustration

Note    
Do not reuse the filler plug gasket (B).
3.
Fill new gear oil through the filler plug hole (A).

Oil Type :
Hypoid gear oil MS517-15 GTC 75W/85 (GL-5)
(SK HCT-5 Gear Oil 75W/85 or equivalent)
Oil Capacity (L) :
About 0.58 ± 0.05 ℓ (0.15 U.S.gal., 0.52 U.S.qt., 0.51 Imp.qt.)

All Wheel Drive (AWD) System — Rear Differential Carrier Assembly / Rear Differential Carrier Gear Oil / Replacement illustration

4.
Install the filler plug (A) and filler gasket (B).

Tightening torque :
39.2 - 58.8 N·m (4.0 - 6.0 kgf·m, 28.9 - 43.4 lb·ft)

All Wheel Drive (AWD) System — Rear Differential Carrier Assembly / Rear Differential Carrier Gear Oil / Replacement illustration

Note    
Do not reuse the filler gasket (B).
5.
Start the vehicle and check for oil leaks from the differential carrier assembly.
Note    
If oil leaks, disassemble and reassemble the differential carrier assembly and re-inspect.

Other information:

Kia Seltos SP2 (2021-2026) Service Manual: Occupant Detection System (ODS)

The Kia Seltos is equipped with an Occupant Detection System (ODS) in the front passenger seat. The ODS is designed to detect whether a properly seated front passenger is present and to determine whether the front passenger air bag should be activated and ready to inflate if needed. Only the front passenger front air bag is controlled by the ODS.

Kia Seltos SP2 (2021-2026) Service Manual: Storage compartments

The Kia Seltos storage compartments are designed for small items needed by the driver or passengers. They help keep the cabin organized and reduce loose objects while driving. To reduce the risk of theft, do not leave valuables in the storage compartments. Always keep storage compartment covers closed while driving. Do not place too many items inside a compartment, so the cover can close securely.